Adding an AWS Elastic Load Balancer (ELB) to direct traffic between web servers on Nutanix Cloud Clusters (NC2)
One of the great things about running a virtualized infrastructure on NC2 on AWS is the close proximity to all the cloud native services. One of those highly useful services is the AWS ELB or Elastic Load Balancer.
In this post we show how to get floating IP addresses from the VPC in which NC2 is located and to assign them to a number of web servers running as VMs on NC2. Then we create a Load Balancer target group and finally we create an Application Load Balancer (ALB) and attach it to the target group.
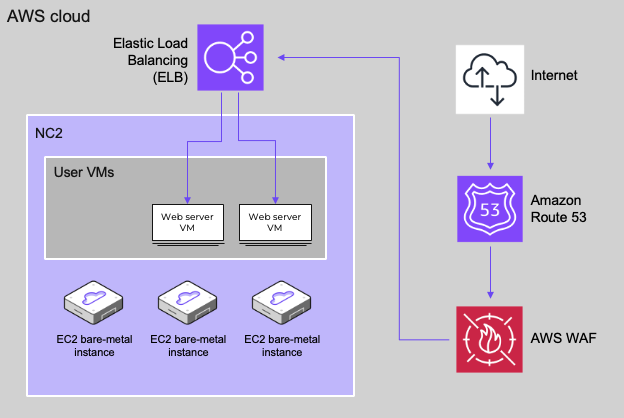
Architecture
In this blog post we only cover the deployment of the web servers and the load balancer, however, Route 53 can also be leveraged for DNS and AWS WAF for security and DDOS protection purposes as illustrated below
Preparing some web servers
We first deploy a few test web servers. In this case the wonderfully named Jammy Jellyfish edition of Ubuntu Server as a cloud image. Feel free to download the image from here:
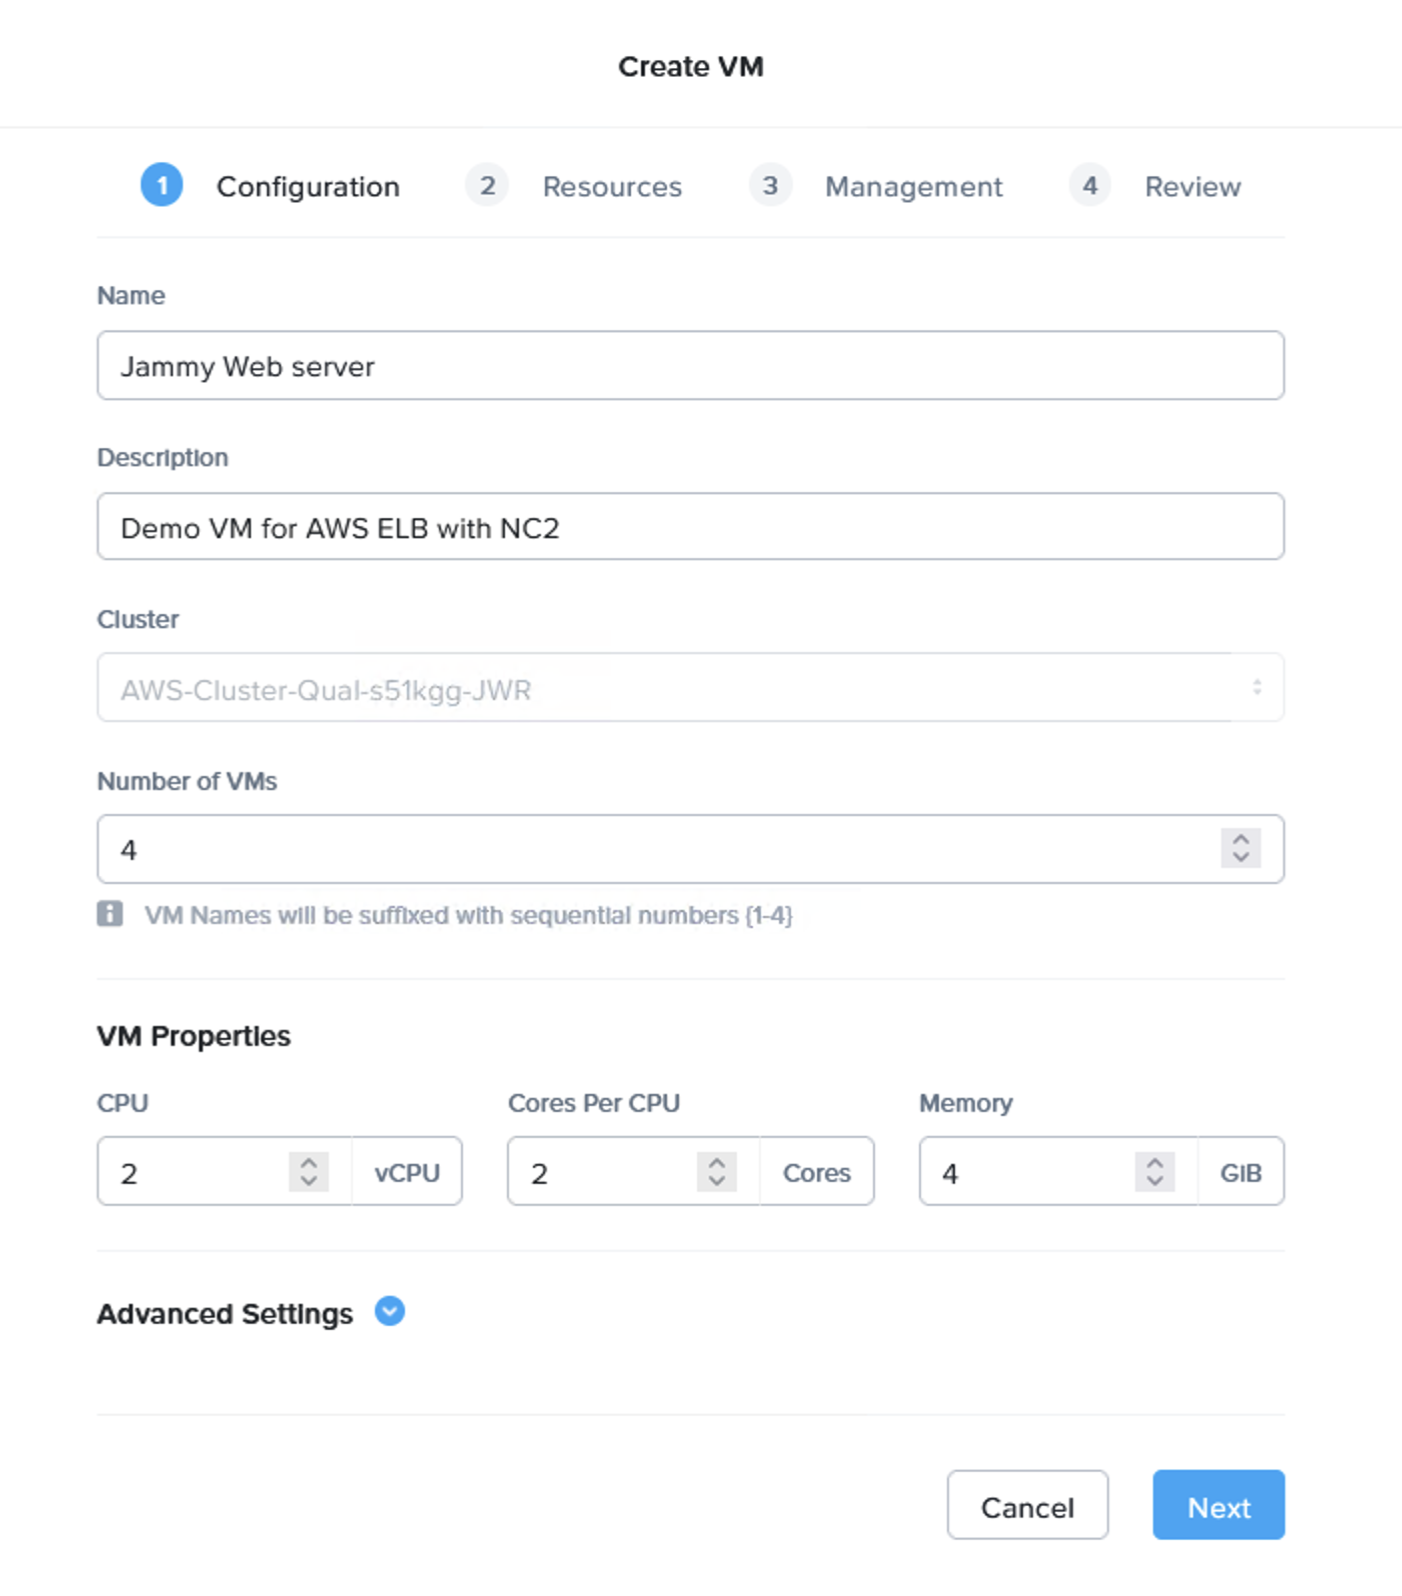
Prism Central makes it very easy to deploy multiple VMs in one go.
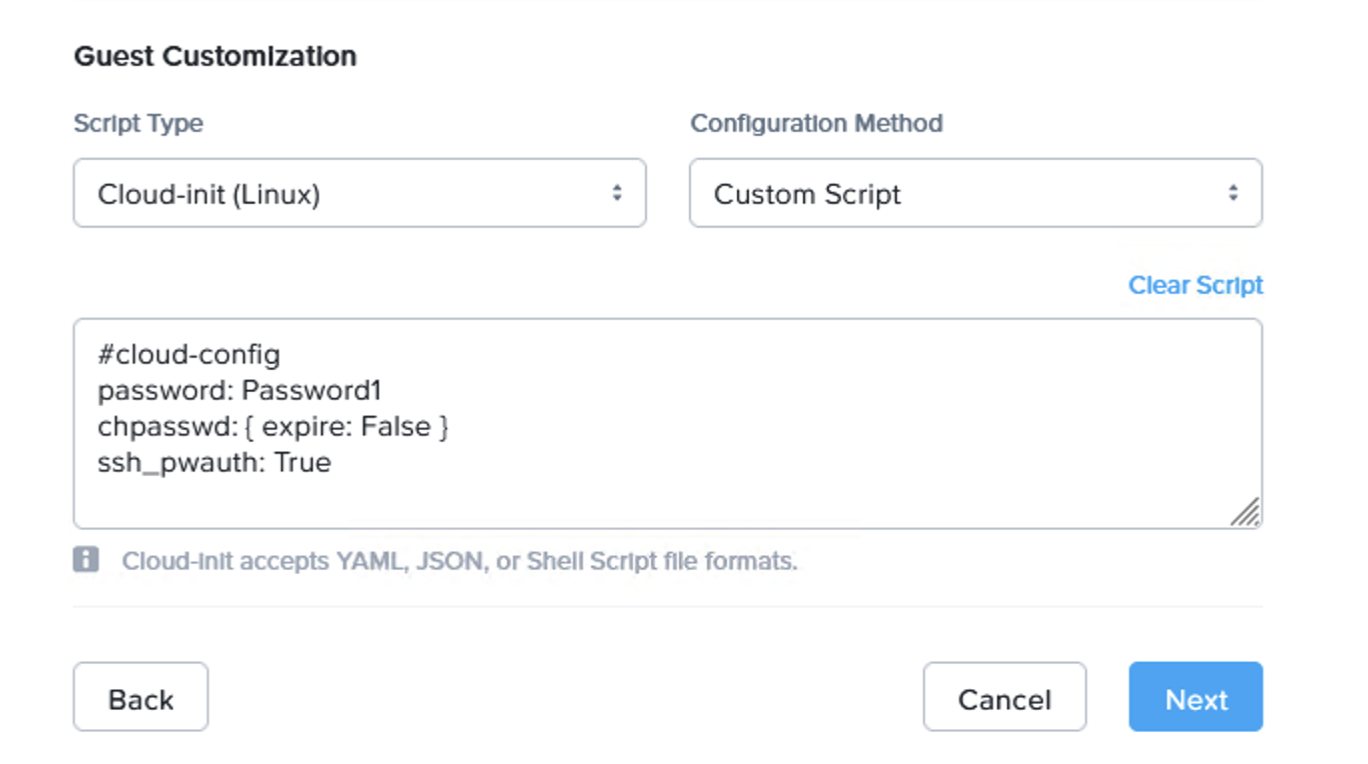
When deploying, make sure to use the cloud-init script to set the password and any other parts to make the VM usable after 1st boot:
1
2
3
4
#cloud-config
password: Password1
chpasswd: { expire: False }
ssh_pwauth: True
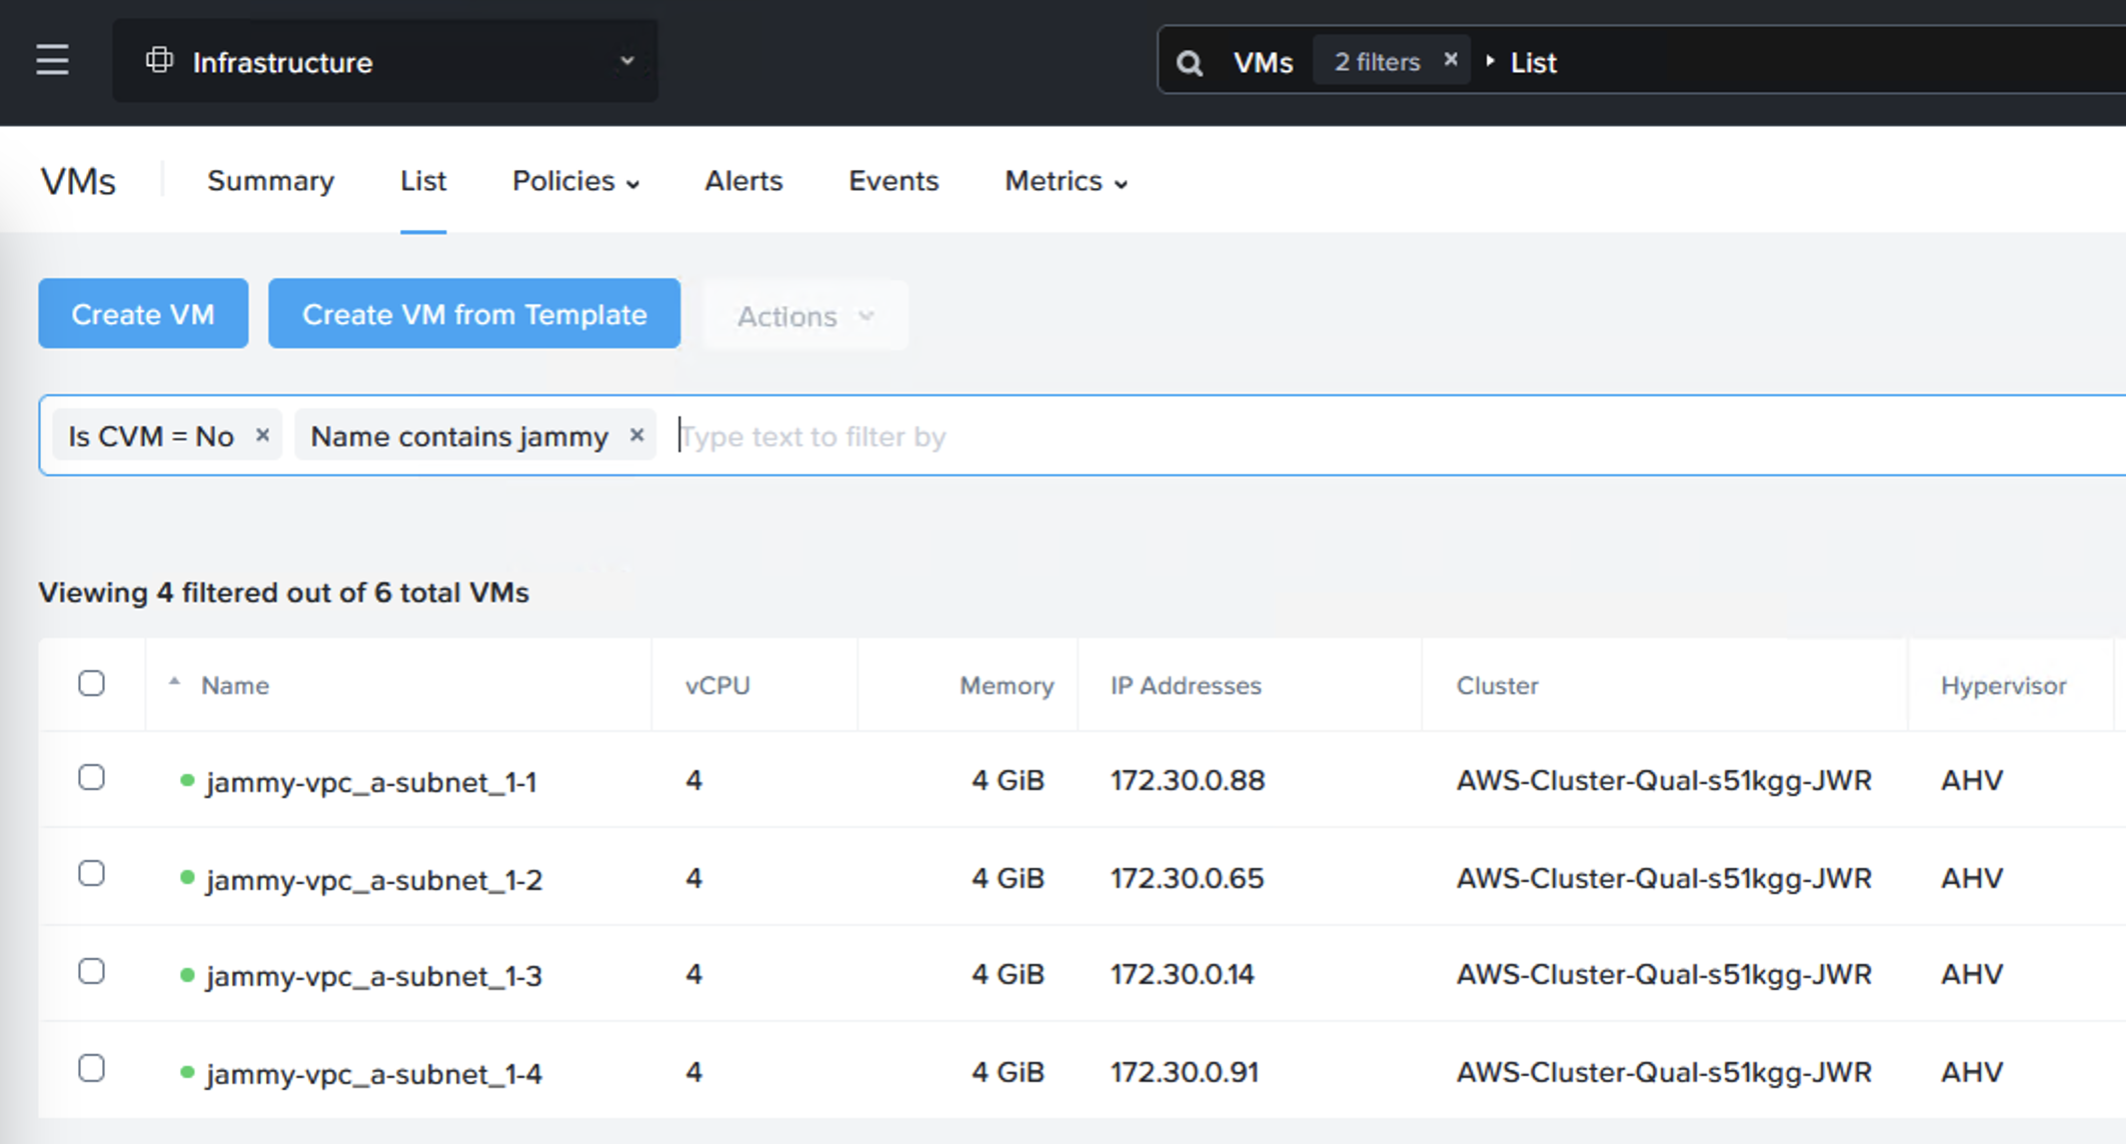
Now we have our VMs ready. I’ve installed the Apache web server to serve pages (apt install apache2) but feel free to use whatever works best in your setup.
I used the following index.html code to show the server ID
1
2
3
4
5
6
7
8
9
10
11
12
13
14
15
16
17
18
19
20
21
22
23
24
25
26
27
28
29
30
31
32
33
34
35
36
37
ubuntu@ubuntu:~$ cat /var/www/html/index.html

<html lang="en">
<head>
    <meta charset="UTF-8">
    <meta name="viewport" content="width=device-width, initial-scale=1.0">
    <title>Welcome</title>
    <style>
        body {
            display: flex;
            justify-content: center;
            align-items: center;
            height: 100vh;
            margin: 0;
            font-family: Arial, sans-serif;
            background-color: #f0f0f0;
        }
        .message-container {
            max-width: 300px;
            padding: 20px;
            text-align: center;
            background-color: #ffffff;
            border: 1px solid #cccccc;
            border-radius: 10px;
            box-shadow: 0 0 10px rgba(0, 0, 0, 0.1);
        }
    </style>
</head>
<body>
    <div class="message-container">
        <script>
            // Fetch the hostname
            document.write("Welcome to Server 1");
        </script>
    </div>
</body>
</html>
Configure floating IP addresses for the web servers
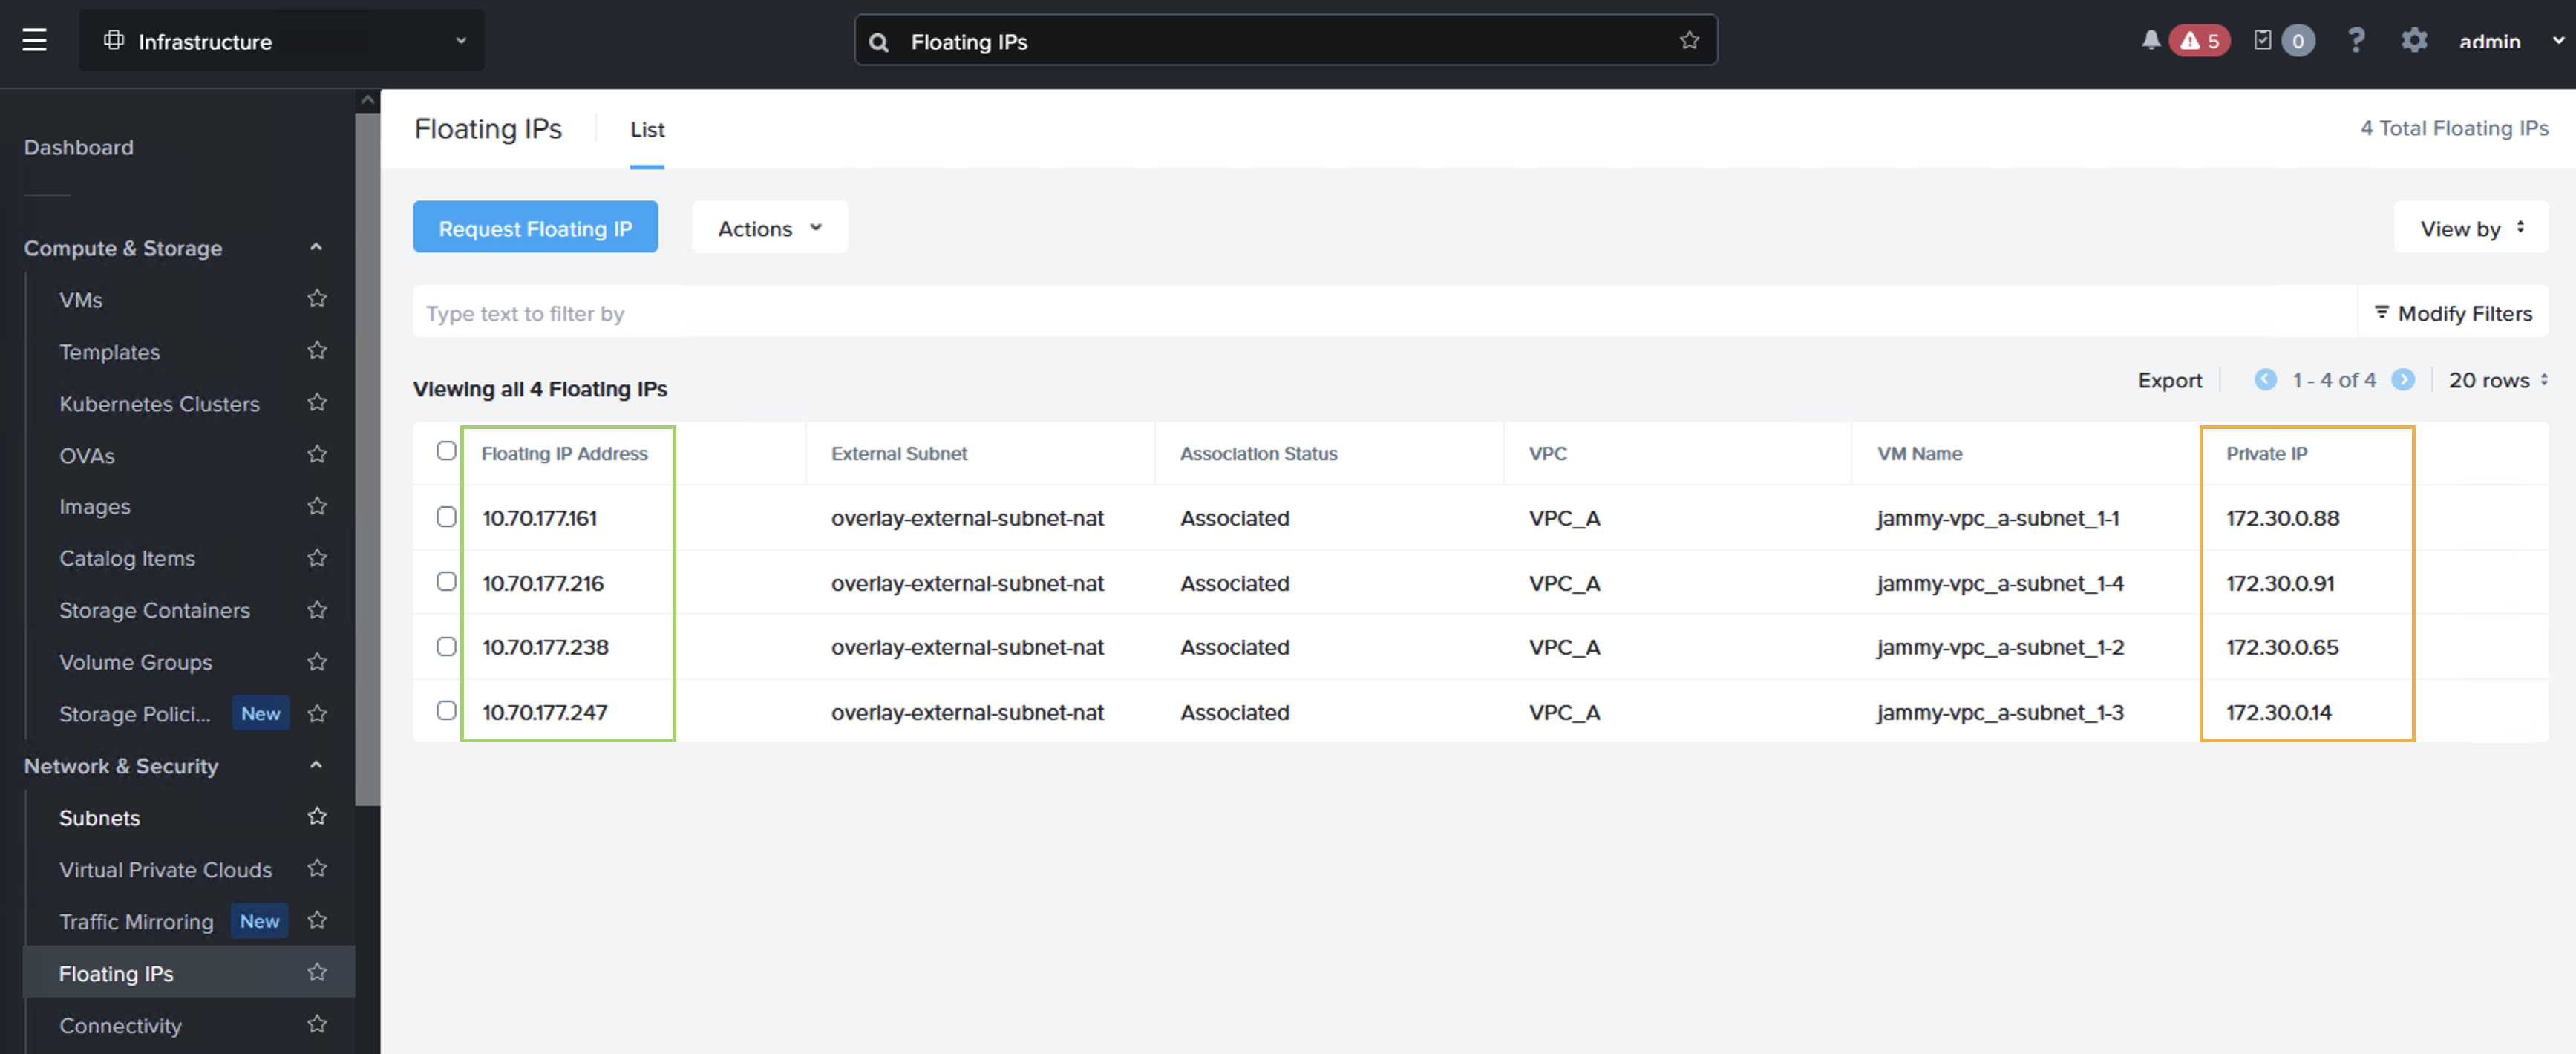
Next we request a few floating IP addresses from the VPC which NC2 is deployed into and then assign one IP each to our web servers. Luckily Prism Central makes also this very easy to do – in a single step! From “Compute & Storage”, select “Floating IPs” under “Network & Security”:

After assigning the IPs we can see that each VM have both an internal and an external IP address, where the “external” IP comes from the AWS VPC CIDR range
Creating an AWS LB target group
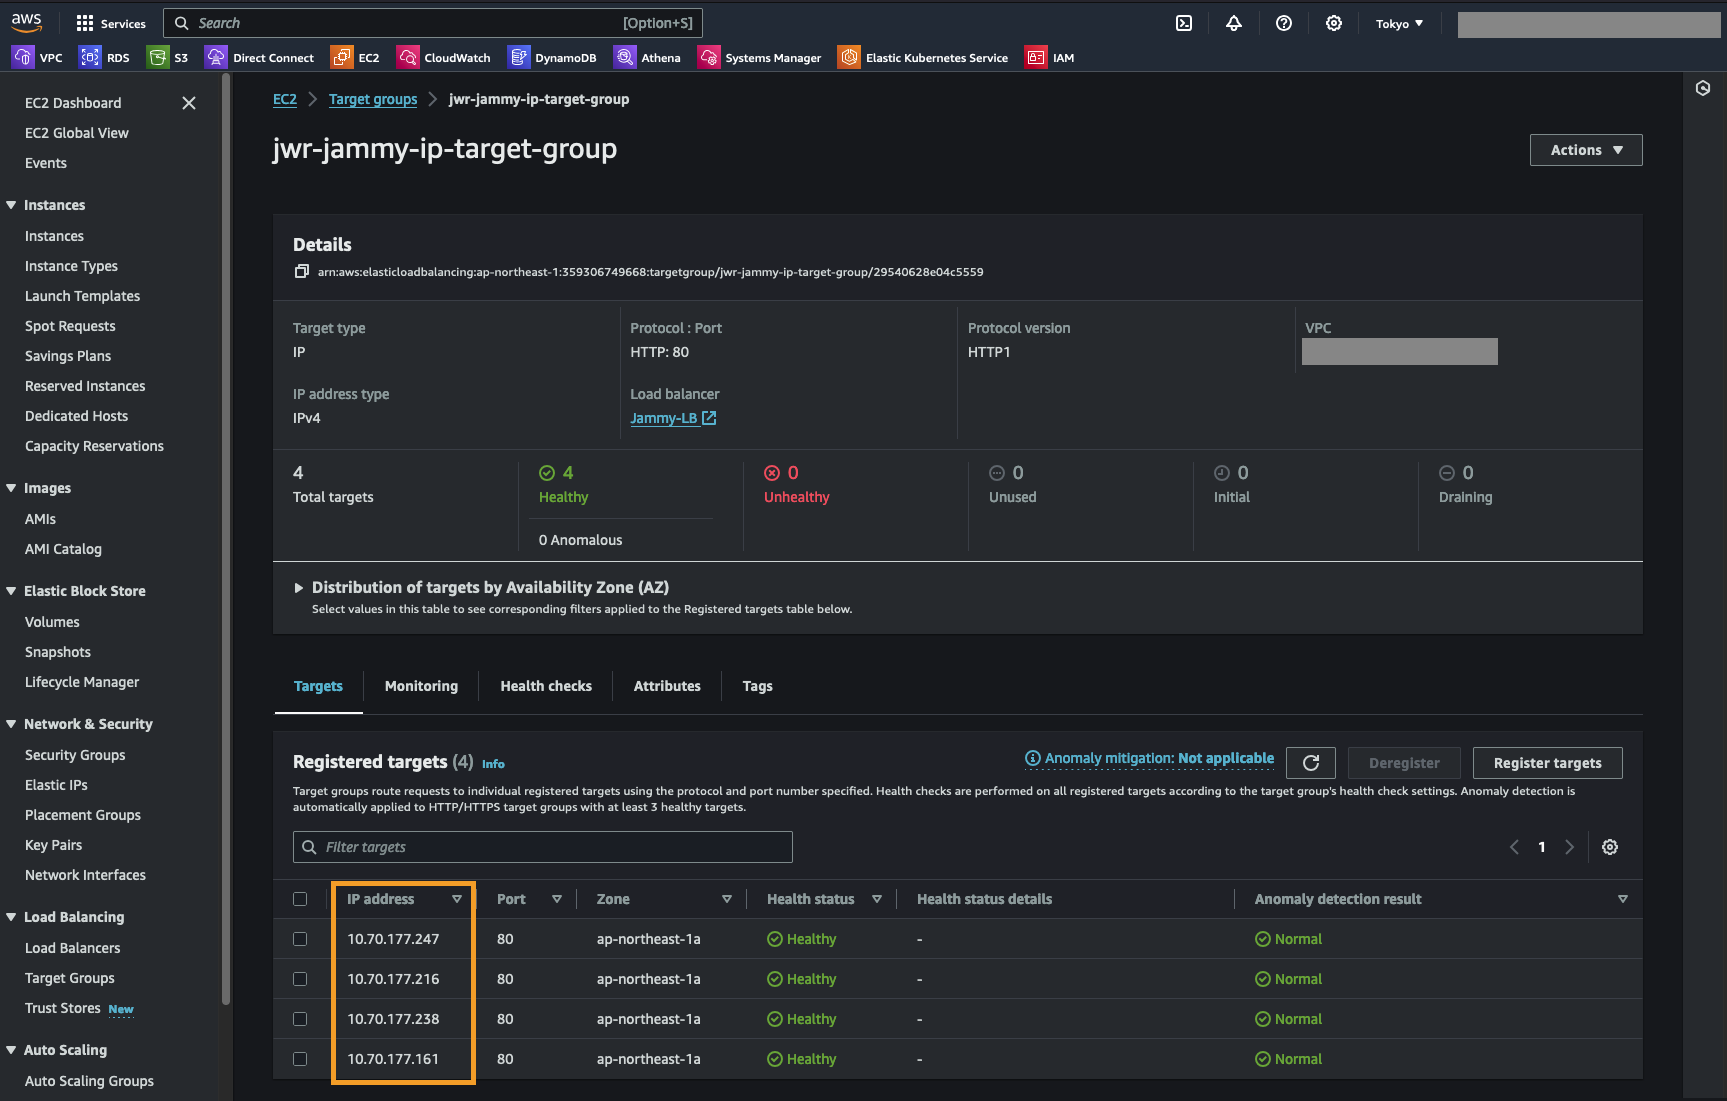
Next we create a target group for the AWS ALB which we deploy in the next step. The LB target group simply contain the Floating IP addresses we just assigned as well as a health check for the web root of these web servers.
We create an “IP address” target group and set the health check to be HTTP, port 80 and the path as “/” or the web root.
We then add the Floating IP addresses we created previously
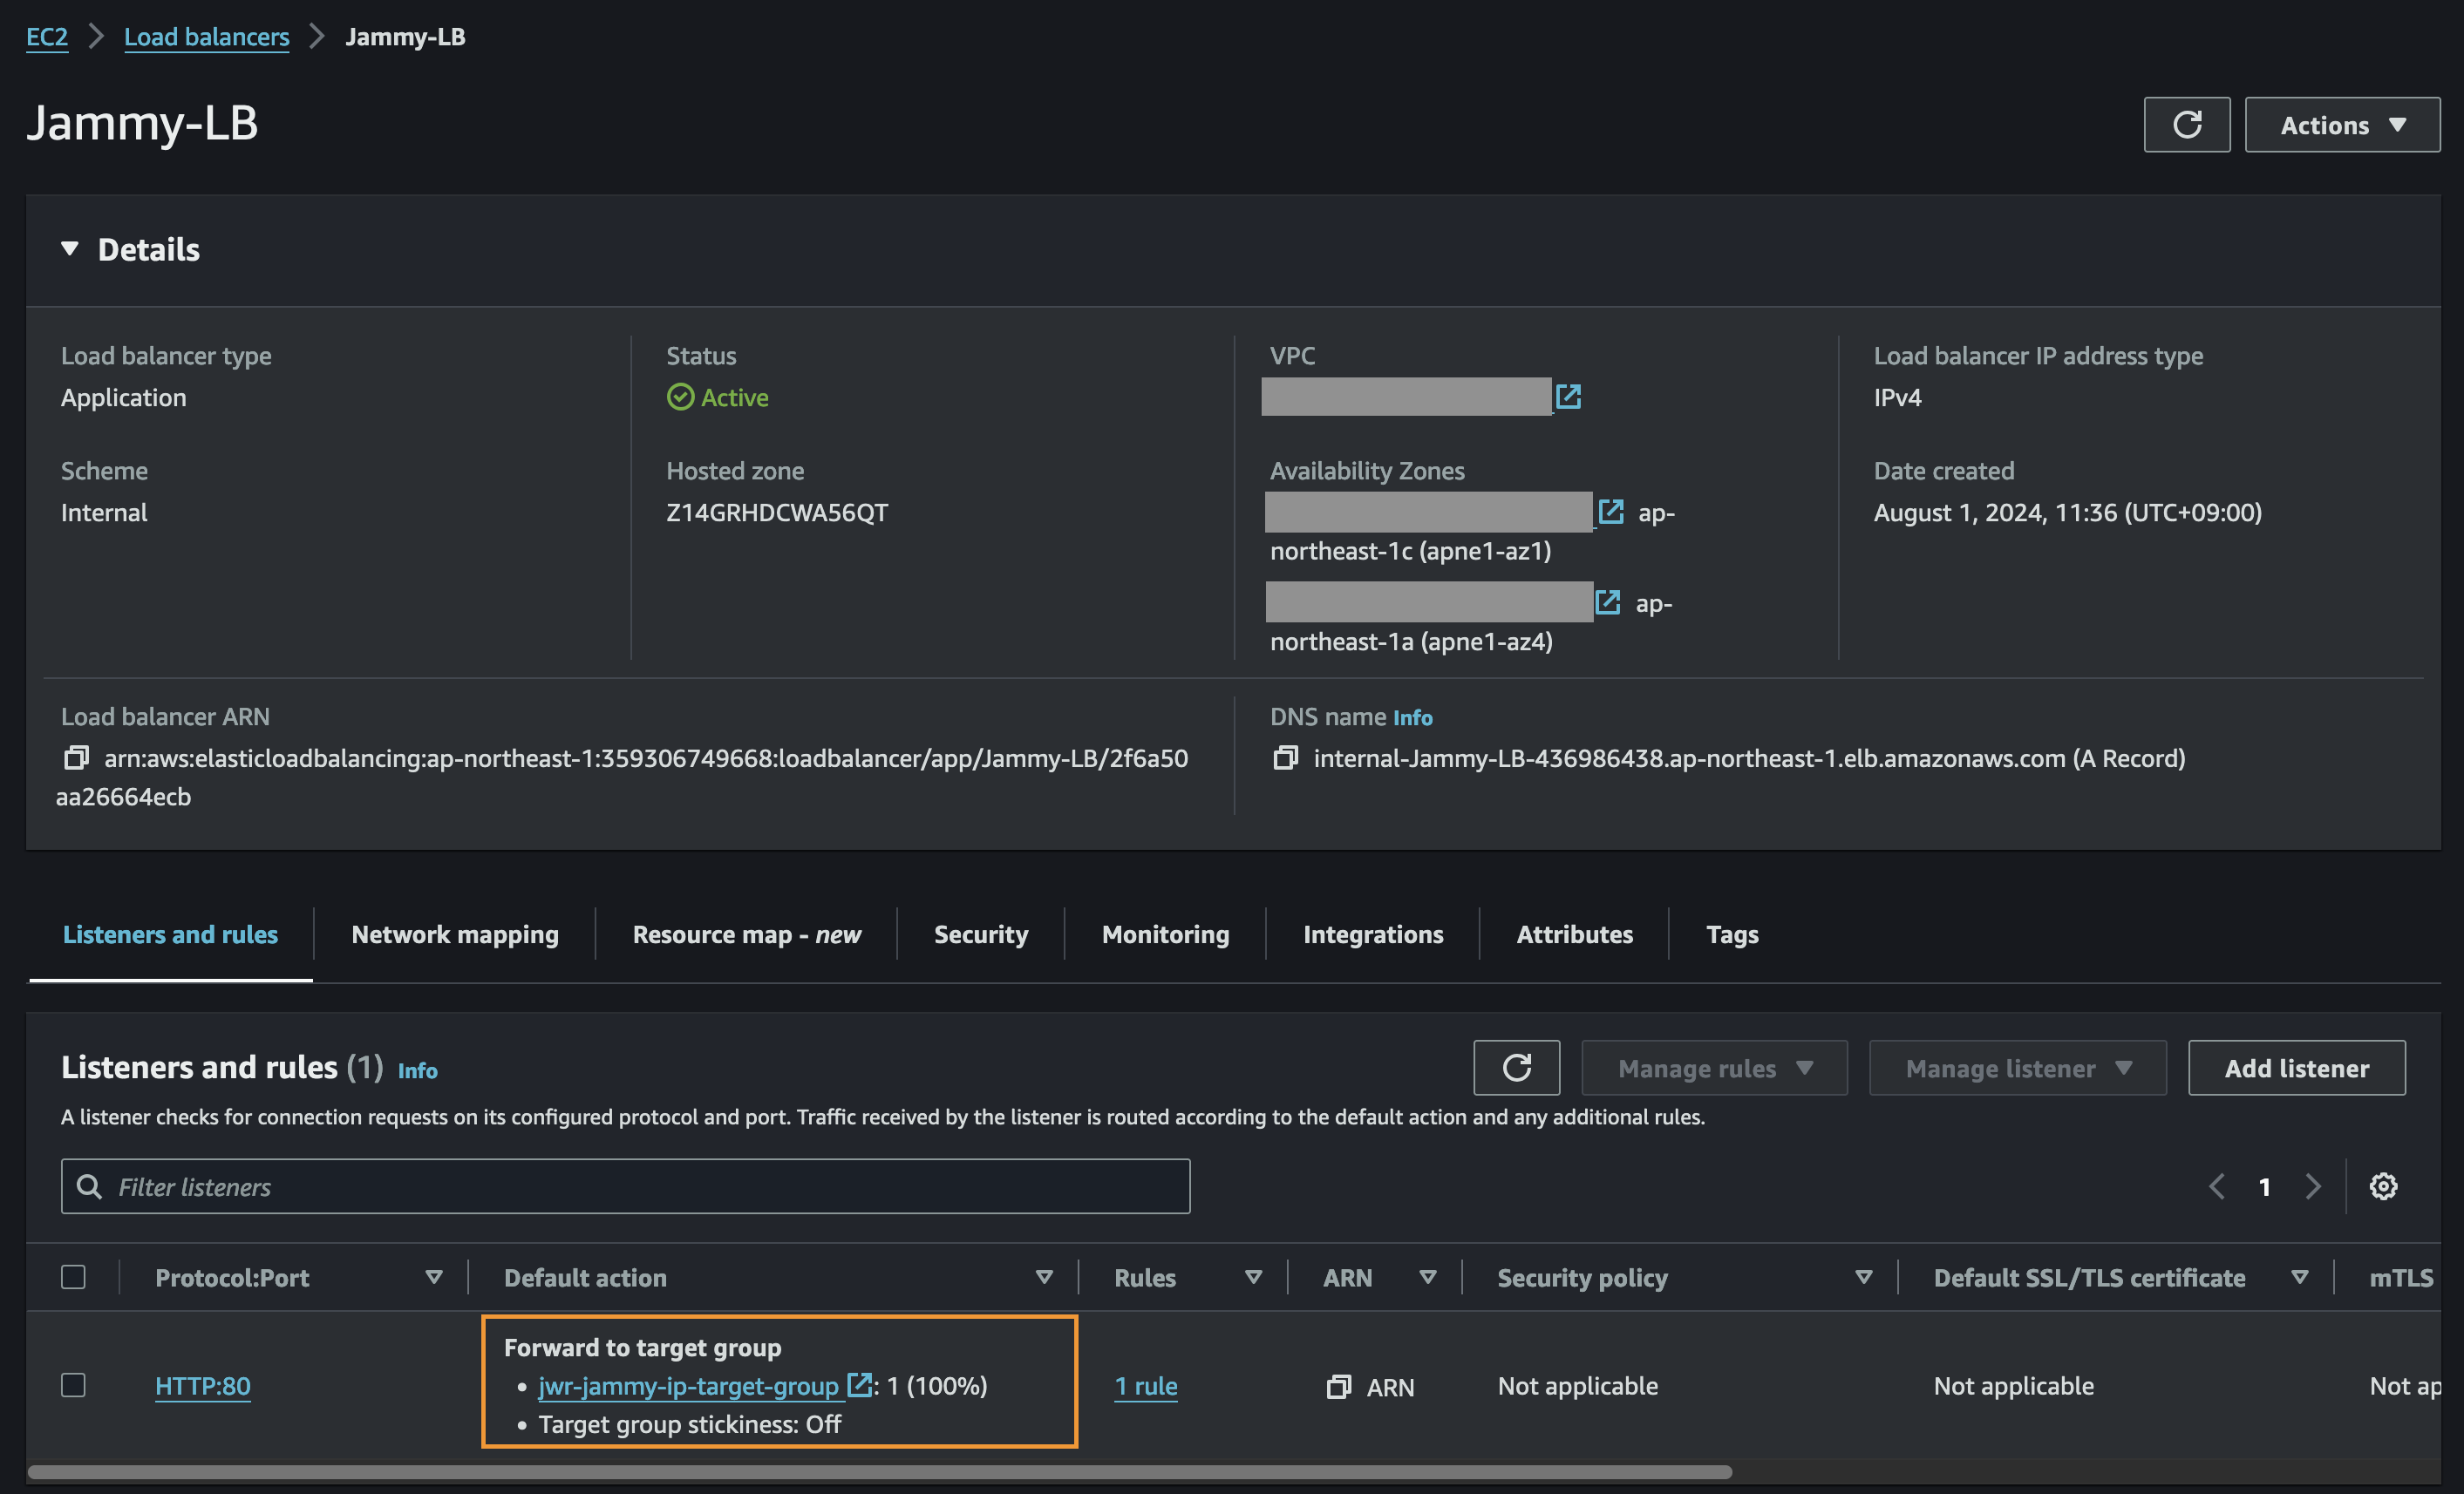
Create the Application Load Balancer (ALB)
Finally we create the ALB and assign it to our target group
Test of the ALB
Now we’re all done and can access our ALB to see if it shows balances between the NC2 VMs as expected.
We’re getting a different web server each time we refresh the page – all good!
That’s all for now. Hope that was helpful and thank you for reading!