Generating a self-signed server certificate for use with the AWS Client VPN service
Using a VPN for your end users is a handy way to securely connect to services and resources in your AWS environment with minimal fuss and effort. The AWS Client VPN service can be configured to ensure users only access the area of your AWS footprint that they are supposed to. It is also possible to use the AWS Client VPN to direct groups of users to specific subnets in Nutanix Cloud Clusters. This post cover the steps required to create a self-signed server certificate for the AWS Client VPN service.
Creating the Open SSL configuration file
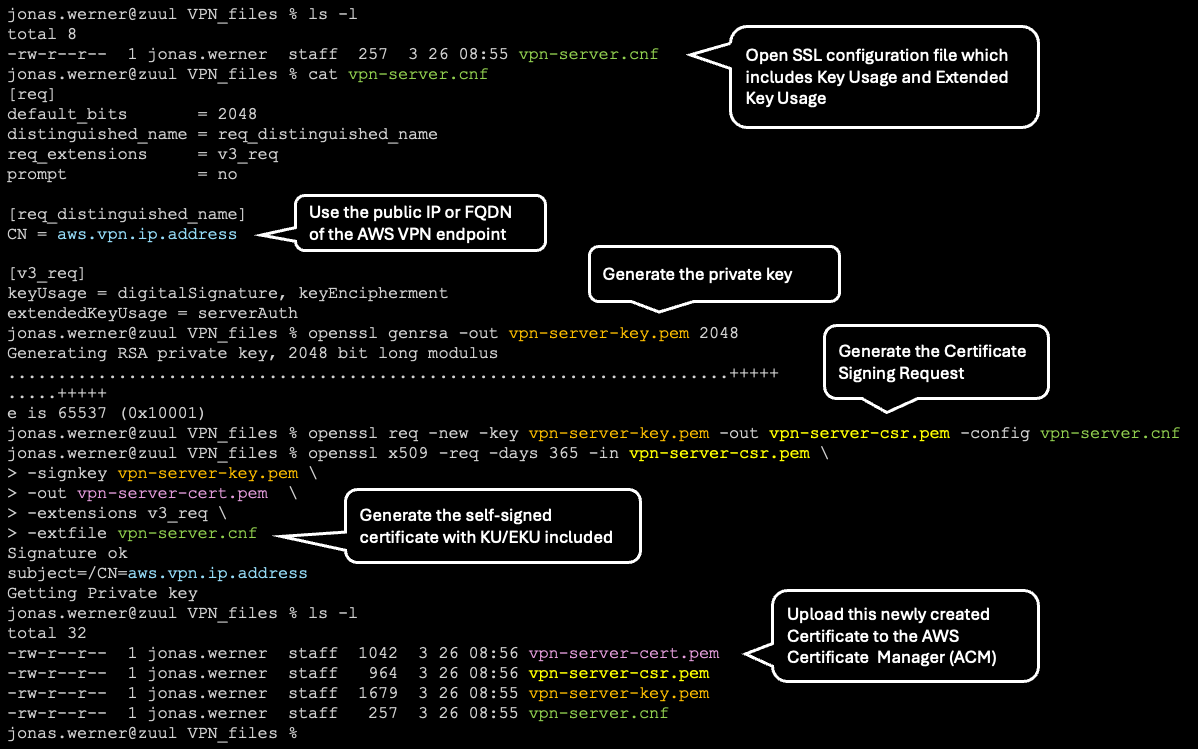
In order to set the “Key Usage” and “Extended Key Usage” parameters and link them with the Client VPN endpoint we need to create a configuration file. The format is as follows:
1
2
3
4
5
6
7
8
9
10
[req]
default_bits   	= 2048
distinguished_name = req_distinguished_name
req_extensions 	= v3_req
prompt         	= no
[req_distinguished_name]
CN = aws.vpn.ip.address
[v3_req]
keyUsage = digitalSignature, keyEncipherment
extendedKeyUsage = serverAuth
Add your VPN endpoint FQDN or IP address and save it as vpn-server.cnf. If you don’t have an FQDN to be used with the VPN service or if you’re just running a quick test, this can be a bit of a chicken and egg situation. How can you enter the IP for the VPN if you haven’t created it yet? In that case, just enter any IP to get the certificate with which to set up the service initially and re-generate and replace the certificate later when the VPN service is up and running.
Commands to create the certificate
First, generate the private key, which we’ll name vpn-server-key.pem
1
openssl genrsa -out vpn-server-key.pem 2048
Then generate the CSR or Certificate Signing Request:
1
2
3
openssl req -new -key vpn-server-key.pem \
-out vpn-server-csr.pem \
-config vpn-server.cnf
Finally, create the certificate by signing it ourselves:
1
2
3
4
5
openssl x509 -req -days 365 -in vpn-server-csr.pem \
-signkey vpn-server-key.pem \
-out vpn-server-cert.pem  \
-extensions v3_req \
-extfile vpn-server.cnf
Overview of the process
Please refer to the below for an overview of the end-to-end process of generating the Cert:
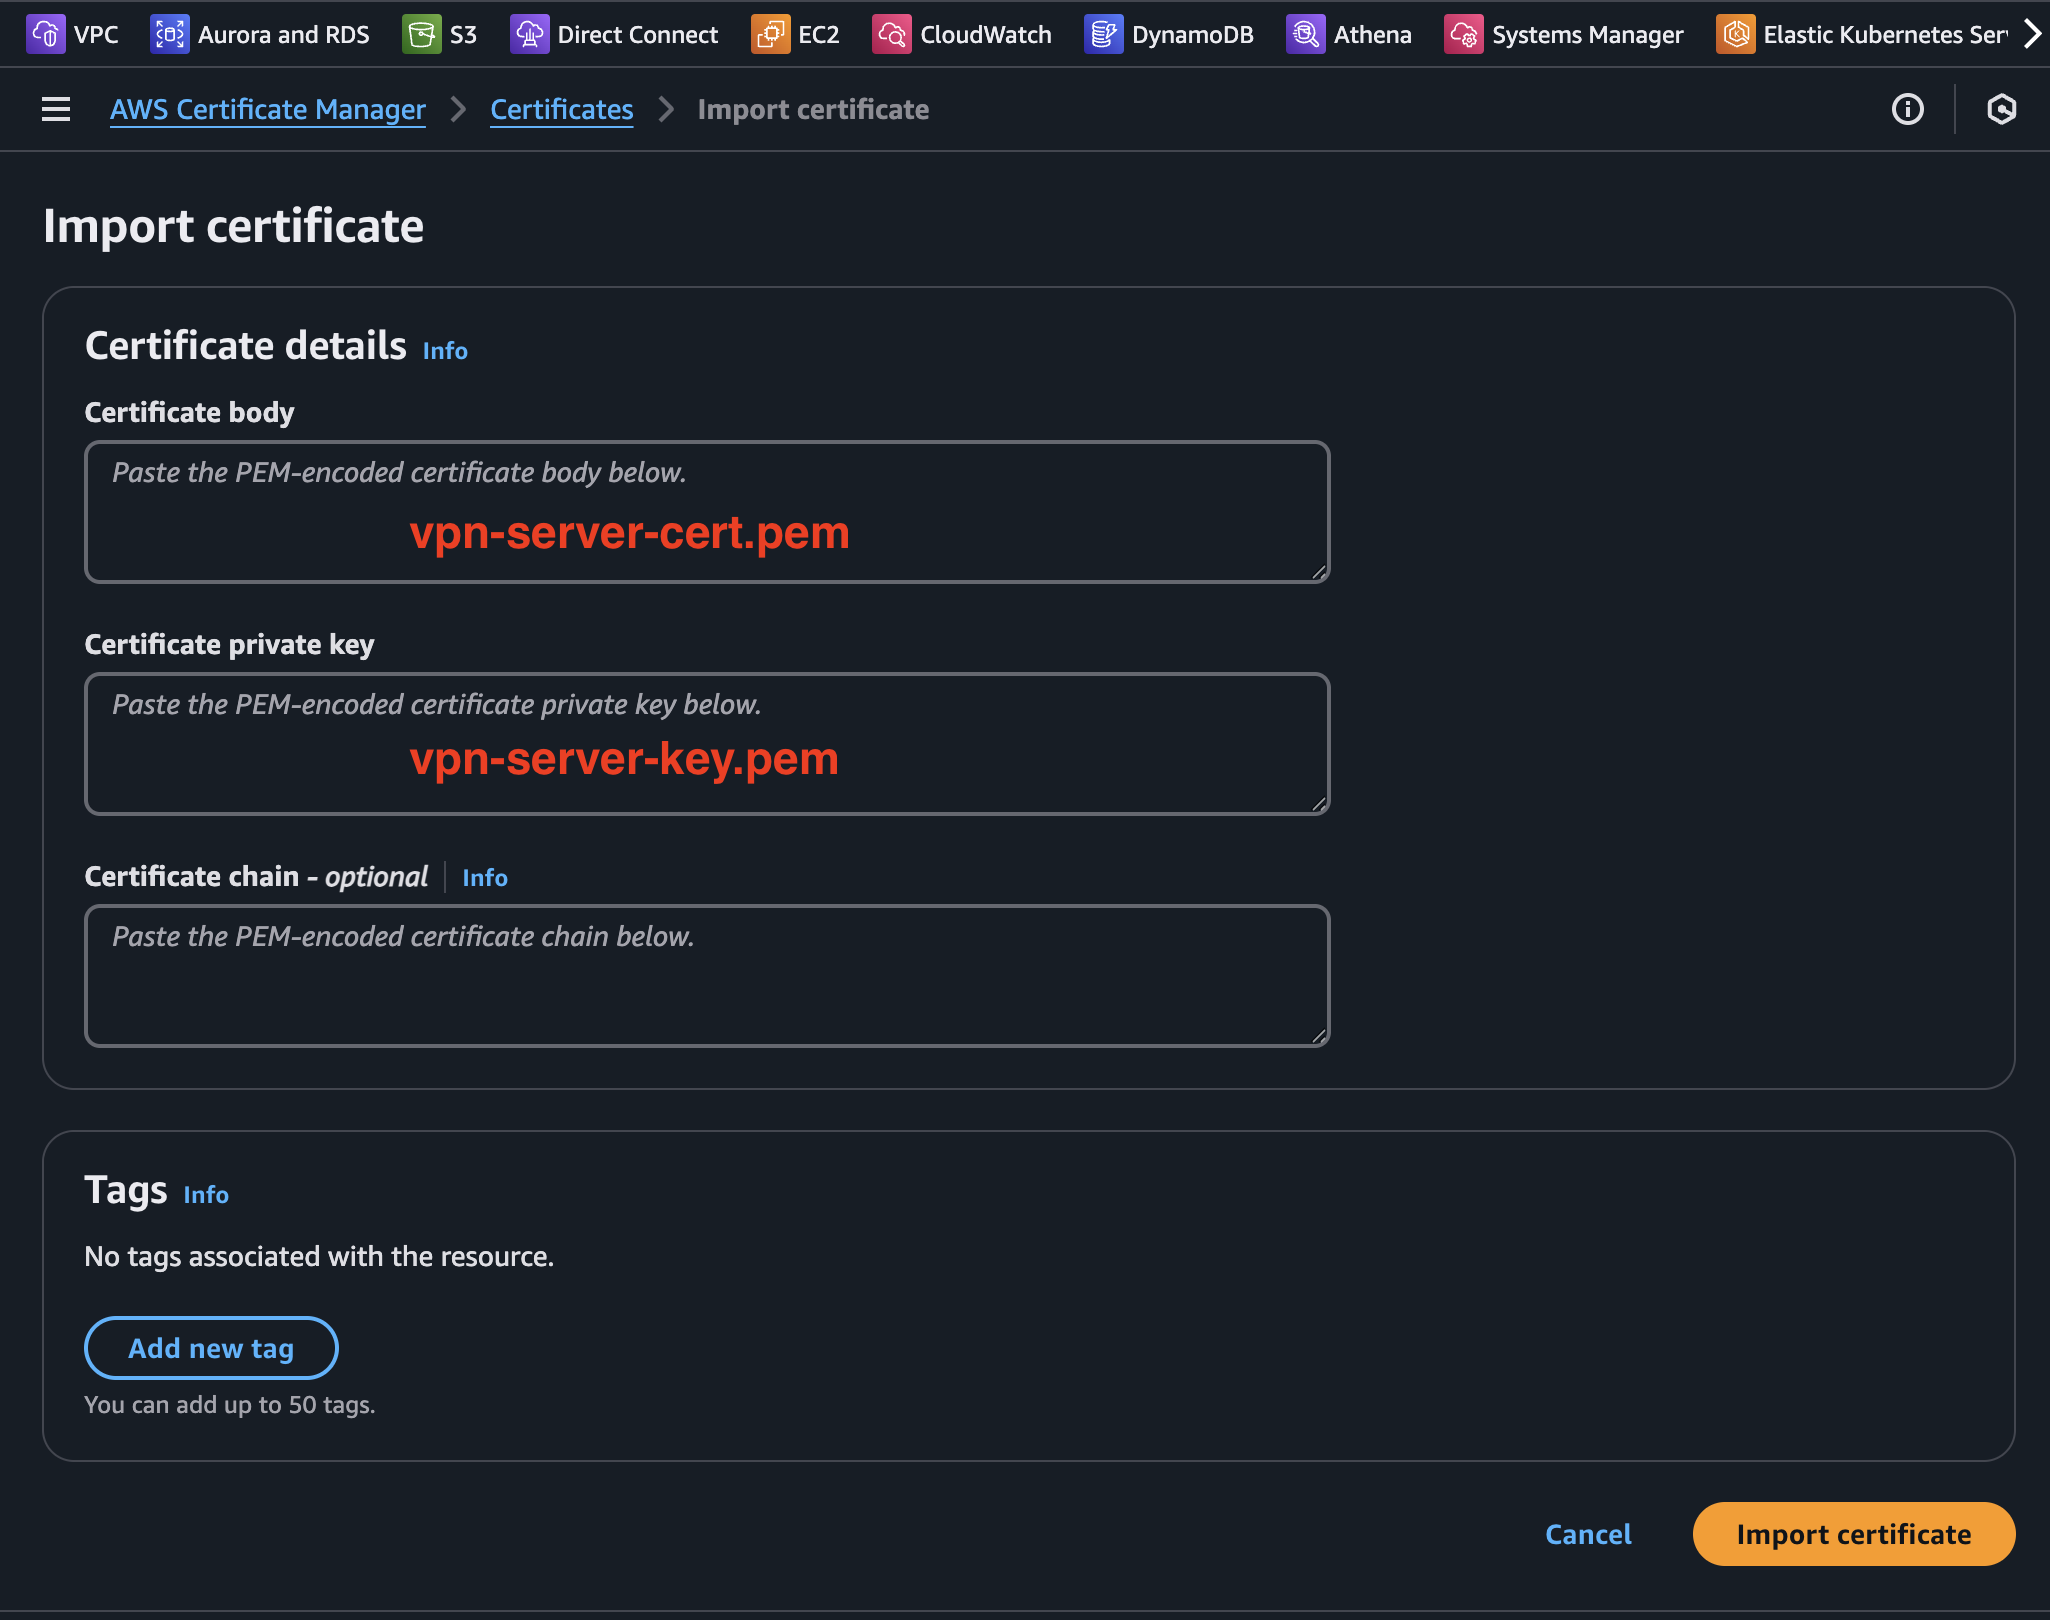
Register the certificate
Now we have a certificate which can be uploaded to and registered with the AWS Certificate Manager (ACM). Navigate to ACM in the AWS console and register it. We do this by copying and pasting the contents of the vpn-server-cert.pem and vpn-server-key.pem files into the Certificate Body and Certificate Private Key sections.
The certificate will now show up as an option when creating the AWS Client VPN endpoint. We will cover the details of creating and using the AWS Client VPN endpoint service with Nutanix Cloud Clusters in an upcoming blog post.
Conclusion
This concludes the creation and registration of a self-signed server certificate for use with the AWS Client VPN endpoint service. Hopefully this was useful.