Using LetsEncrypt to get TLS certificates for your k8s apps
Introduction: Encrypting traffic to apps hosted on k8s
Encrypting data in transit is not just a best practice. One can easily say that it’s essential for protecting sensitive information and maintaining user trust. When hosting applications on Kubernetes, implementing TLS encryption ensures that all communication between clients and your services remains secure and private.
Let’s Encrypt has had an incredible impact on certificate management by providing free, automated SSL/TLS certificates that renew automatically. This makes it very convenient to secure your Kubernetes applications without the traditional hassle of manual certificate procurement and renewal processes.
If you already have a domain registered with Amazon Route53, the integration becomes even smoother. Route53’s API allows cert-manager to automatically create and manage DNS records required for certificate validation, streamlining the entire process. In our setup, we’ll use our own public domain (*.bamboozledaardvark.com) for issuing the certificate, but we’ll create the DNS records in our local DNS server for the subdomains. In our case, we use PiHole as our local lab DNS server, which allows us to resolve internal services while maintaining the security benefits of Let’s Encrypt certificates.
Overview of steps
Before we begin, there are some prerequisites to consider. Of course, you’ll need a domain in order to use TLS certificates with your applications. If you have one registered with Route53, it makes the process much easier, as we can configure cert-manager to use it directly.
We assume you already have MetalLB and Traefik deployed on your cluster. MetalLB provides load balancing capabilities, while Traefik acts as our ingress controller to route traffic to the appropriate services.
Cert-manager is a Kubernetes add-on that automates the management and issuance of TLS certificates from various issuing sources. It will monitor your ingress resources and automatically request certificates when needed. We’ll install it directly from the GitHub repository to ensure we get the latest stable version.
For this example, we’ll use DNS01 challenge validation, which involves creating TXT records in your DNS zone to prove domain ownership. This method is particularly useful for wildcard certificates and works well with Route53. While HTTP01 validation is also possible (where cert-manager creates temporary files that Let’s Encrypt can access via HTTP), DNS01 is more flexible for our use case.
Here’s a summary of what we’ll set up:
- Create IAM Policy and User: We’ll create a new IAM policy with the necessary Route53 permissions and attach it to a new user
- Generate Security Credentials: The new user will receive access keys (access key ID and secret access key)
- Configure Kubernetes Secrets: We’ll register the secret access key as a Kubernetes secret
- Create ClusterIssuer: We’ll configure cert-manager to use our Route53 credentials for automatic certificate issuance
Step 1: Install cert-manager
cert-manager can be installed either directly from the GitHub repository or via a Helm chart. For this guide, we’ll use the GitHub repository method and install version 1.19.1:
1
k apply -f https://github.com/cert-manager/cert-manager/releases/download/v1.19.1/cert-manager.yaml
Check the status of the deployment:
1
2
3
4
5
6
7
8
9
10
11
12
13
14
15
16
17
18
19
20
k get all -n cert-manager
NAME                                           READY   STATUS    RESTARTS   AGE
pod/cert-manager-69fd4bc5fc-27sc7              1/1     Running   0          20m
pod/cert-manager-cainjector-85b6d7fc67-vqn9w   1/1     Running   0          20m
pod/cert-manager-webhook-cfbc49fc8-msvkq       1/1     Running   0          20m

NAME                              TYPE        CLUSTER-IP       EXTERNAL-IP   PORT(S)            AGE
service/cert-manager              ClusterIP   10.106.197.183   <none>        9402/TCP           20m
service/cert-manager-cainjector   ClusterIP   10.106.43.167    <none>        9402/TCP           20m
service/cert-manager-webhook      ClusterIP   10.110.116.8     <none>        443/TCP,9402/TCP   20m

NAME                                      READY   UP-TO-DATE   AVAILABLE   AGE
deployment.apps/cert-manager              1/1     1            1           20m
deployment.apps/cert-manager-cainjector   1/1     1            1           20m
deployment.apps/cert-manager-webhook      1/1     1            1           20m

NAME                                                 DESIRED   CURRENT   READY   AGE
replicaset.apps/cert-manager-69fd4bc5fc              1         1         1       20m
replicaset.apps/cert-manager-cainjector-85b6d7fc67   1         1         1       20m
replicaset.apps/cert-manager-webhook-cfbc49fc8       1         1         1       20m
Step 2: Create AWS IAM Policy and User
In the AWS console, we need to create a new IAM policy that grants the necessary permissions for cert-manager to manage DNS records in Route53. This policy will allow the service to create and delete TXT records for domain validation.
1
2
3
4
5
6
7
8
9
10
11
12
13
14
15
16
17
18
19
20
21
22
{
    "Version": "2012-10-17",
    "Statement": [
        {
            "Effect": "Allow",
            "Action": [
                "route53:ListHostedZonesByName",
                "route53:ListHostedZones",
                "route53:ListResourceRecordSets",
                "route53:GetChange"
            ],
            "Resource": "*"
        },
        {
            "Effect": "Allow",
            "Action": [
                "route53:ChangeResourceRecordSets"
            ],
            "Resource": "arn:aws:route53:::hostedzone/your-zone-here"
        }
    ]
}
Once you have your policy created, create a new IAM user and attach the policy to it. After creating the user, generate access credentials and make note of both the Access Key ID and Secret Access Key as you’ll need these in the next steps.
Step 3: Create the Kubernetes Secret
Now that we have our IAM user credentials, it’s time to configure cert-manager to use them. We’ll start by creating a Kubernetes secret to store our Route53 credentials securely:
1
2
3
k create secret generic route53-credentials-secret \
 --from-literal=secret-access-key='your-secret-access-key' \
 -n cert-manager
Let’s verify that the secret was created successfully:
1
2
3
4
5
6
7
8
9
10
11
k describe secret route53-credentials-secret -n cert-manager
Name:         route53-credentials-secret
Namespace:    cert-manager
Labels:       <none>
Annotations:  <none>

Type:  Opaque

Data
====
secret-access-key:  40 bytes
Step 4: Create the ClusterIssuer
Next, we’ll create the ClusterIssuer configuration. This tells cert-manager how to interact with Let’s Encrypt and Route53. Here you will need your hosted zone ID from Route53. You can find it at the top of the domain details in the AWS management console.
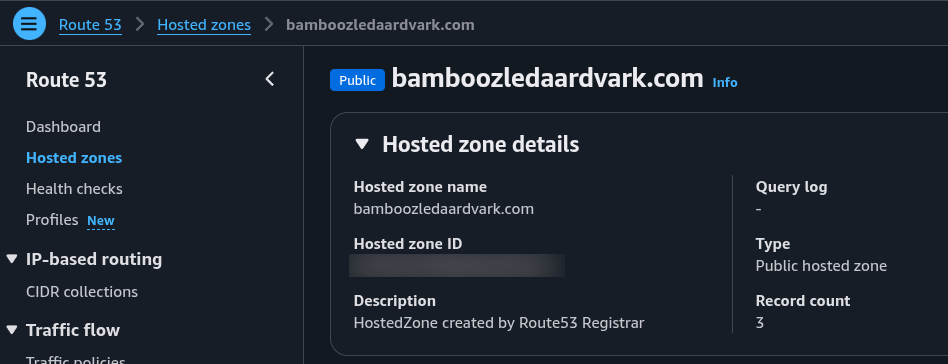
Update the YAML example below to include your access key and match your secret name if you used anything different from the example above:
1
2
3
4
5
6
7
8
9
10
11
12
13
14
15
16
17
18
19
apiVersion: cert-manager.io/v1
kind: ClusterIssuer
metadata:
  name: letsencrypt-r53
spec:
  acme:
    email: jonas@jonamiki.com
    server: https://acme-v02.api.letsencrypt.org/directory
    privateKeySecretRef:
      name: letsencrypt-r53-account-key
    solvers:
    - dns01:
        route53:
          region: us-east-1
          hostedZoneID: your-hosted-zone-id
          accessKeyID: your-access-key
          secretAccessKeySecretRef:
            name: route53-credentials-secret
            key: secret-access-key
Apply the ClusterIssuer configuration and verify that it was created successfully:
1
k apply -f clusterIssuerLetsEncryptR53.yaml
… and we verify that it has been created:
1
2
3
k get clusterissuer
NAME              READY   AGE
letsencrypt-r53   True    6s
Great work. You’re now ready to issue certificates automatically. The ClusterIssuer is configured and cert-manager will handle the rest when you create ingress resources with the appropriate annotations.
Example: Deploy Grafana to Verify Certificate Issuance
To demonstrate that everything is working correctly, we’ll deploy Grafana as a test application. This will allow us to verify that certificates are issued automatically and that our TLS configuration is working properly.
Note that the deployment example uses a PVC for a storage class called “nfs-storage”. Please update the example to match the storage classes available in your deployment:
1
2
3
4
5
6
7
8
9
10
11
12
13
14
15
16
17
18
19
20
21
22
23
24
25
26
27
28
29
30
31
32
33
34
35
36
37
38
39
40
41
42
43
44
45
46
47
48
49
50
51
52
53
54
55
56
57
58
59
60
61
62
63
64
65
66
67
68
69
70
71
72
73
74
75
76
77
78
79
80
81
82
83
84
85
86
87
88
89
90
91
92
93
94
95
96
97
98
99
100
101
102
103
104
105
106
107
108
109
110
111
112
113
114
115
116
117
118
119
120
121
122
123
124
125
126
127
128
129
130
131
132
---
apiVersion: v1
kind: Namespace
metadata:
  name: grafana
---
apiVersion: v1
kind: PersistentVolumeClaim
metadata:
  name: grafana-pvc
  namespace: grafana
spec:
  accessModes:
    - ReadWriteMany
  storageClassName: nfs-storage
  resources:
    requests:
      storage: 10Gi
---
apiVersion: apps/v1
kind: Deployment
metadata:
  name: grafana
  namespace: grafana
  labels:
    app: grafana
spec:
  replicas: 1
  selector:
    matchLabels:
      app: grafana
  template:
    metadata:
      labels:
        app: grafana
    spec:
      containers:
      - name: grafana
        image: grafana/grafana:latest
        ports:
        - containerPort: 3000
          name: http-grafana
          protocol: TCP
        readinessProbe:
          failureThreshold: 3
          httpGet:
            path: /robots.txt
            port: 3000
            scheme: HTTP
          initialDelaySeconds: 10
          periodSeconds: 30
          successThreshold: 1
          timeoutSeconds: 2
        livenessProbe:
          failureThreshold: 3
          httpGet:
            path: /robots.txt
            port: 3000
            scheme: HTTP
          initialDelaySeconds: 30
          periodSeconds: 10
          successThreshold: 1
          timeoutSeconds: 1
        resources:
          limits:
            cpu: 200m
            memory: 200Mi
          requests:
            cpu: 100m
            memory: 128Mi
        volumeMounts:
        - mountPath: /var/lib/grafana
          name: grafana-storage
        env:
        - name: GF_SECURITY_ADMIN_USER
          value: admin
        - name: GF_SECURITY_ADMIN_PASSWORD
          value: admin123
        - name: GF_INSTALL_PLUGINS
          value: ""
        - name: GF_SERVER_ROOT_URL
          value: "https://grafana.bamboozledaardvark.com"
        - name: GF_SERVER_SERVE_FROM_SUB_PATH
          value: "false"
      volumes:
      - name: grafana-storage
        persistentVolumeClaim:
          claimName: grafana-pvc
---
apiVersion: v1
kind: Service
metadata:
  name: grafana-service
  namespace: grafana
  labels:
    app: grafana
spec:
  type: ClusterIP
  ports:
  - port: 80
    targetPort: 3000
    protocol: TCP
    name: http
  selector:
    app: grafana
---
apiVersion: networking.k8s.io/v1
kind: Ingress
metadata:
  name: grafana-ingress
  namespace: grafana
  annotations:
    traefik.ingress.kubernetes.io/router.entrypoints: websecure
    traefik.ingress.kubernetes.io/router.tls: "true"
    cert-manager.io/cluster-issuer: letsencrypt-r53
spec:
  ingressClassName: traefik
  tls:
  - hosts:
    - grafana.bamboozledaardvark.com
    secretName: grafana-tls
  rules:
  - host: grafana.bamboozledaardvark.com
    http:
      paths:
      - path: /
        pathType: Prefix
        backend:
          service:
            name: grafana-service
            port:
              number: 80
Apply the Grafana deployment configuration:
1
2
3
4
5
6
k apply -f grafanaDeployment.yaml
namespace/grafana created
persistentvolumeclaim/grafana-pvc created
deployment.apps/grafana created
service/grafana-service created
ingress.networking.k8s.io/grafana-ingress created
Get the details for the deployment:
1
2
3
4
5
6
7
8
9
10
11
12
k get all -n grafana
NAME                           READY   STATUS              RESTARTS   AGE
pod/grafana-7466b9579b-chpsv   0/1     ContainerCreating   0          5s

NAME                      TYPE        CLUSTER-IP       EXTERNAL-IP   PORT(S)   AGE
service/grafana-service   ClusterIP   10.104.161.175   <none>        80/TCP    5s

NAME                      READY   UP-TO-DATE   AVAILABLE   AGE
deployment.apps/grafana   0/1     1            0           5s

NAME                                 DESIRED   CURRENT   READY   AGE
replicaset.apps/grafana-7466b9579b   1         1         0       5s
Let’s also verify that cert-manager has started the certificate issuance process for our new deployment:
1
2
3
4
5
6
7
8
9
10
11
12
k get certificates,certificaterequests,orders,challenges -n grafana
NAME                                      READY   SECRET        AGE
certificate.cert-manager.io/grafana-tls   False   grafana-tls   14s

NAME                                               APPROVED   DENIED   READY   ISSUER            REQUESTER                                         AGE
certificaterequest.cert-manager.io/grafana-tls-1   True                False   letsencrypt-r53   system:serviceaccount:cert-manager:cert-manager   14s

NAME                                                  STATE     AGE
order.acme.cert-manager.io/grafana-tls-1-1401423357   pending   14s

NAME                                                                 STATE     DOMAIN                           AGE
challenge.acme.cert-manager.io/grafana-tls-1-1401423357-2796188809   pending   grafana.bamboozledaardvark.com
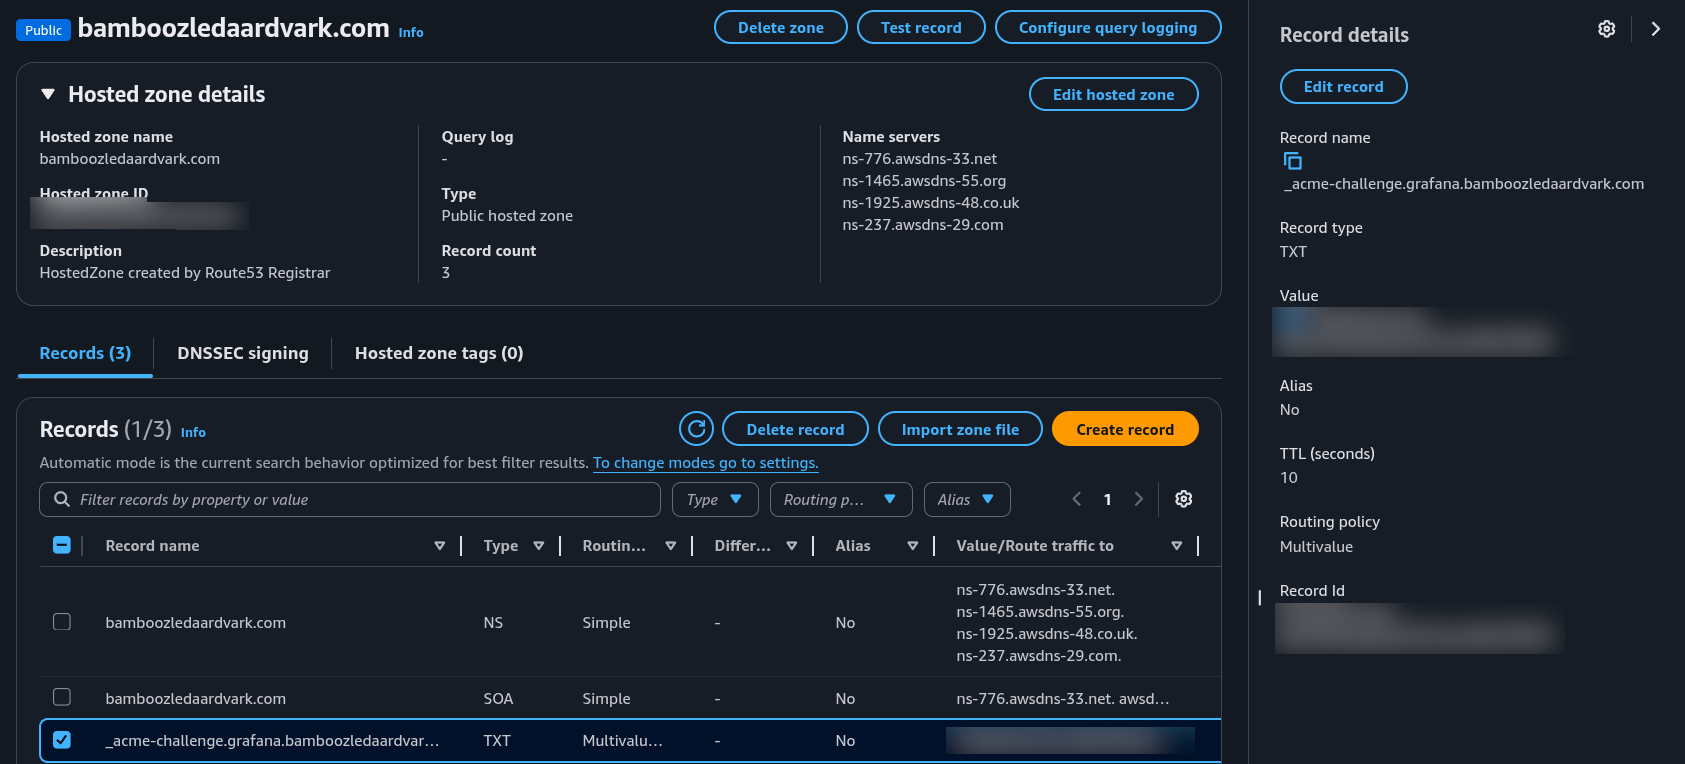
The certificate resources are currently in a pending state, and it may take a few minutes for them to be updated as Let’s Encrypt validates domain ownership. You can monitor the progress by watching the certificate status. You can also watch the new TXT record being added to your Route53 domain through the AWS management console:
Once the validation process is complete, we can verify that we have our certificate:
1
2
3
4
5
6
7
8
9
k get certificates,certificaterequests,orders,challenges -n grafana
NAME                                      READY   SECRET        AGE
certificate.cert-manager.io/grafana-tls   True    grafana-tls   2m37s

NAME                                               APPROVED   DENIED   READY   ISSUER            REQUESTER                                         AGE
certificaterequest.cert-manager.io/grafana-tls-1   True                True    letsencrypt-r53   system:serviceaccount:cert-manager:cert-manager   2m37s

NAME                                                  STATE   AGE
order.acme.cert-manager.io/grafana-tls-1-1401423357   valid   2m37s
If you encounter any issues during the certificate issuance process, it may be helpful to check the cert-manager logs for troubleshooting:
1
k logs -n cert-manager deploy/cert-manager --tail=20
Configure Local DNS Records
While we now have the certificate issued, we also need to create the local DNS records for the Grafana service. In this case we use PiHole as the local DNS server but add the records in the service you use on your network.
To determine what IP address to point our DNS record to, we need to check our Traefik service:
1
2
3
4
k get svc -n traefik
NAME          TYPE           CLUSTER-IP       EXTERNAL-IP   PORT(S)                                    AGE
traefik       LoadBalancer   10.101.71.253    10.42.2.102   80:32522/TCP,443:30929/TCP,443:30929/UDP   3d6h
traefik-k8s   LoadBalancer   10.107.105.134   10.42.2.101   443:31762/TCP                              3d6h
Since our Traefik installation has the external IP “10.42.2.102”, we’ll use this in our local DNS record. Simply add the A record in your DNS server pointing grafana.bamboozledaardvark.com to this IP address.

Test the Complete Setup
Now that everything is configured, it’s time to test if our TLS-enabled Grafana deployment is working correctly. Let’s start by testing from the command line to see if we get a proper response:
1
2
curl -s https://grafana.bamboozledaardvark.com/
<a href="/login">Found</a>.
That seems to have worked well. The HTTPS connection is working properly. Next, let’s try accessing it through a web browser. Although Grafana typically uses port 3000 internally, we don’t need to worry about that since Traefik handles the ingress routing for us. We just need to specify the domain name.
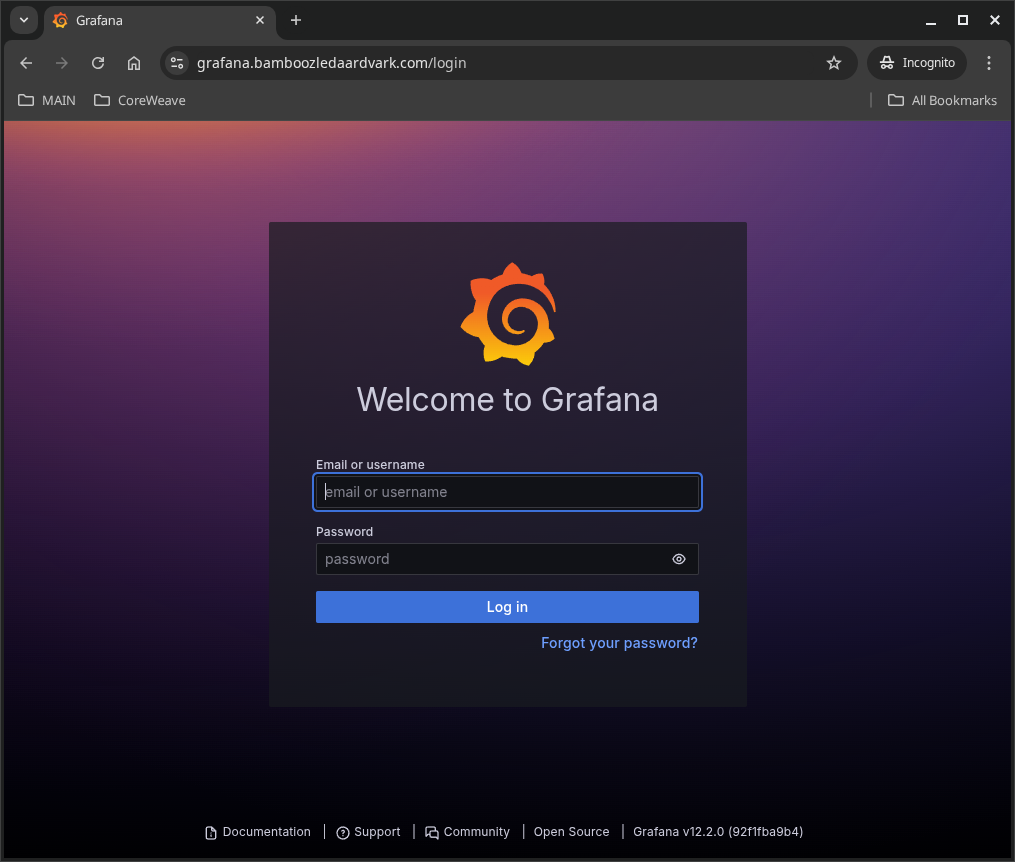
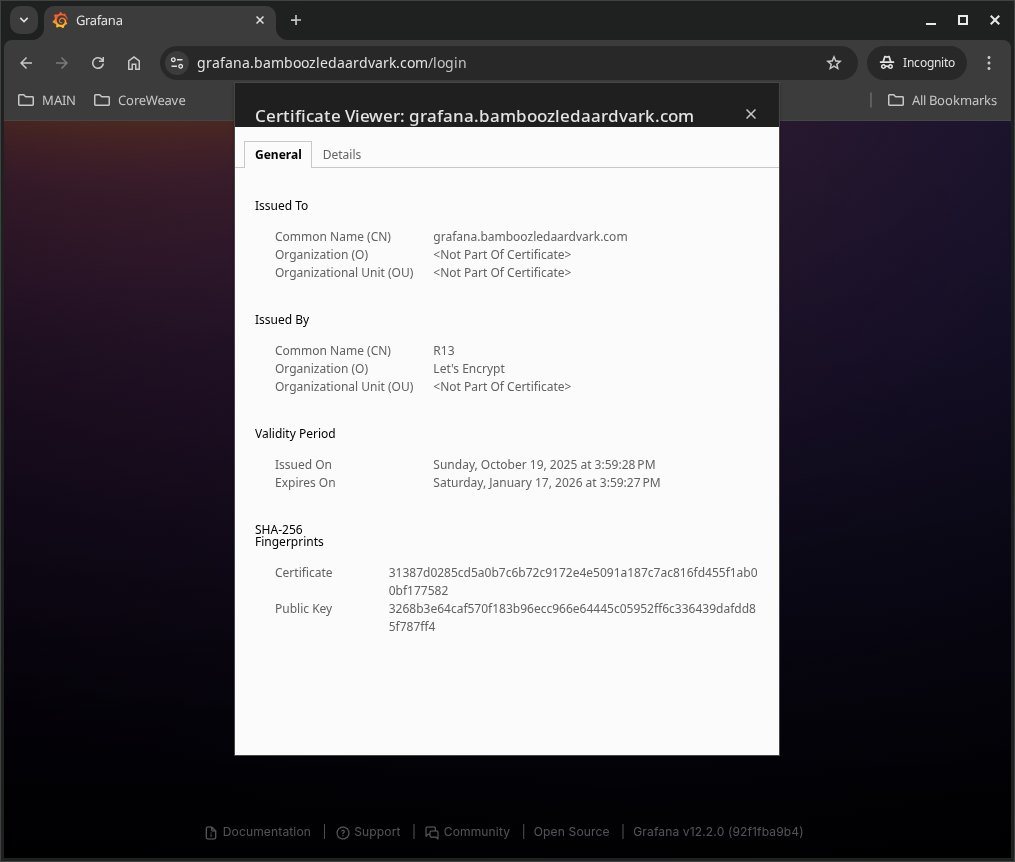
The login page loads without problems and if we check the certificate we can see that it is valid and has been issued by Let’s Encrypt:
Summary
This guide has walked you through configuring TLS certificates with Let’s Encrypt and Route53 for local Kubernetes services. We’ve successfully:
- Installed and configured cert-manager
- Created the necessary AWS IAM policies and credentials
- Set up automatic certificate issuance using DNS01 validation
- Deployed a test application (Grafana) with TLS encryption
- Configured local DNS resolution
The beauty of this setup is that cert-manager will automatically handle certificate renewals, so you won’t need to worry about certificates expiring. Any new ingress resources you create with the cert-manager.io/cluster-issuer: letsencrypt-r53 annotation will automatically get TLS certificates issued.
This has been a guide for configuring TLS certificates with letsencrypt and R53 for local k8s services. I hope this has been useful.