Deploying VyOS on VMware vSphere
VyOS is a powerful and flexible network appliance which can be used for a variety of things. In this case we deploy it on VMware vSphere in preparation for extending on-premises VLANs to NC2 on AWS (layer-2 extension) in a later blog post.
What is VyOS?
VyOS is a powerful, open-source network operating system built on GNU/Linux, designed to unify diverse network functions under a single, user-friendly configuration interface. It delivers a reliable, zero-lock-in networking solution that provides unmatched transparency and flexibility. Please refer to the official tech datasheet here: https://vyos.io/files/vyos-datasheet-v5.pdf
Downloading the image
For the free (but unsupported) build, navigate to https://vyos.io/ and select Rolling Release. Alternatively sign up for a paid plan to get a supported version. Download the version you want. In this case we used the “2025.03.12-1116-rolling” version.
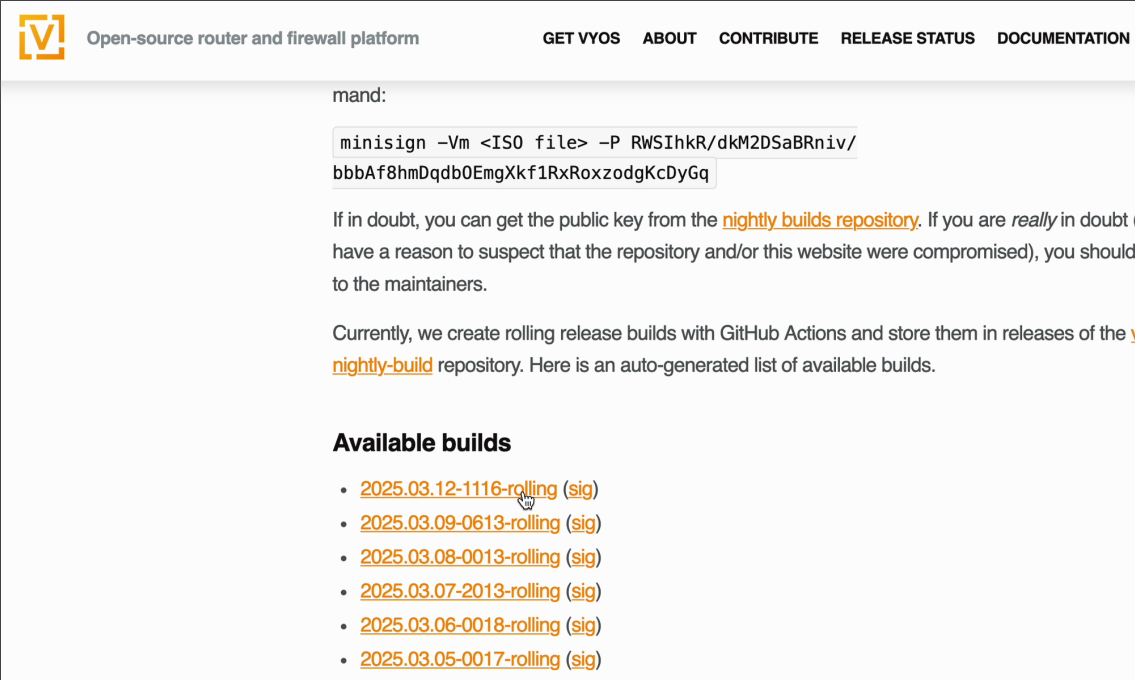
You’ll end up with an ISO file from which the VM can be installed. Upload the ISO to your VMware environment. We put ours in one of the datastores.
Create a new VM and install VyOS
Create a new VM through vCenter. We selected 4 vCPUs, 8Gb of memory and 40Gb of storage for our VM. Give the VM one NIC in the underlay network (the network which has IP reachability to the NC2 cluster) and one NIC in the network / VLAN you wish to extend. Mount the ISO file, check the box to ensure the VM will boot from it and click Create.

As the VM powers up you’ll be presented with the login screen. The following credentials will log you in:
- Username: vyos
- Password: vyos
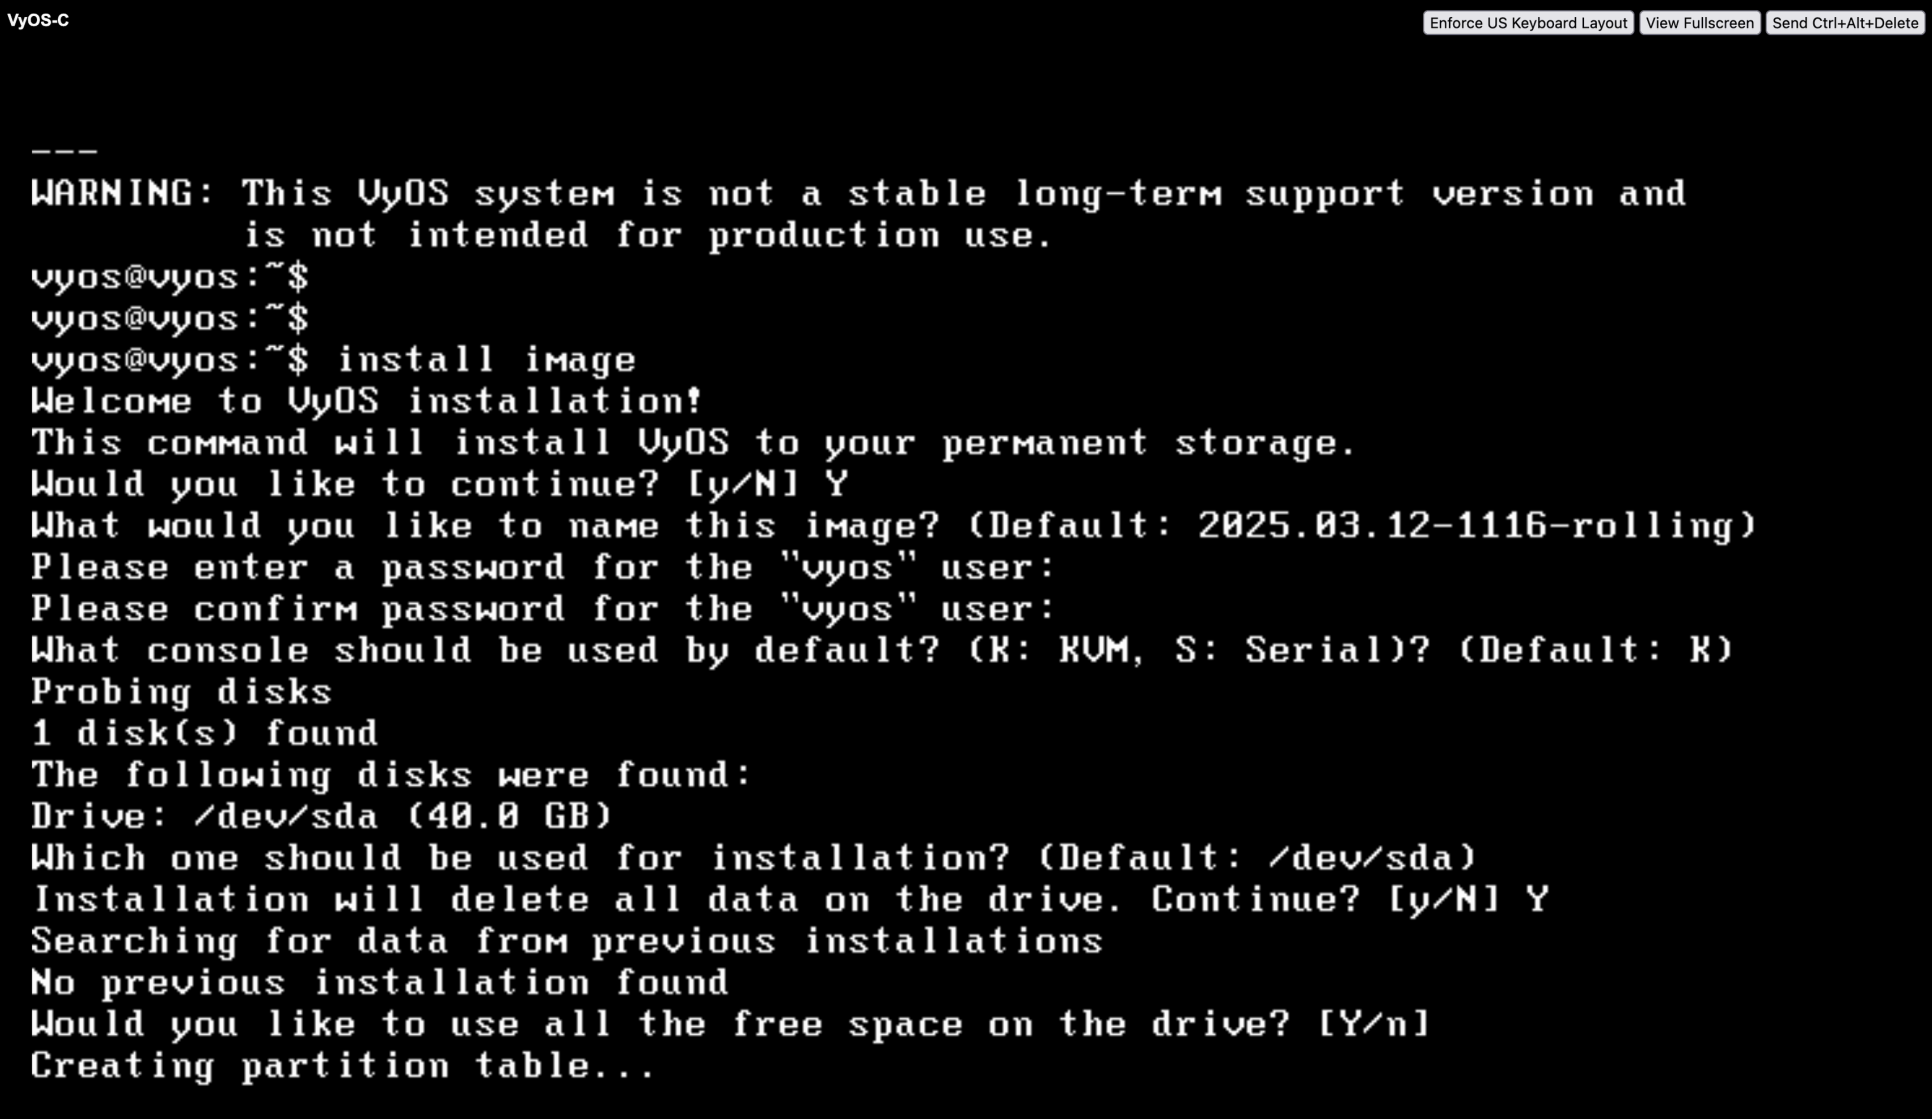
After logging in it is possible to run the system as a Live image, but the system reset at boot time is probably not what you want. As such we proceed with installing the system to disk using:
1
install image
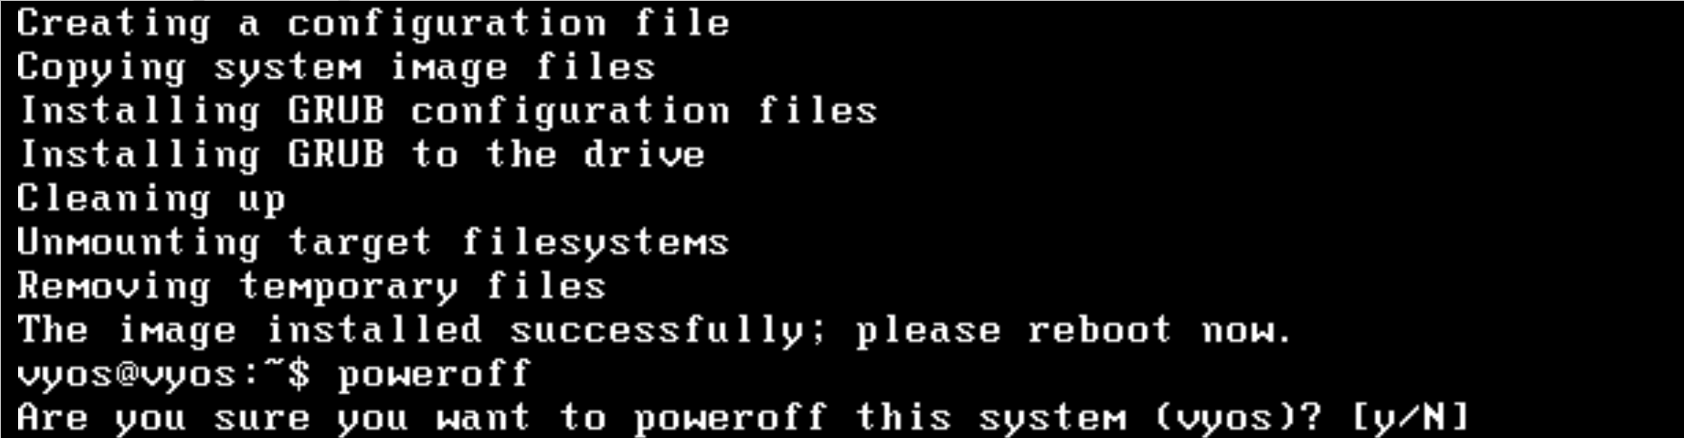
After the installation has completed, power off the virtual appliance rather than rebooting. Once the VM has powered down, remove the ISO from the CD-ROM and boot the VM up again.
Configuring SSH access
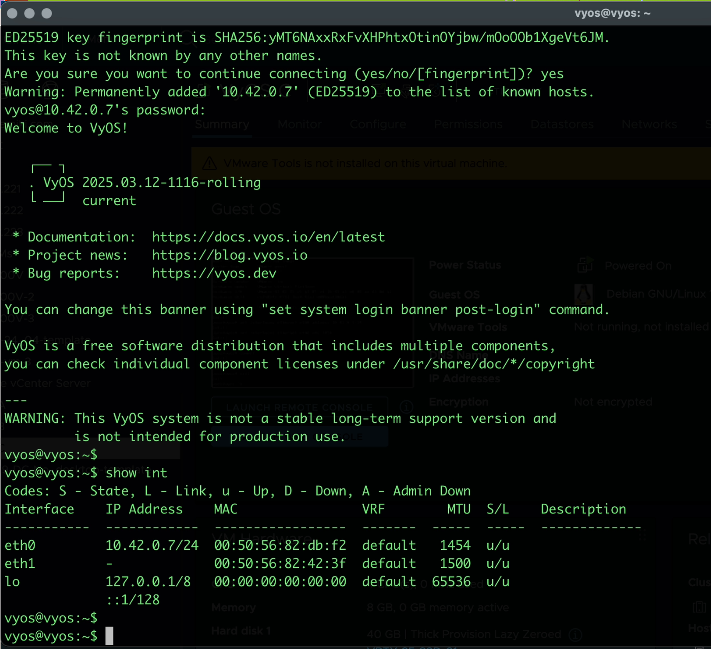
Since it is a lot easier to change settings over SSH compared to using the VM console, once the VM has powered up again it is possible to assign an IP addres and enable SSH.
1
2
3
4
5
conf
set interfaces ethernet eth0 address 10.42.0.7/24
set service ssh
commit
save
Configuring the default route and DNS for the VyOS appliance
1
2
3
4
[edit]
vyos@vyos# set protocols static route 0.0.0.0/0 next-hop 10.42.0.1
[edit]
vyos@vyos# set system name-server 192.168.0.10
Once that’s done we can use SSH for access instead
Conclusion
This concludes the download, installation and initial configuration of VyOS on VMware vSphere. The next post will cover the steps for configuring Layer 2 extension of on-premises VLANs to Nutanix Cloud Clusters on AWS for seamless migration of VMs from on-prem to the cloud.