VMware Cloud on AWS is configured to be highly secure from the get-go. However, there are additional add-on services both on the VMware Cloud on AWS side and the AWS native service side which can be of benefit for those looking to add additional layers of security to their cloud environments. This guide aims to provide an overview of those services as well as list links for further reading
Overview
Maintaining tight access control for workloads and ensuring they are on the latest patch revisions is central to running an efficient and secure IT environment. In this post we cover how to heighten security by leveraging the tools which comes with AWS Systems Manager and complementing AWS native services. This way IT administrators will be empowered with tools central to their quest of reaching higher security levels while simultaneously being able to reduce management overhead.
Defining good security practices
While security in both on-premises and cloud environments is a broad topic, there are a few security practices which generally makes good sense to implement regardless of where workloads reside. In this section we will cover a few points to define good security practices and in the latter half we will look at what tools can be leveraged to implement this in practice.
Restricting access
Adhering to the principle of least privilege by assigning access to workloads only to those who actually need to administer those workloads. It is easy to assign a single or a few administrative accounts with blanket access across all virtual machines in a VMware environment but it’s certainly not best practice. We will look at tools to help divide and limit access as required in this document.
Tracking access
After limiting access to those who require it for their respective roles it also makes sense to track who has accessed what virtual machine at what time and to centralize the logging of workload access. This makes it easier to back track in case of either a security breach or purely for troubleshooting purposes.
Limiting the attack surface
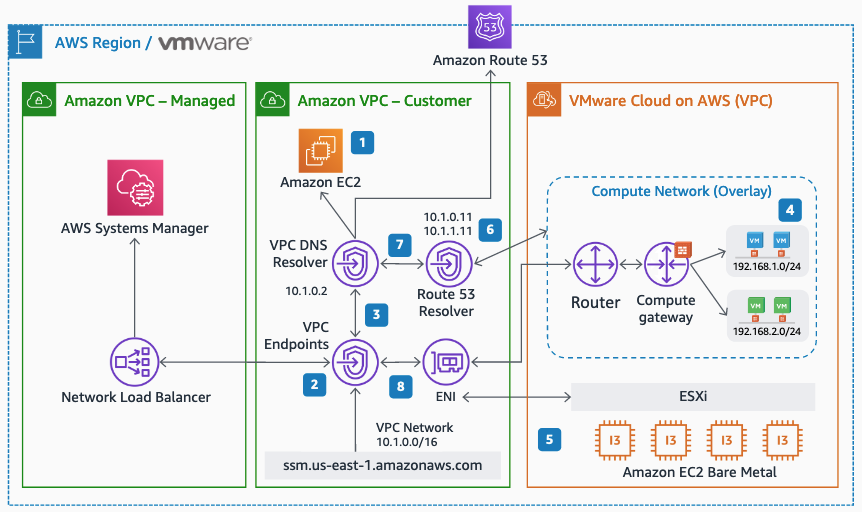
Virtual machines are generally accessed by administrators over RDP for Windows or SSH for Linux. These protocols are frequently the first ones that hackers will try to exploit. Normally closing these access ports would make managing the workloads remotely a challenge, if not impossible but when using AWS native services in conjunction with VMware Cloud on AWS the methods and options for secure remote systems management increase. For this we leverage AWS Systems Manager in combination with VMware Cloud on AWS.
Having insight into what software is installed where
While keeping operating systems patched and up to date help safeguard against known Common Vulnerabilities and Exposures (CVEs), old or non-approved software can also provide attackers with additional vectors through which to gain access to otherwise protected systems. Gaining clear insight into what is installed and what versions are running in an environment is usually a priority for the security minded IT administrator. Here AWS Systems Manager can be a powerful ally as it integrates well with the virtual machines running on top of VMware Cloud on AWS.
Addressing CVEs quickly
New bugs are found frequently and as they are made public they usually end up in the CVE database. Patching these security holes is of course vital in maintaining a secure environment. Likewise is scanning for attempts to exploit these vulnerabilities with an IDS / IPS system. VMware Cloud on AWS add-ons can be leveraged to assist with this.
Alerting when something happens
Hackers will often spend a significant time in a compromised environment while they investigate ways to broaden their attack by mapping out the network and additional systems to target. These days, assuming that an attack will succeed at some point is common. Instead of just hardening the external-facing systems the internal systems should get a similar treatment. Equally important is to get alerted at an early stage to limit any potential blast radius after a system has been compromised.
Centralized logging
The first indication that intrusion attempts are being made can often be found in the log files of the systems being accessed. Having single source of truth into which all logs and access attempts are sent is vital when it comes to maintaining a birds-eye-view of an environment. It also makes it a lot easier if data doesn’t have to be correlated across multiple locations and tools.
Ensuring firewalls are configured correctly and notify / revert if this changes
A properly configured firewall can make the difference between a secure system and one which can easily be hacked. The old “hard shell – soft core” approach is no longer relevant in today’s environments when everything is connected and therefore potentially an access vector for an aggressor. Keeping standards for firewall configurations and ensuring they are properly applied on an ongoing basis is a great help in making sure that internal as well as external systems are properly protected against attack.
Get notified and react quickly if a hackers gain a foothold in your environment (IDS / IPS)
It’s not a question of “if” but “when” an attack succeeds. Once an assailant has gained a foothold they are inside your environment. The next step is to scan and map out other vulnerable systems in the vicinity. Quick reaction times can limit or even prevent any further intrusion.
Guard against ransomware by having immutable backups of important data and virtual machines
Hoping for the best and planning for the worst case scenarios involve having backups and a Disaster Recovery (DR) plan for when data has become corrupted and / or encrypted by ransomware. Read more about VMware Cloud on AWS add-ons for DR and how AWS native tools can provide immutable backups of all virtual machines and their data later in this blog post.
Using VMware Cloud on AWS add-ons and AWS native services to enhance security
The above may be good points for enhancing security, but how can they be implemented in a VMware Cloud on AWS environment? The following three sections show how to do so in more practical detail:
- Leveraging AWS Systems Manager (SSM)
- Leveraging VMware Cloud on AWS add-ons
- Leveraging additional AWS native services
1. Leveraging AWS Systems Manager
AWS Systems Manager involves several services which in combination provide powerful management capabilities.
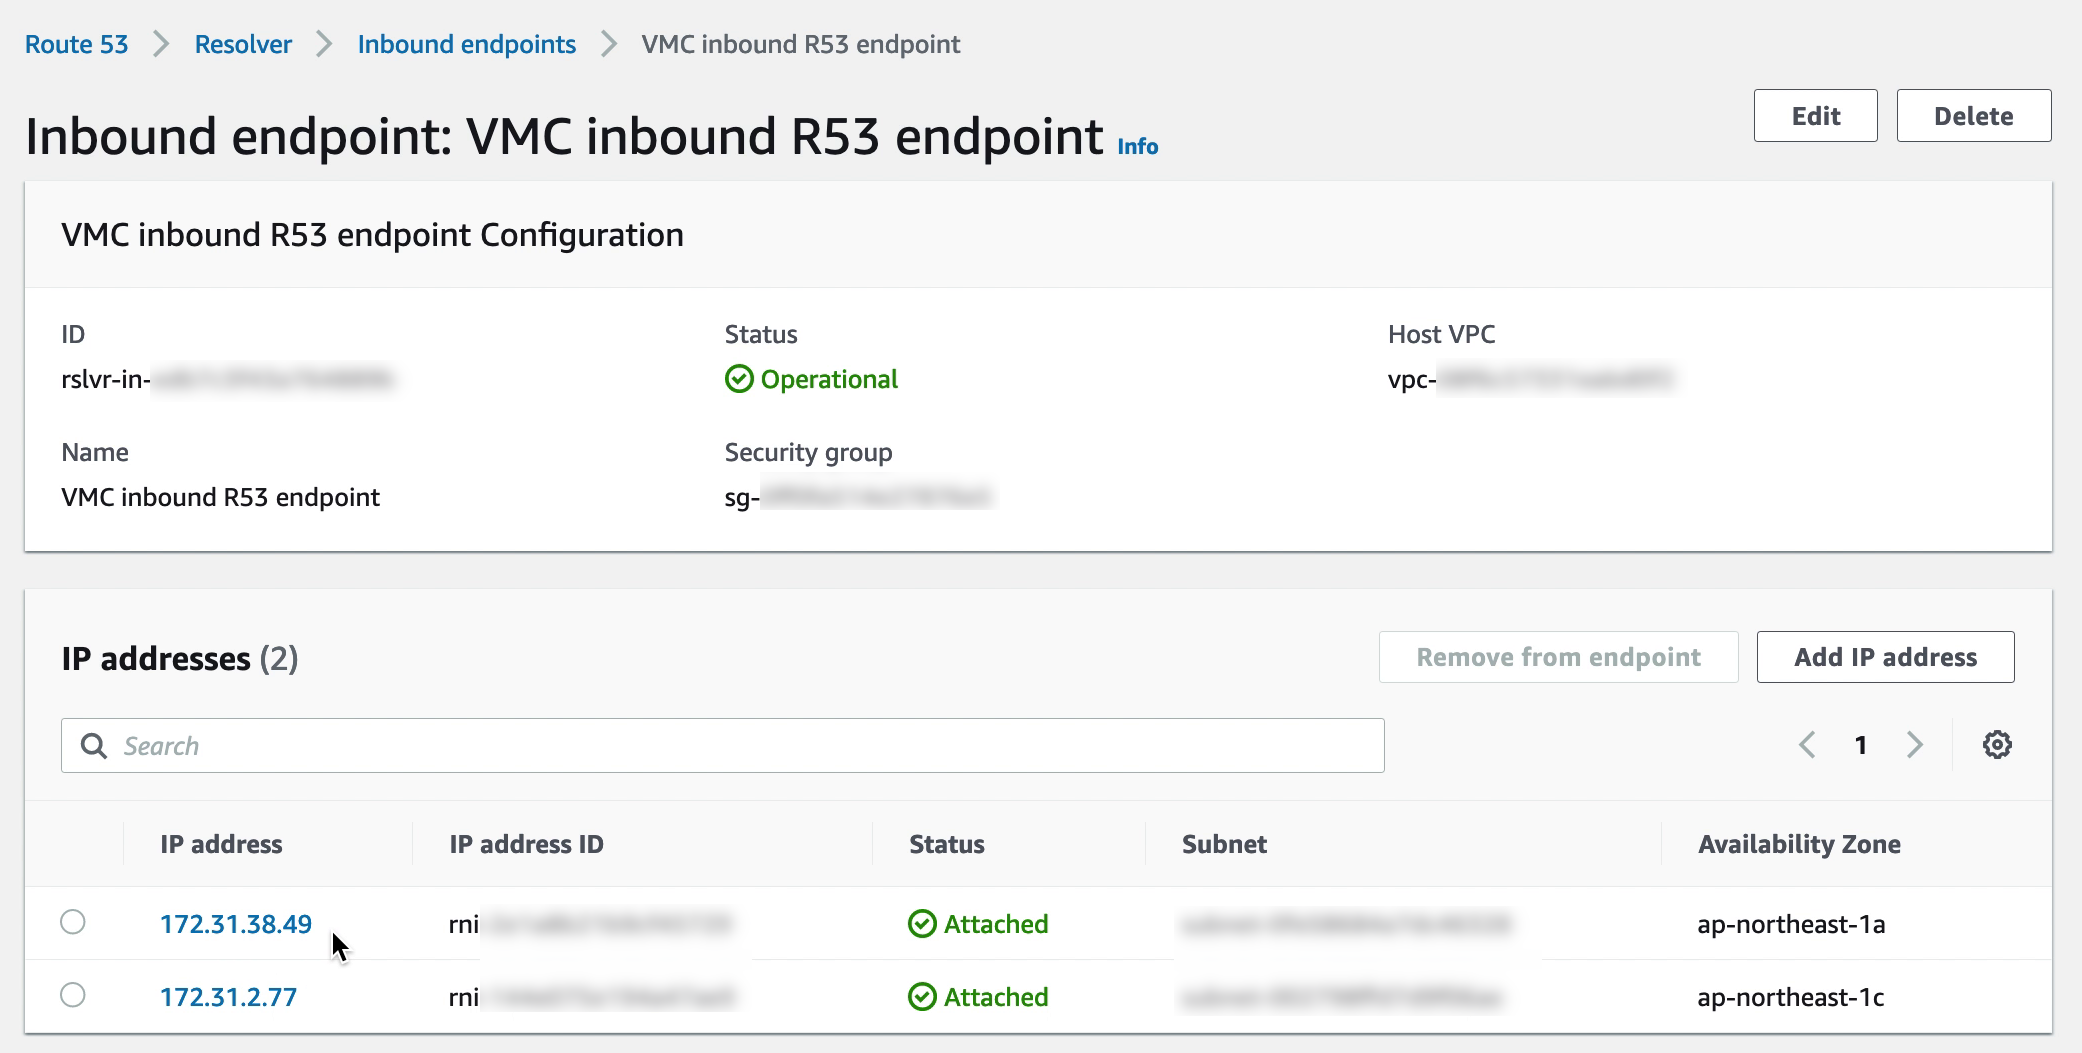
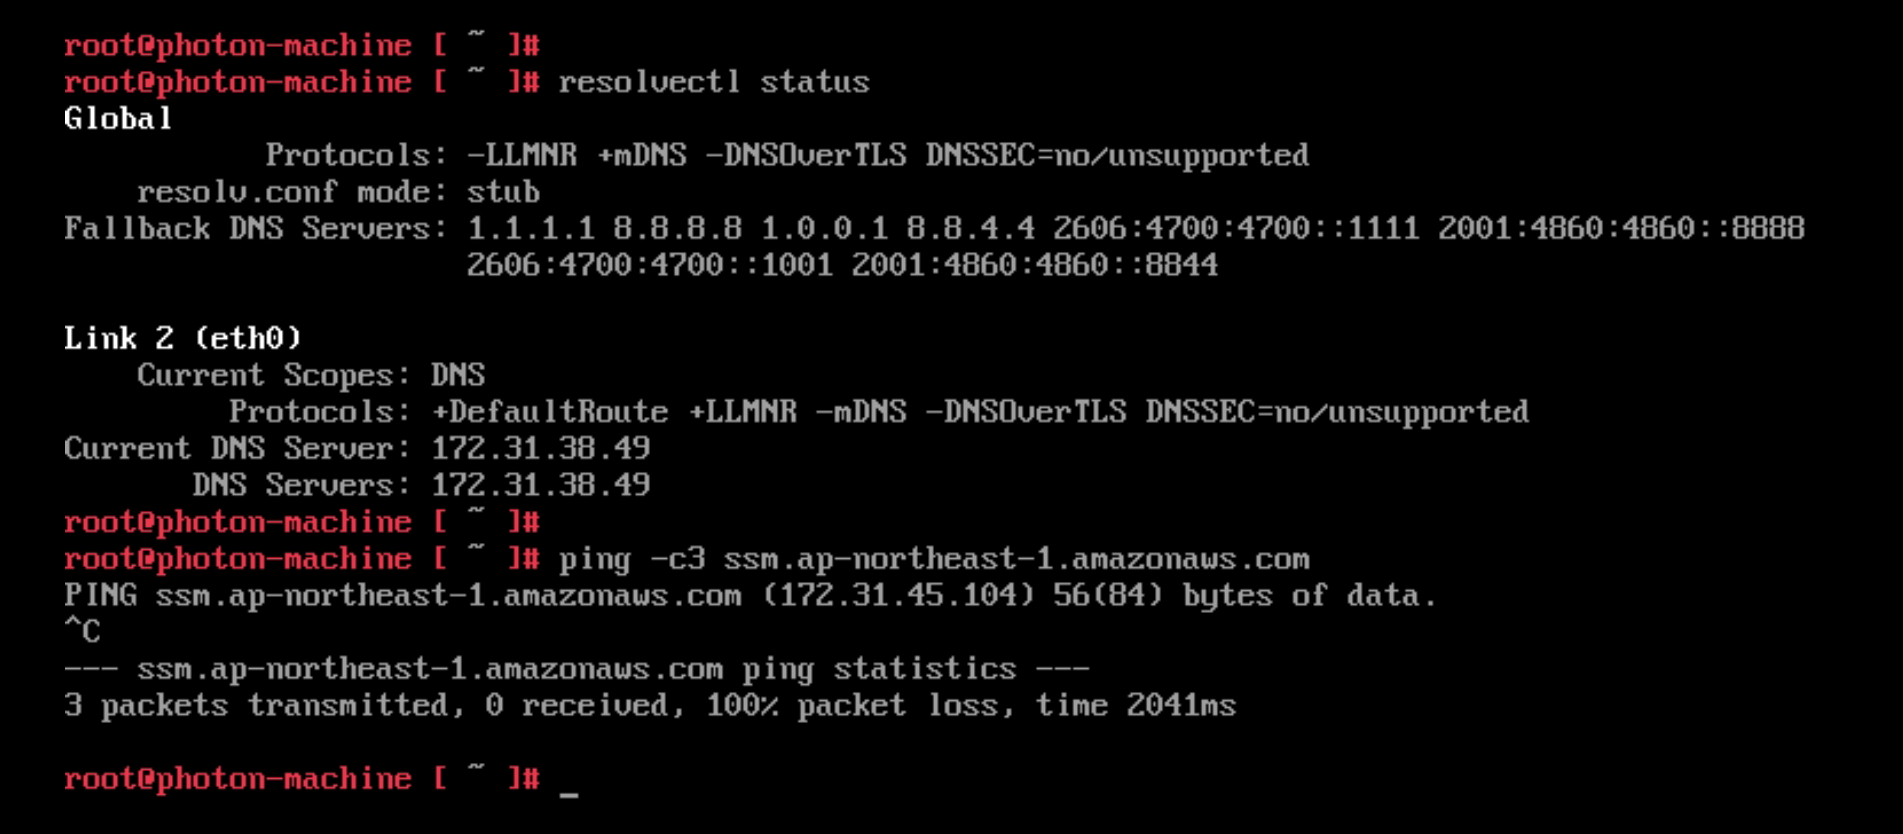
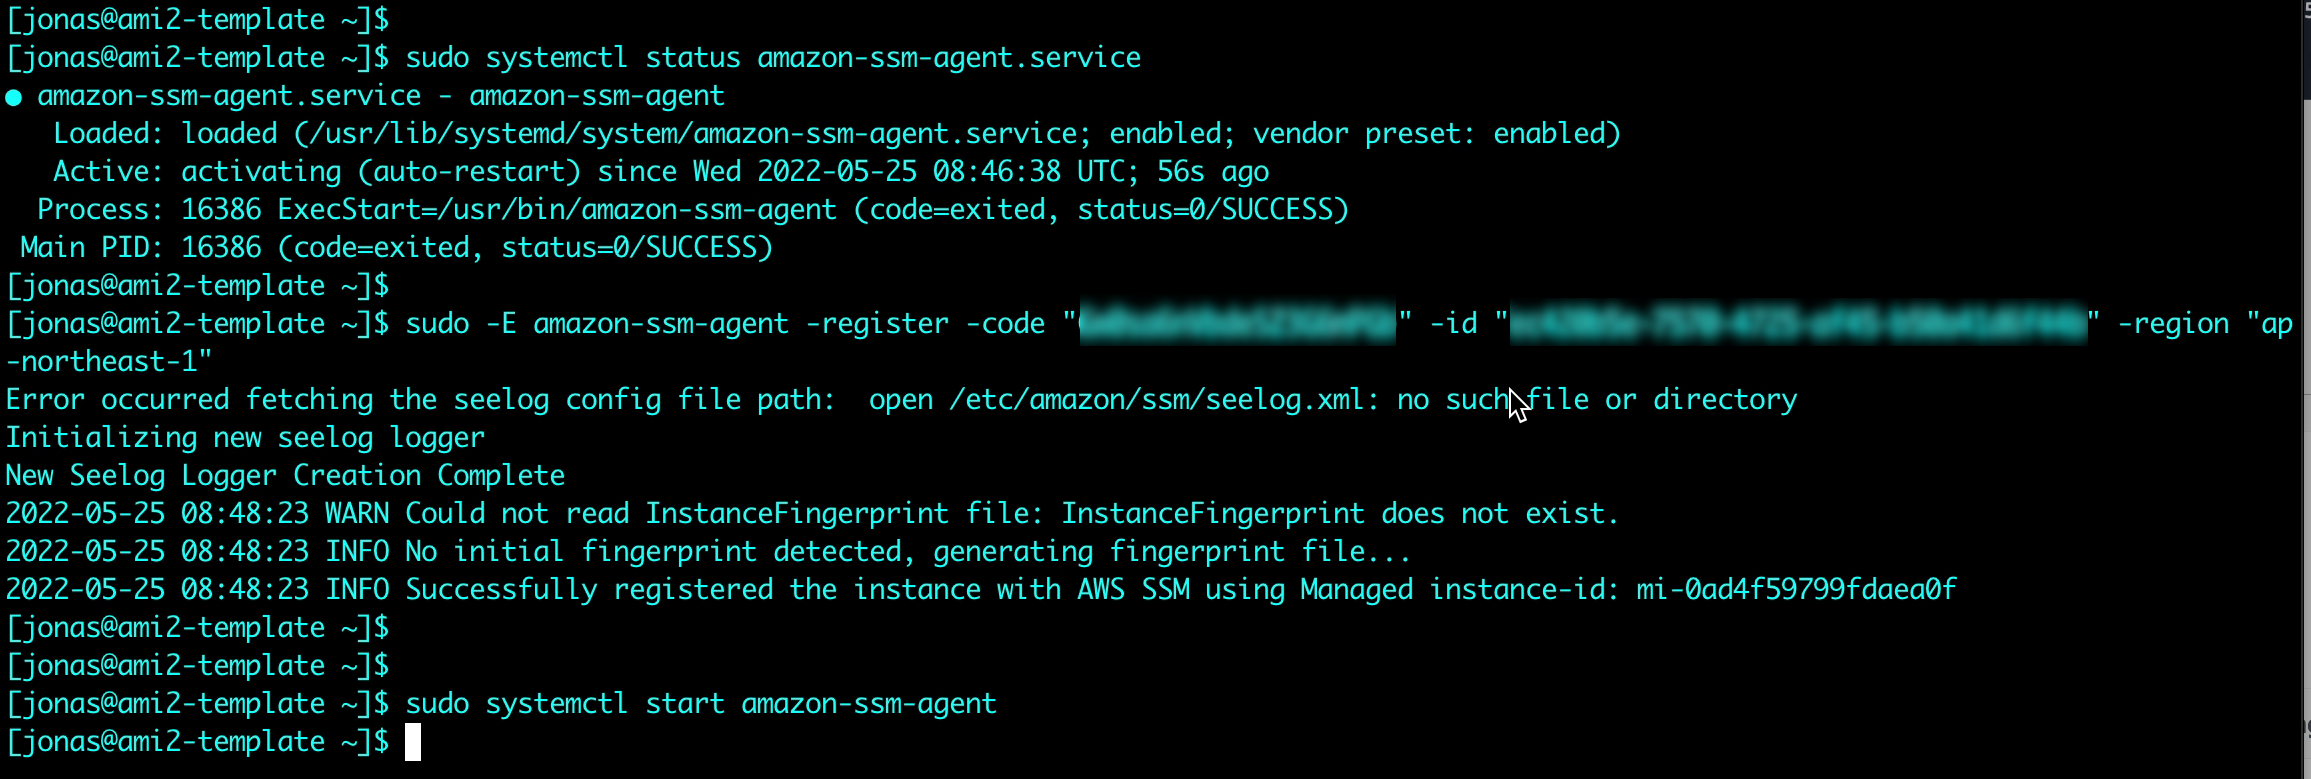
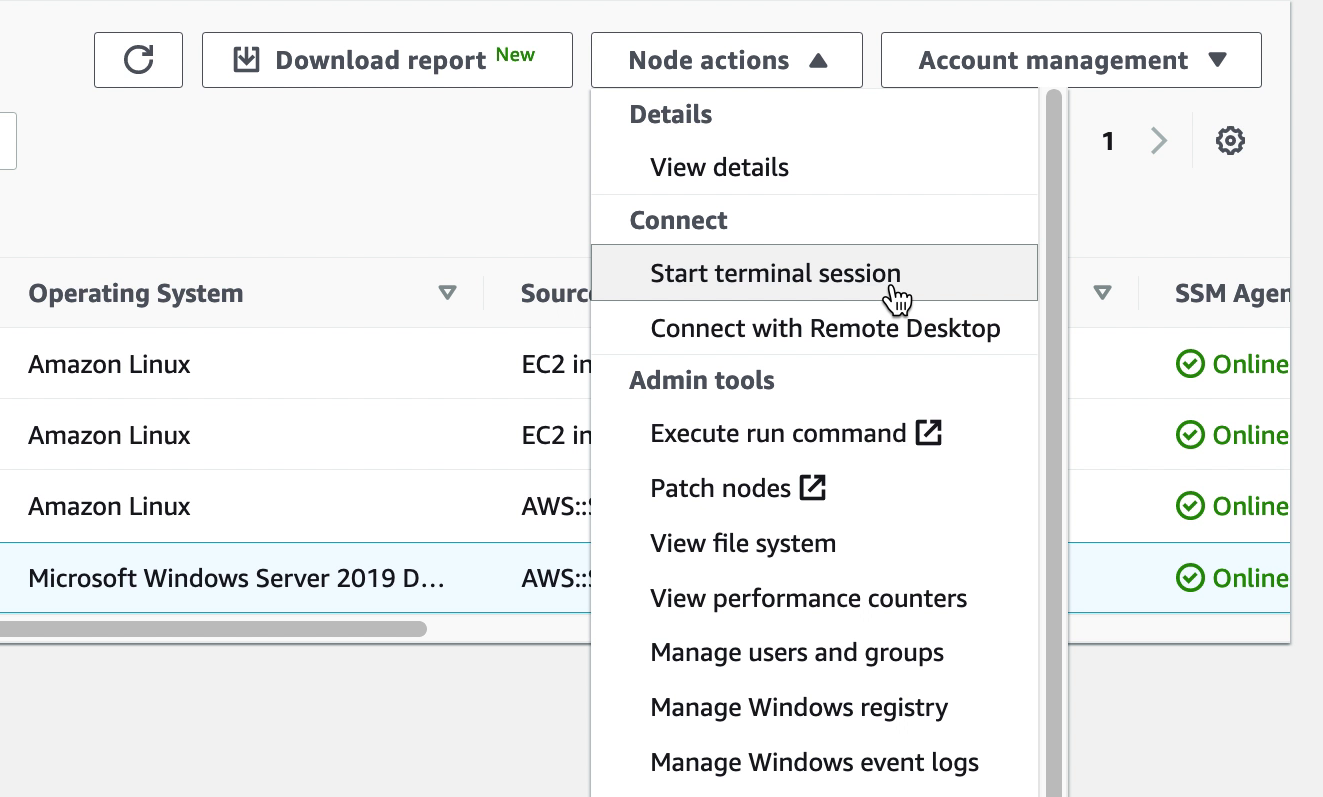
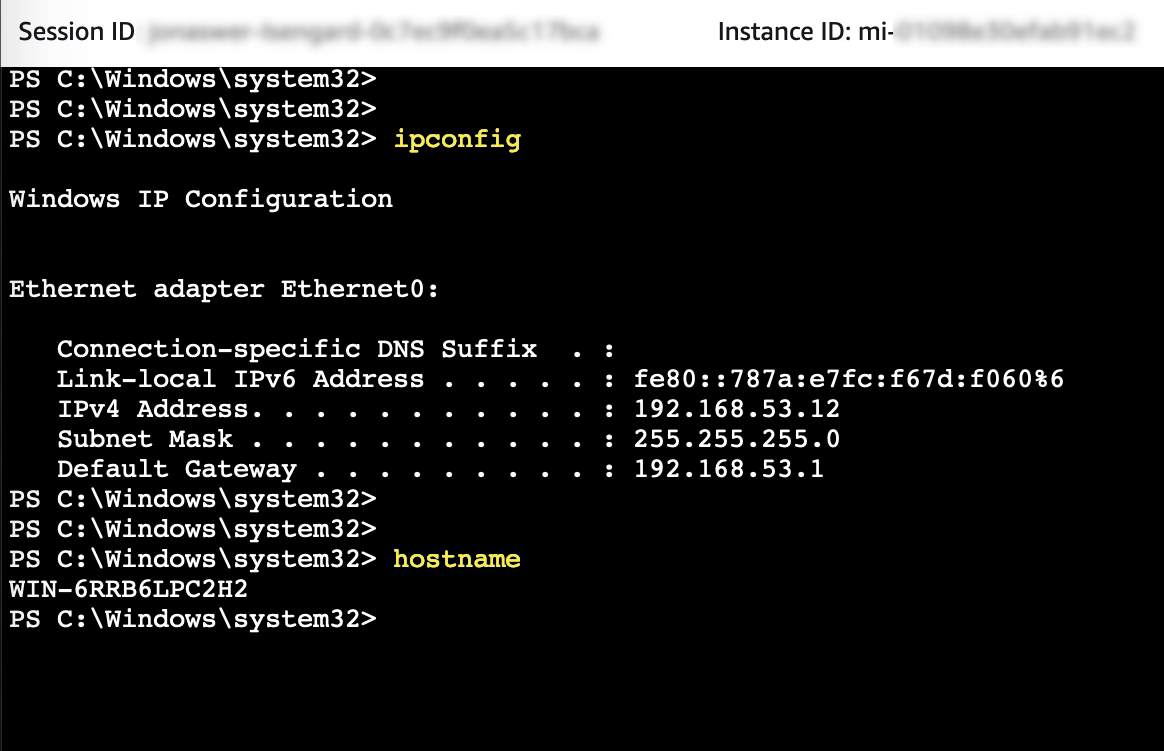
For Restricting access and Limiting the attack surface it is possible to use AWS SSM Session Manager for remote access rather than connecting to virtual machines over RDP or SSH. Thereby commonly used ports such as 3389 (RDP) and 22 (SSH) can be closed and will therefore significantly reduce the attack surface of the virtual machines.
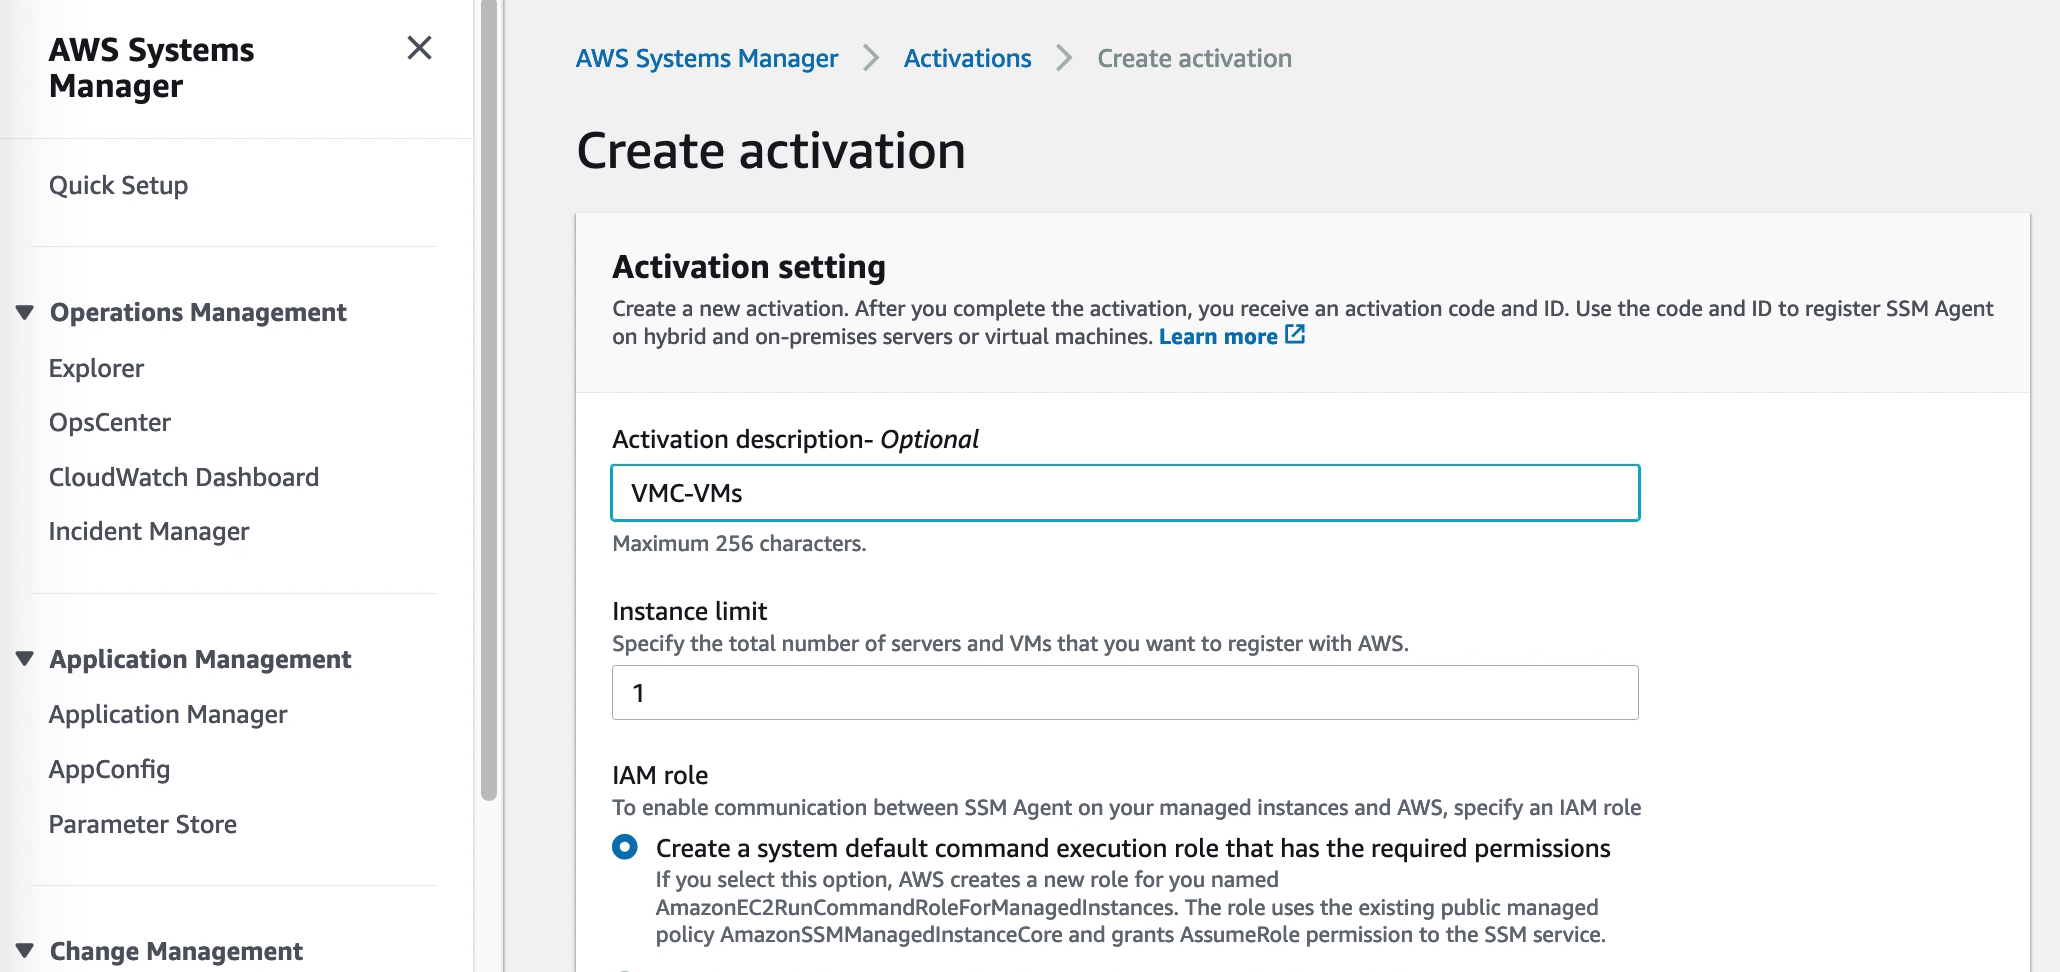
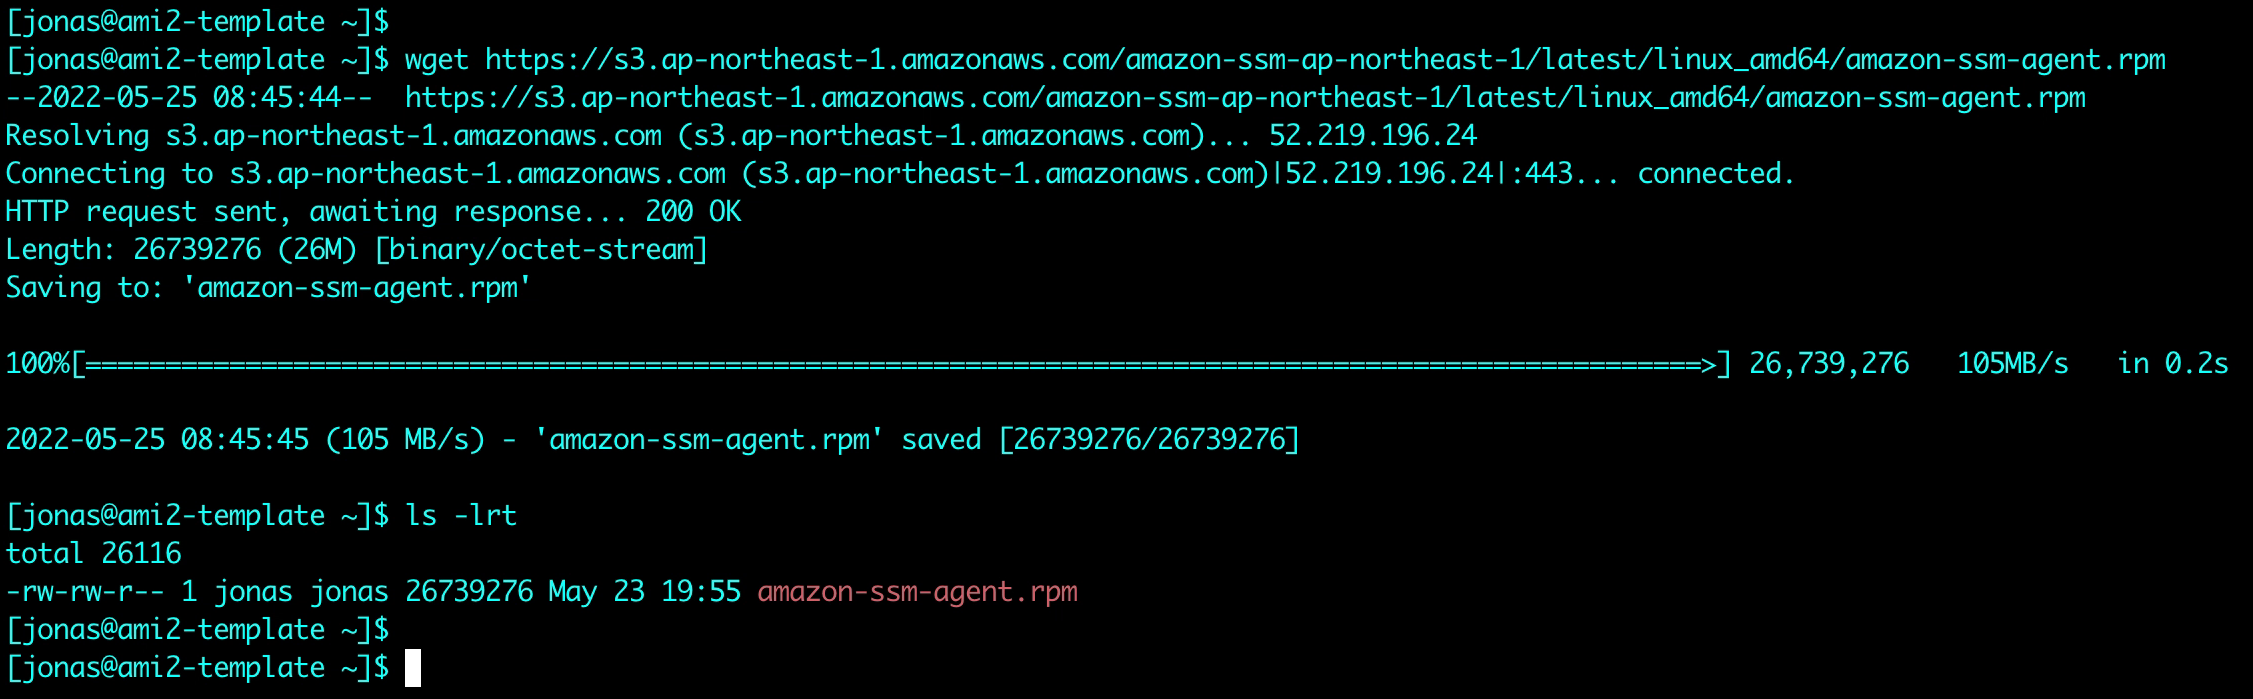
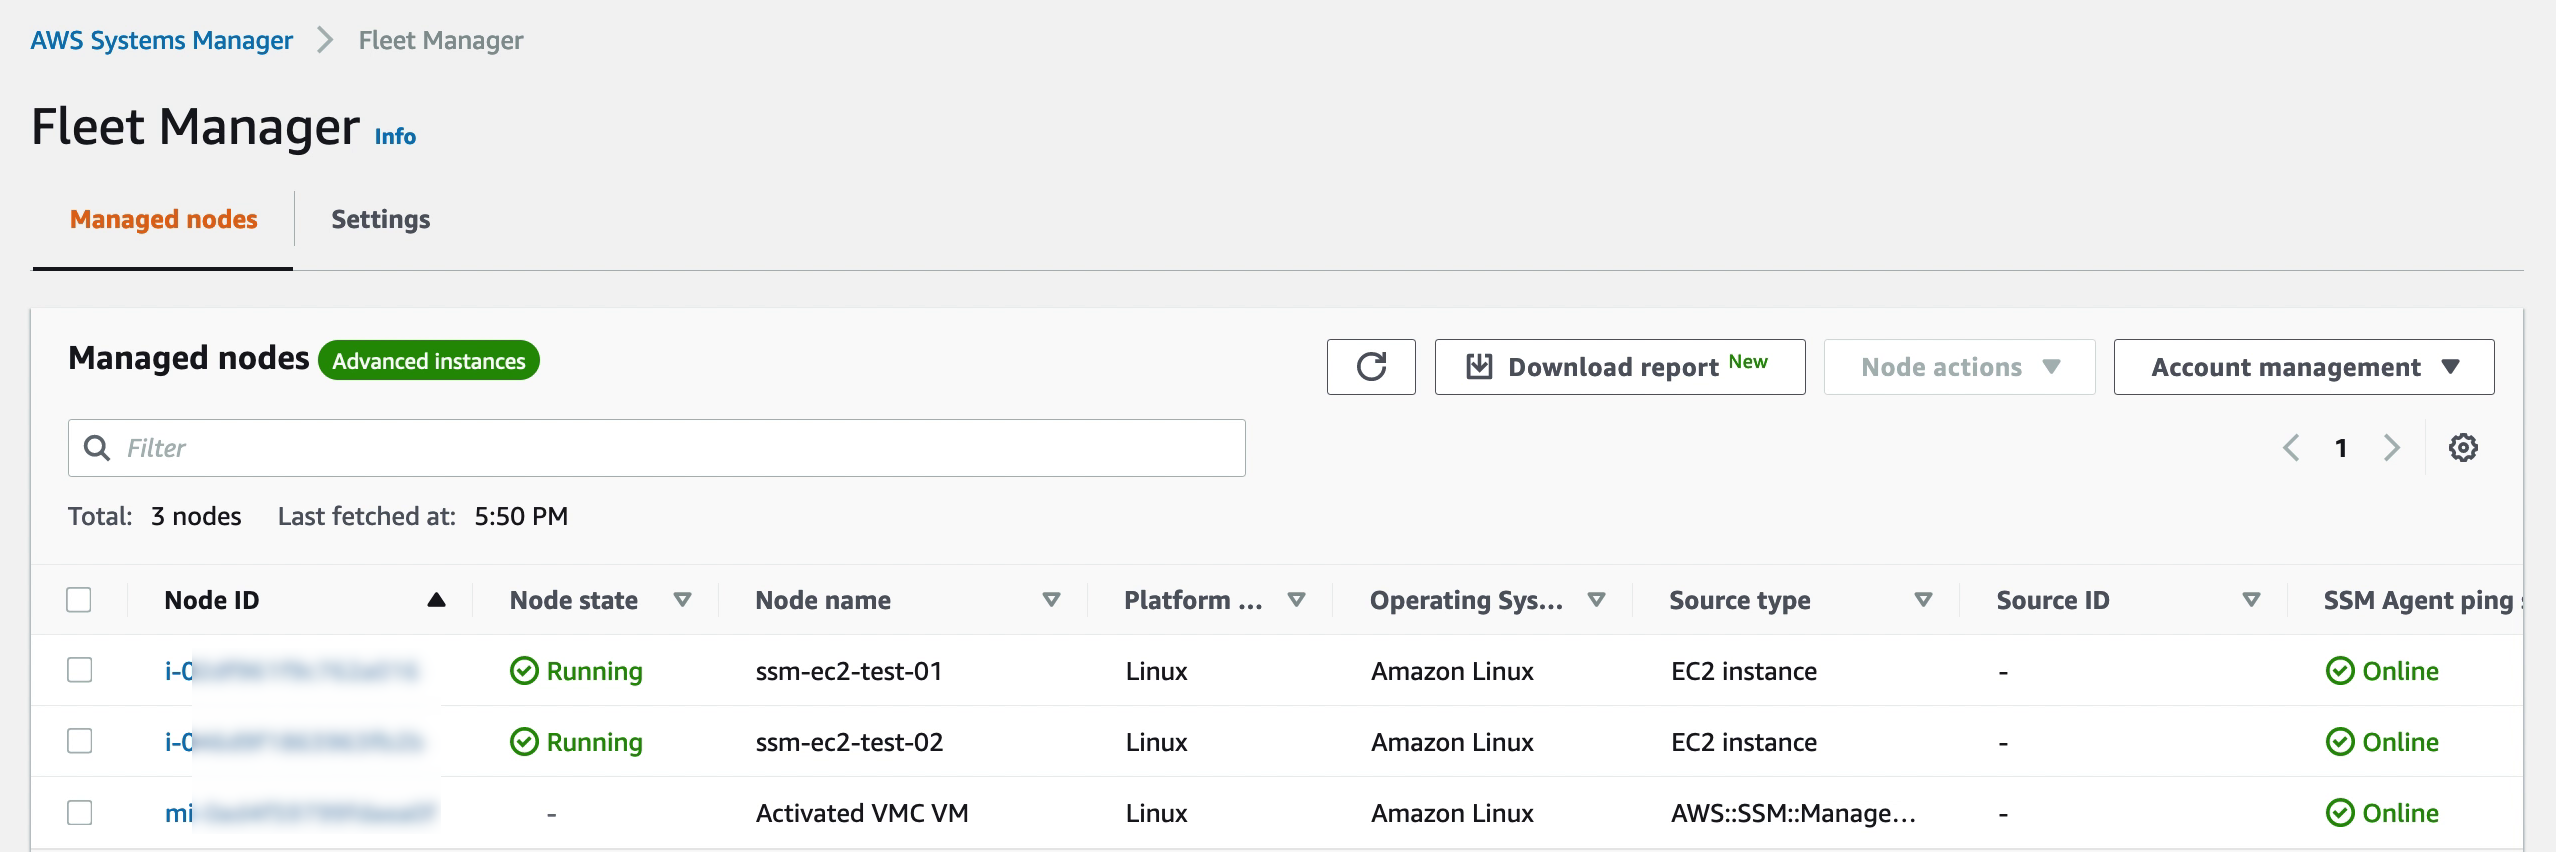
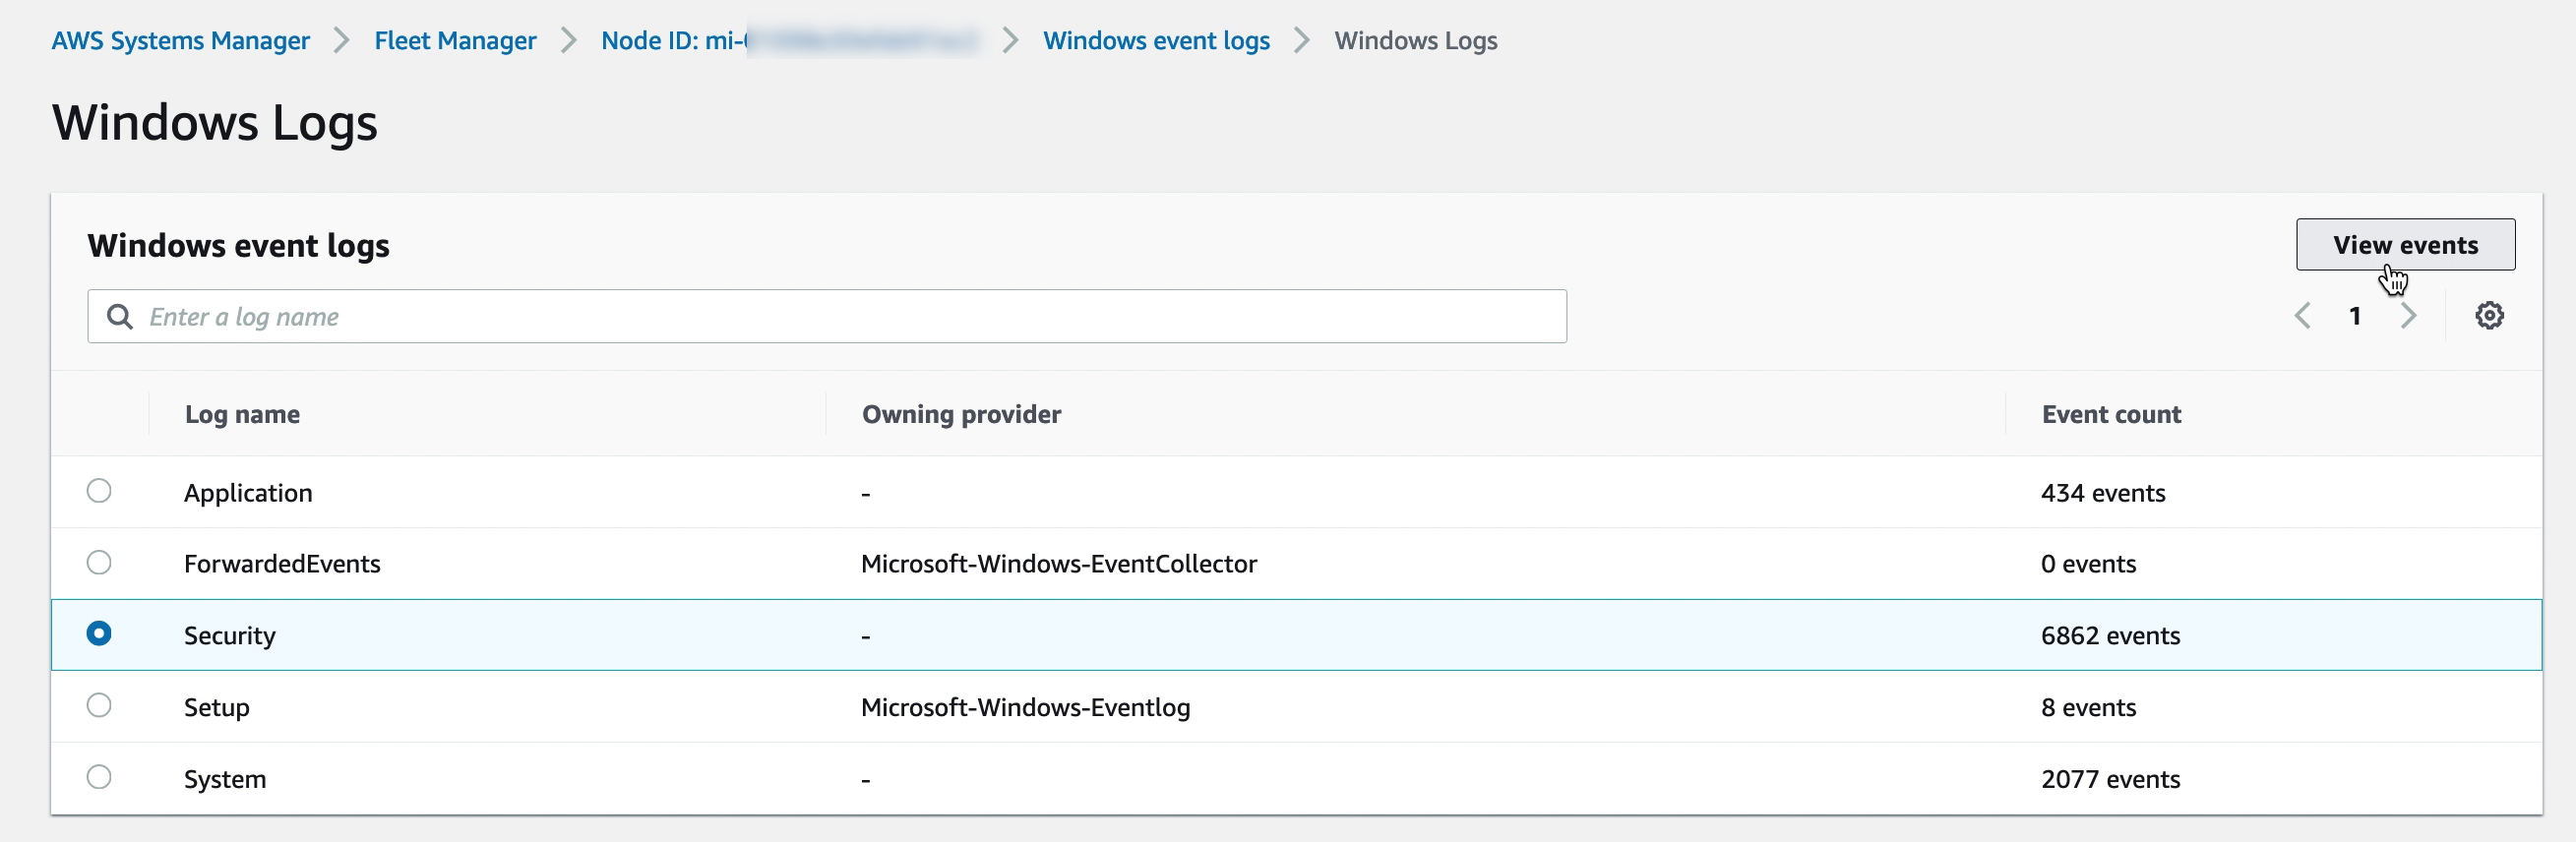
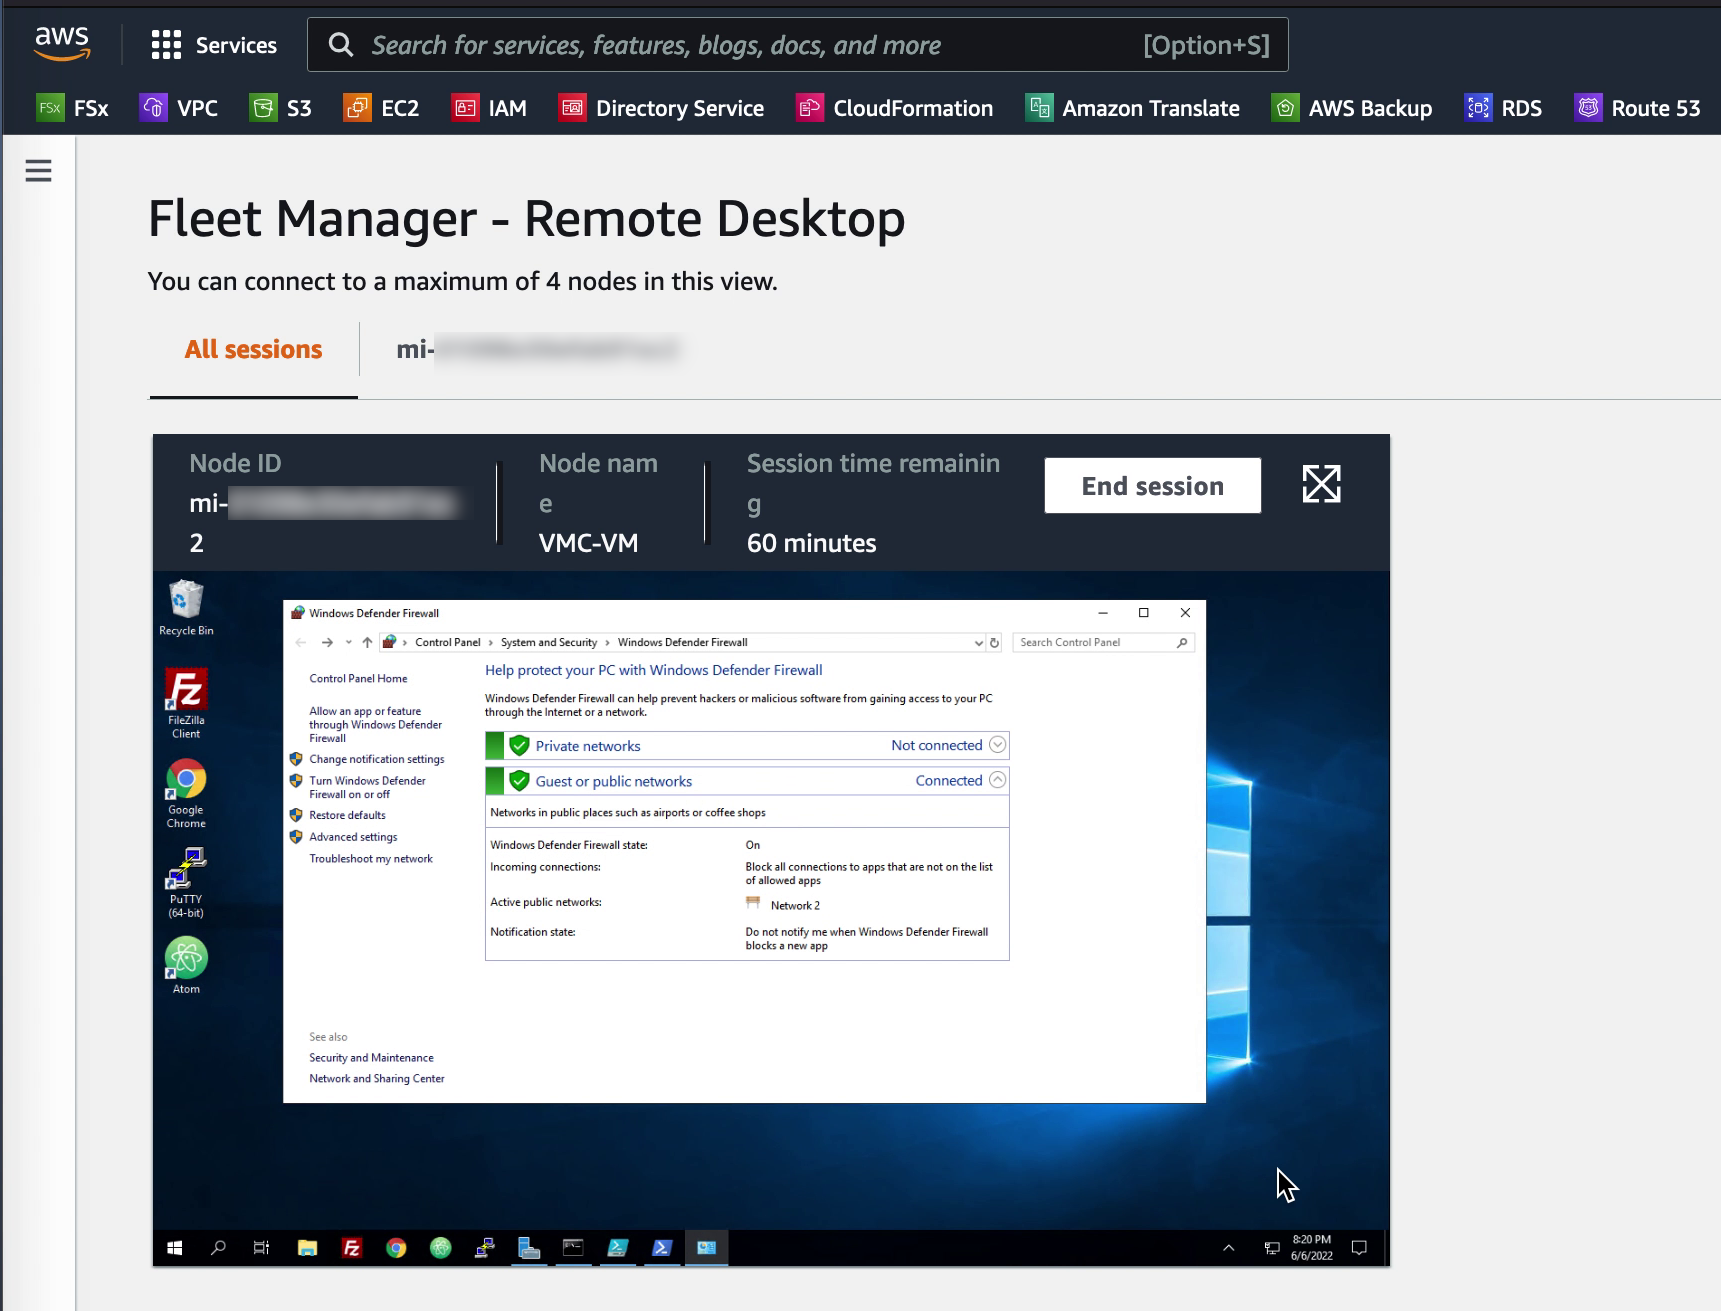
Additionally, in many cases it is possible to avoid accessing virtual machines directly. AWS SSM Fleet Manager provides a convenient way of connecting to virtual machines by offering access to Windows registry, Windows logs, Windows file system as well as command line access to Windows PowerShell – all through the AWS Console. Graphical desktop access is of course also possible and can be done by forwarding the RDP port of the virtual machine to the local IT admins computer. For Linux machines the access can be had in the same way and a connection to the Linux shell prompt is readily available through the AWS Console.
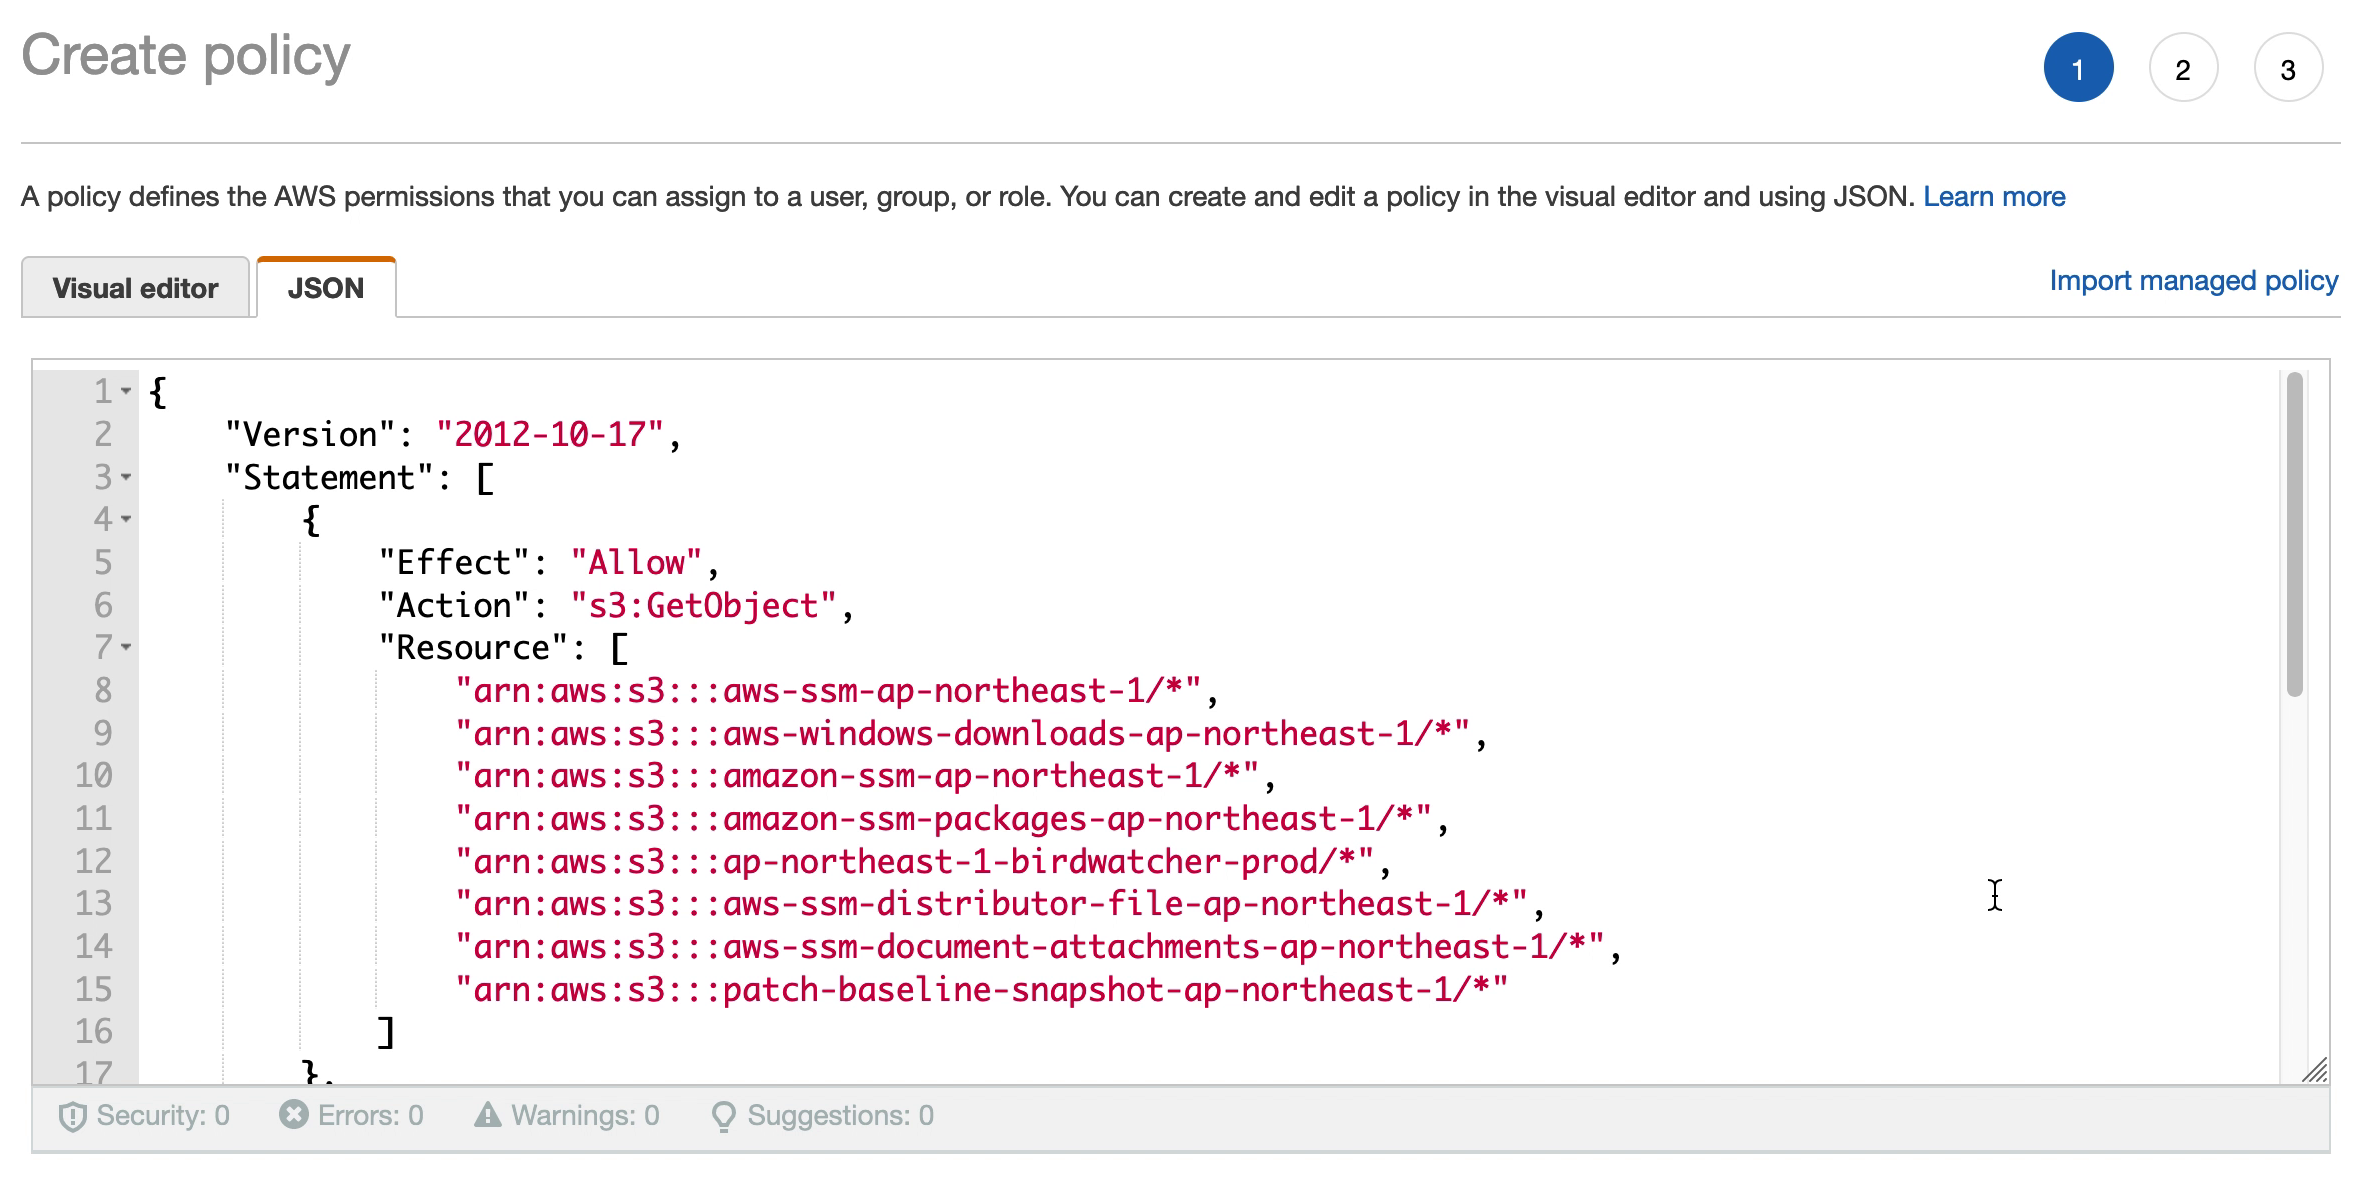
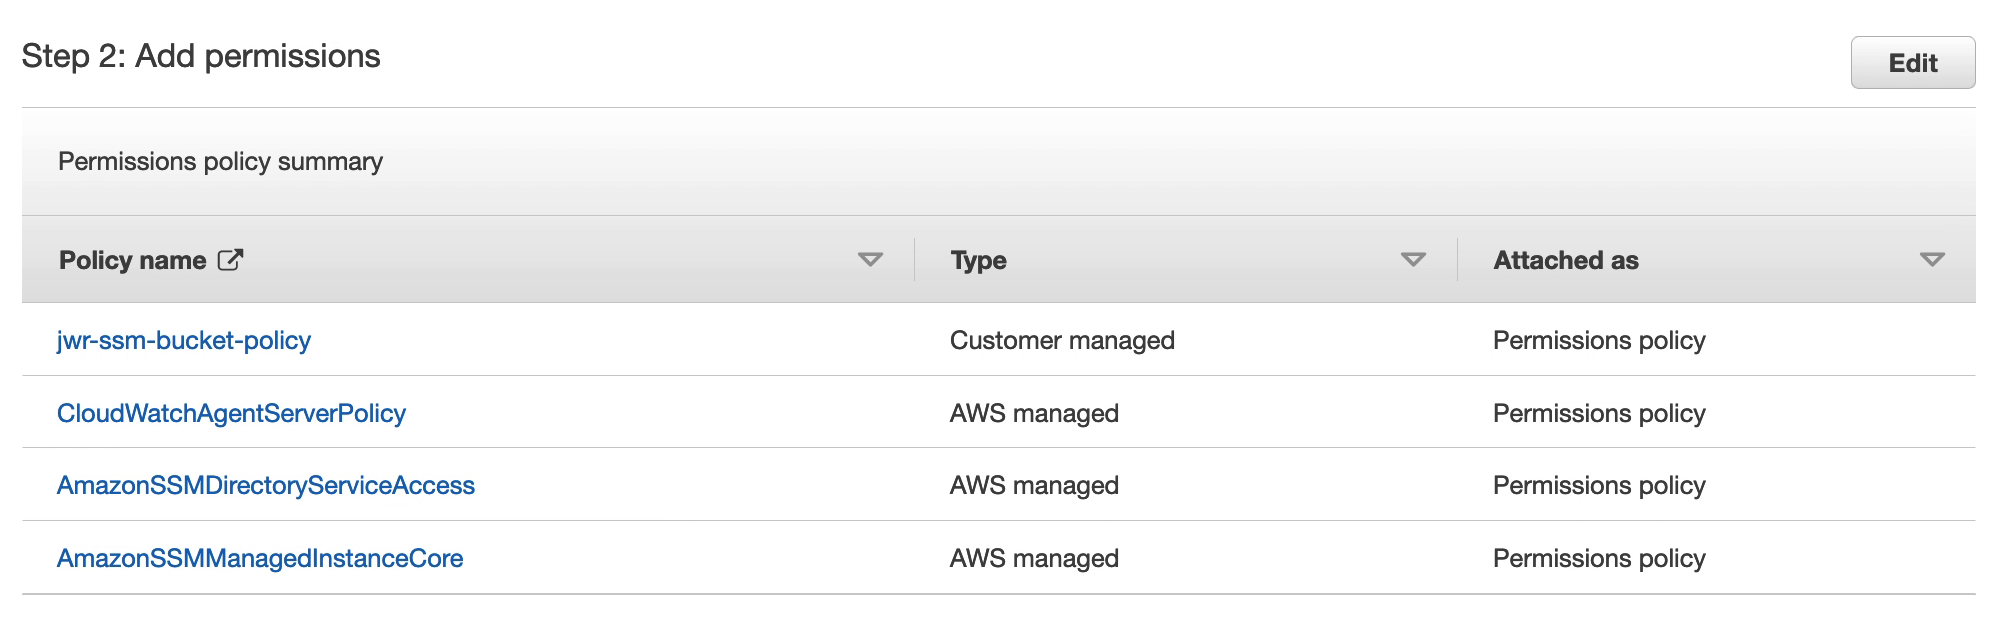
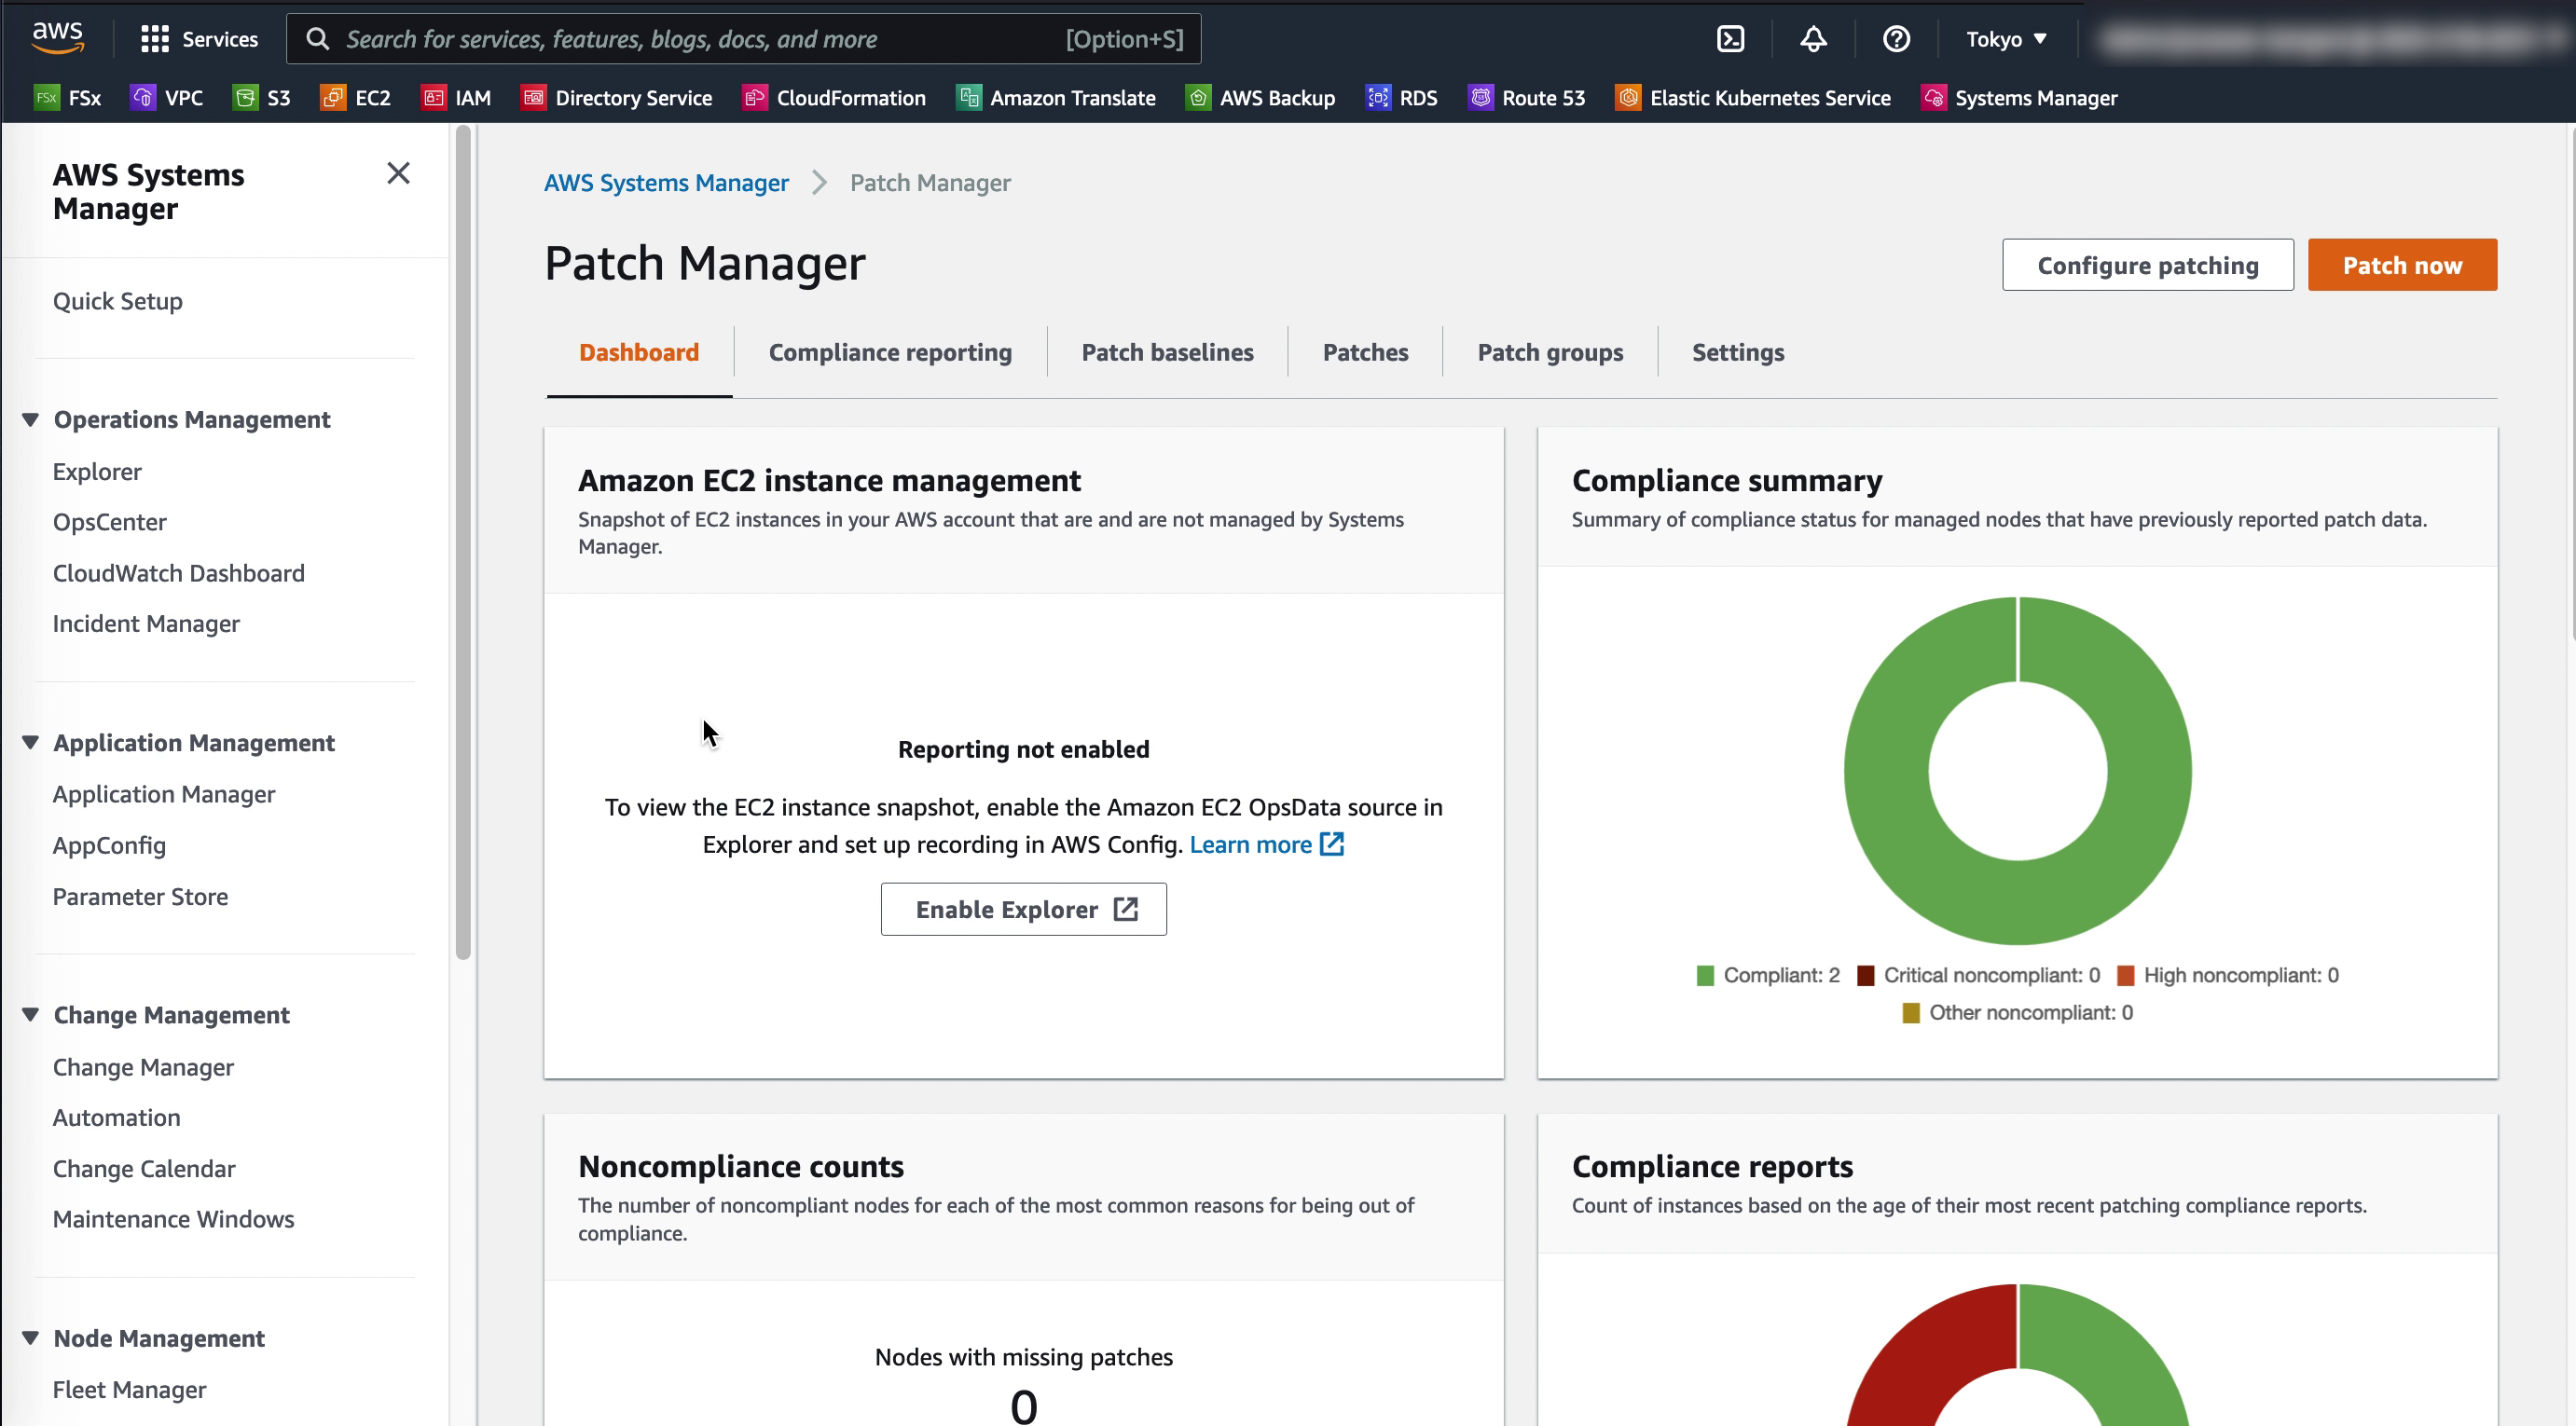
For Addressing CVEs quickly AWS Systems Manager offers Patch Manager – a centralized way to ensure VMware Cloud on AWS virtual machines and EC2 instances have their latest security patches applied. Create patch baselines, set maintenance windows and tag virtual machines into groups to ensure continuous uptime while patching takes place.
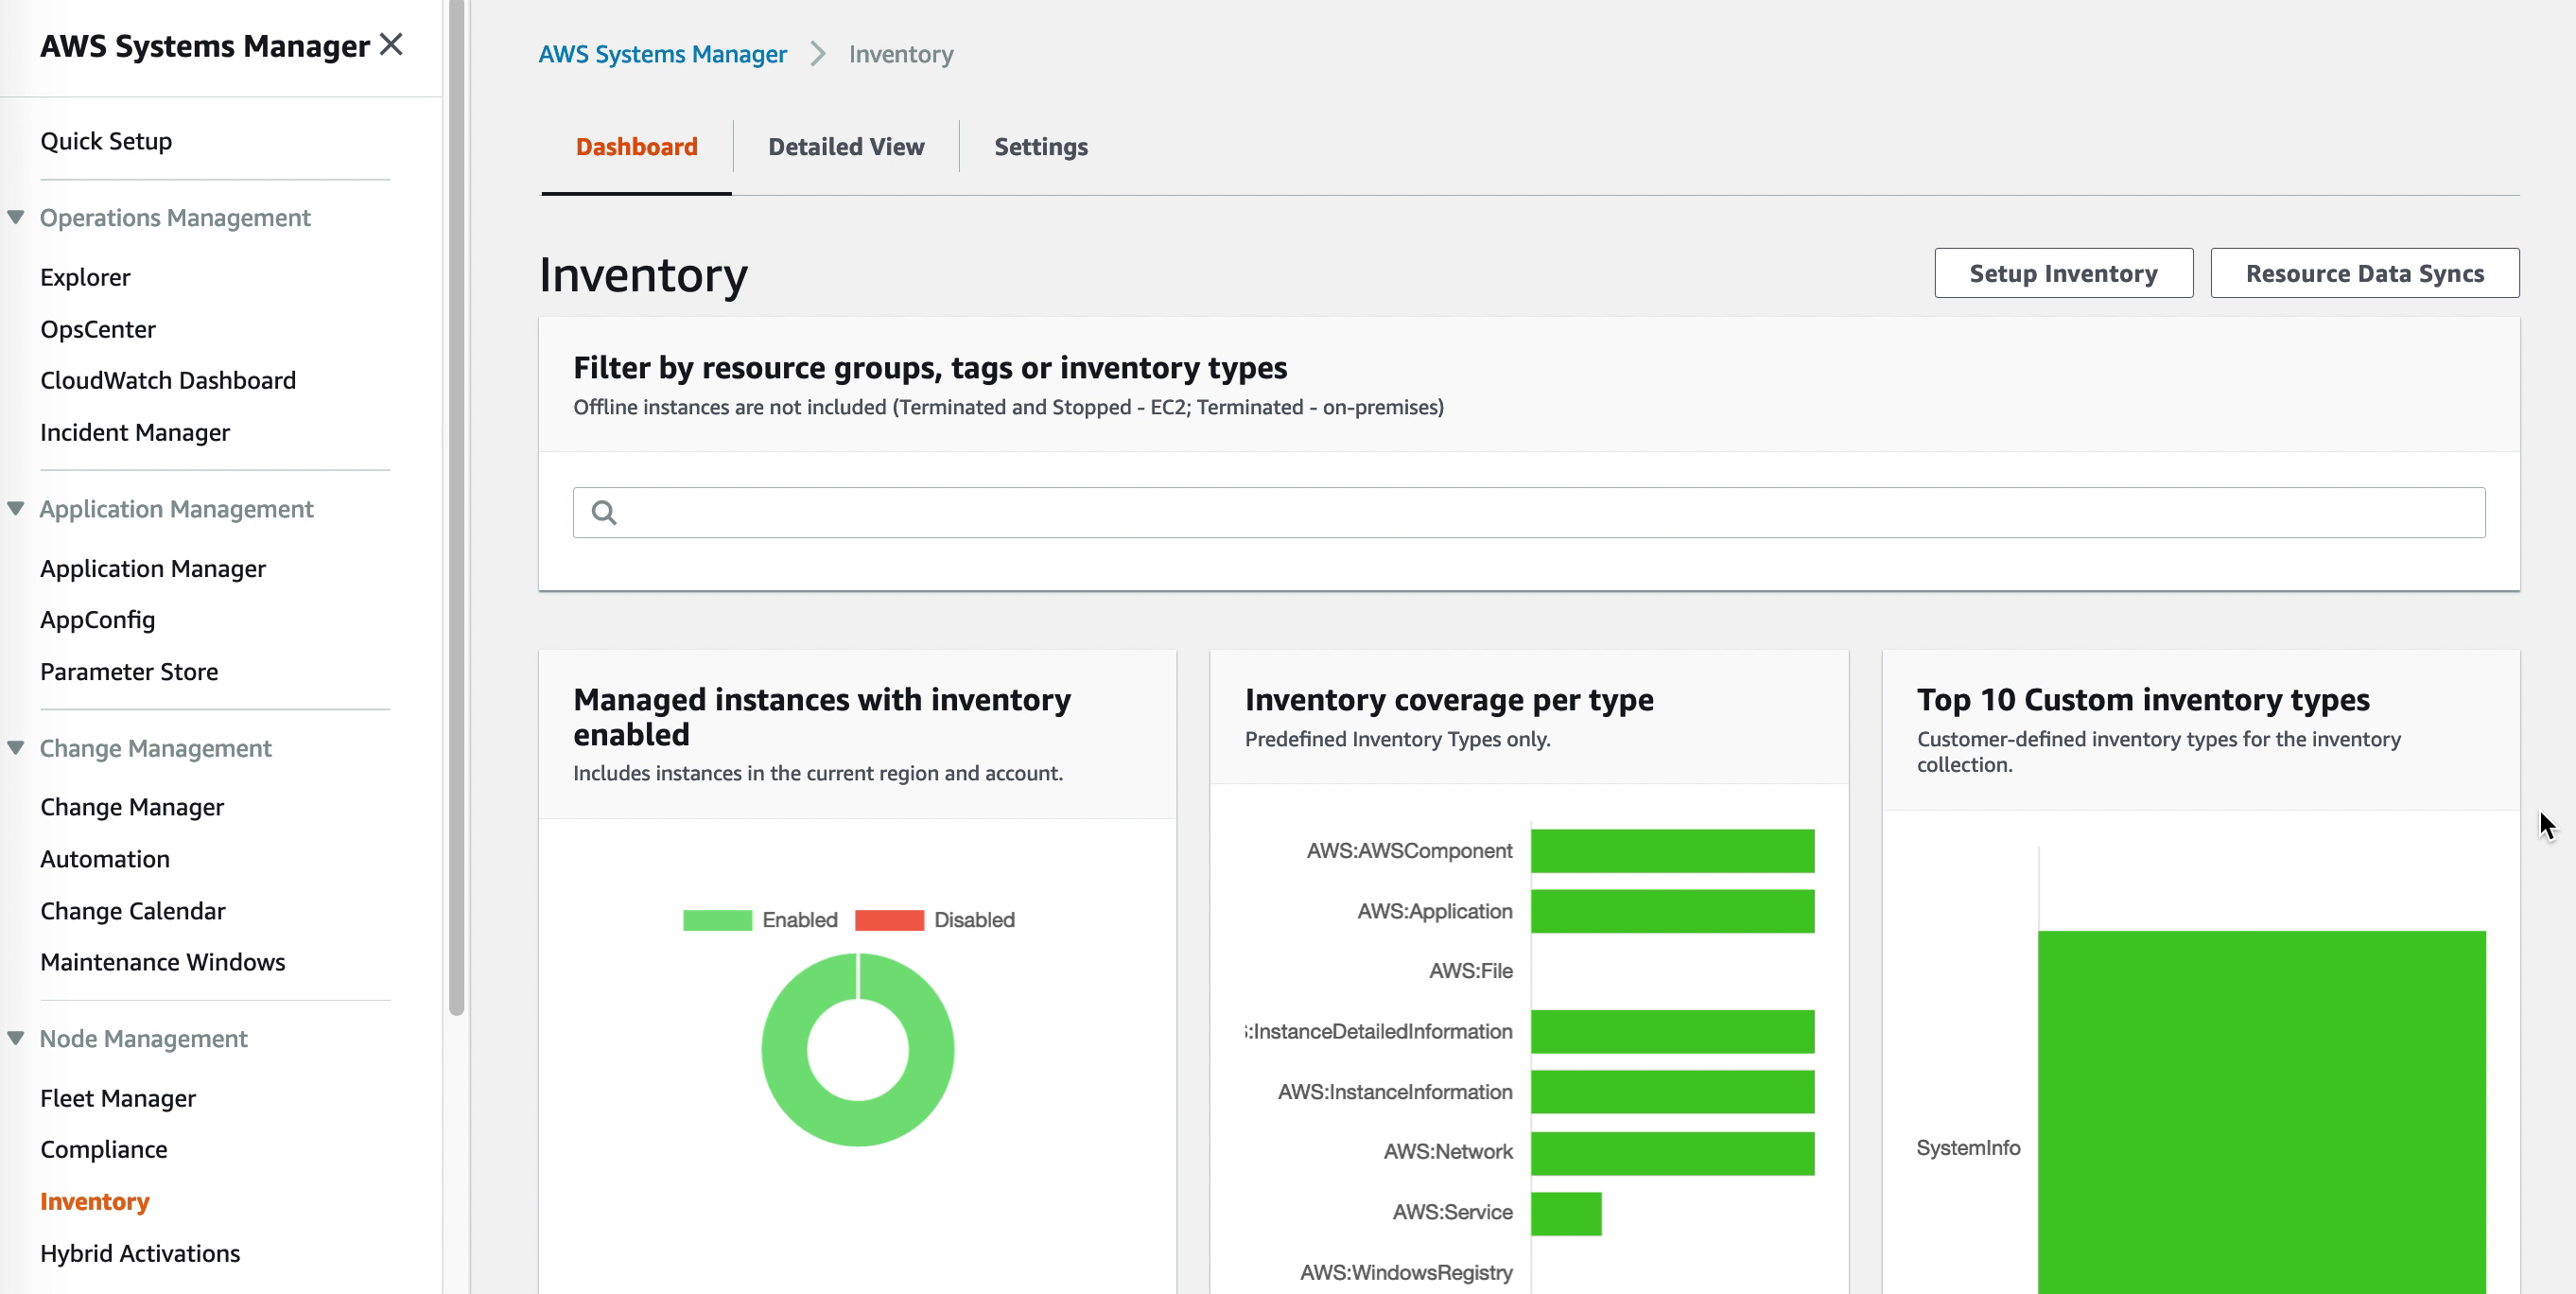
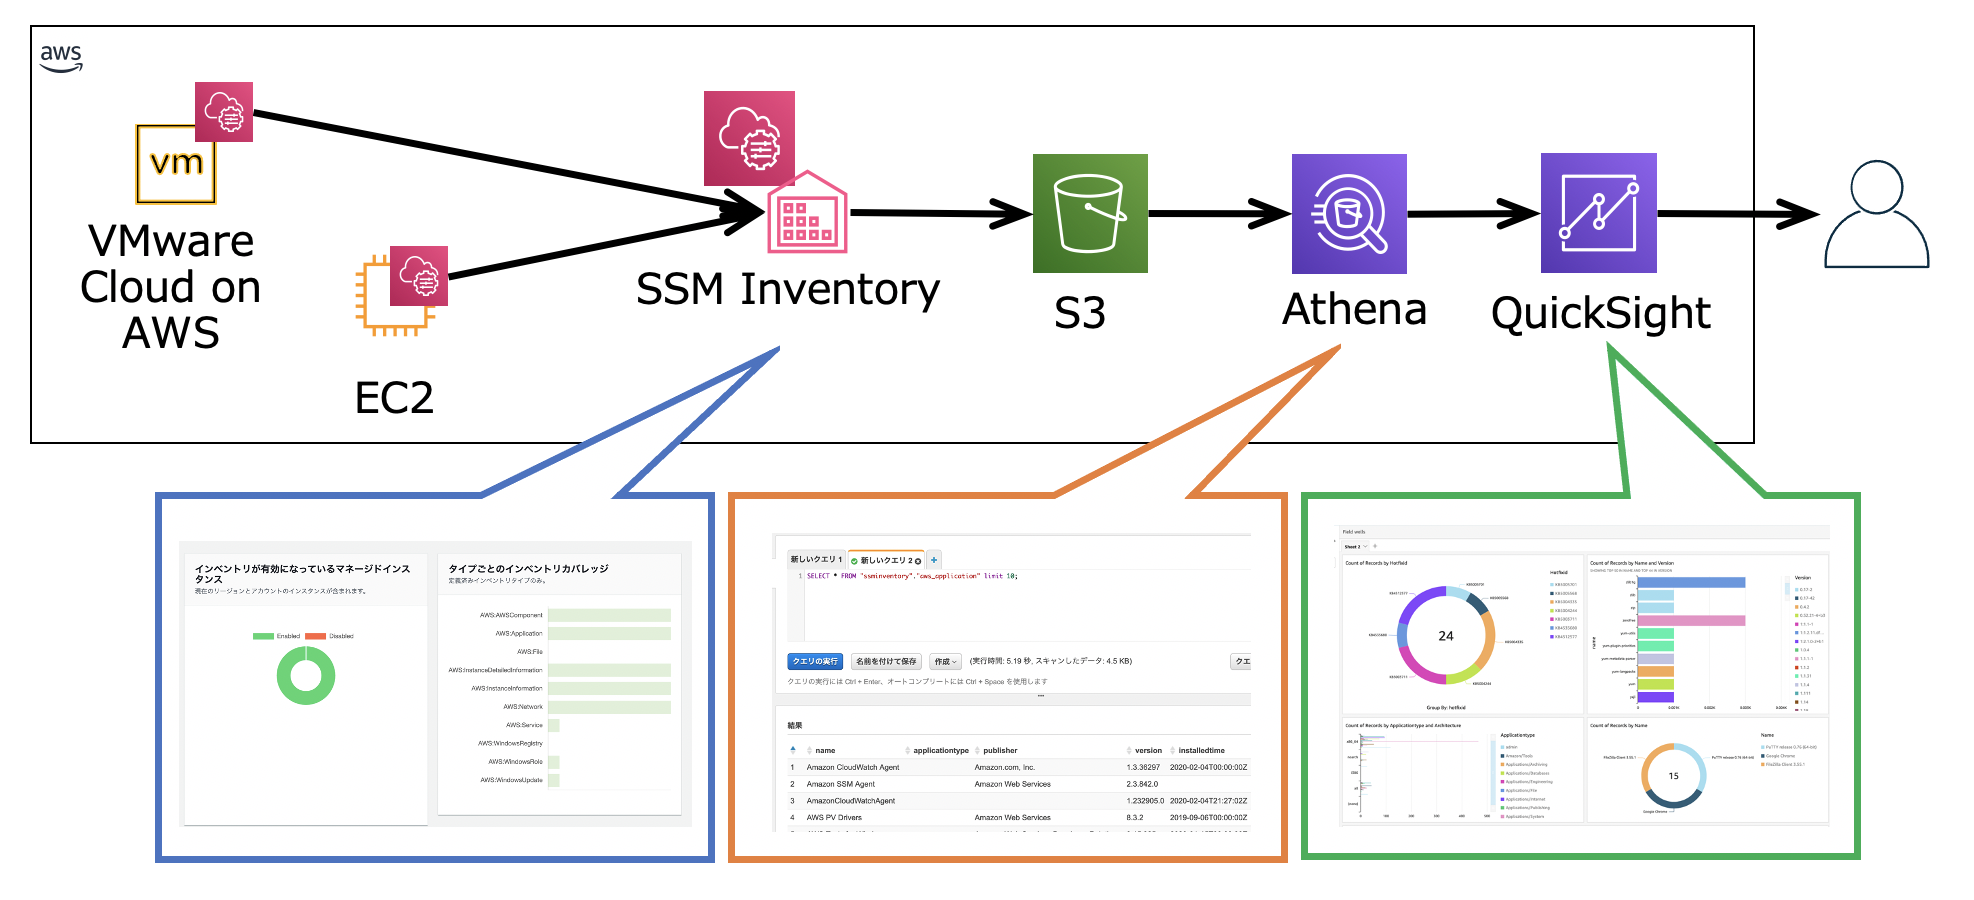
When it comes to gaining Insight into what software is installed AWS SSM has us covered through AWS Systems Manager Inventory. The AWS SSM agent automatically pulls software inventory from managed instances, like VMware Cloud on AWS virtual machines, and displays it through the AWS Console. For even more detailed reports and prettier graphics SSM Inventory can be expanded by putting the inventory data into Amazon S3, query it with Amazon Athena and finally access the query result data from Amazon QuickSight. This way it is possible to generate comprehensive and sometimes even beautiful reports.
2. Leveraging VMware Cloud on AWS add-ons
While AWS native services can cover many angles of security and systems management, when it comes to keeping guard inside the VMware Cloud on AWS environment the VMware Cloud on AWS add-on service NSX Advanced Firewall is a powerful solution. NSX Advanced Firewall can be easily be deployed in a VMware Cloud on AWS environment and helps with the security practice of Getting notified and react quickly if a hackers find a foothold in your environment (IDS / IPS). It comes pre-loaded with CVEs to protect against, like SQL injection attacks. However, it can also alert on, and optionally block, both attacks and network scans in real-time.
Disaster recovery is another topic which goes hand-in-hand with good security best practices. Primarily from a standpoint of safeguarding against ransomware. This aligns directly with Guard against ransomware by having immutable backups of important data and virtual machines. For the purposes of DR with VMware Cloud on AWS there are two standout solutions available in VMware Cloud Disaster Recovery (VCDR) and VMware Site Recovery. Both are powerful in their own right and offer recovery from corrupted or encrypted data as well as actual DC disasters of course. Please also refer to AWS Backup in the section below for an AWS alternative to backing up virtual machine data to protect from ransomware and other data loss.
3. Leveraging other AWS native services
A wide variety of AWS native services can be brought to bear to boost security in both a VMware Cloud on AWS or on-premises VMware environment. One aspect is increased insight by centralizing logging and alerting for events and another aspect is backing up data as well as running commands. All these topics are covered in the section below.
CloudWatch and CloudWatch logs
The AWS CloudWatch agent can be installed both in VMware Cloud on AWS and on-premises VMware environments. Instructions for installation are listed here. Once installed, telemetry from virtual machines will be logged in CloudWatch to be used for diagnostics and alerting. Filters can be created where log files are searched for key words and events which can subsequently be used to trigger alerts. Read more about CloudWatch log filtering here: https://docs.aws.amazon.com/AmazonCloudWatch/latest/logs/MonitoringLogData.html
CloudTrail and EventBridge
As covered in the Restricting Access section above, once remote access has been configured to be allowed only through SSM Session Manager, API calls done for virtual machine and instance access can be logged in CloudTrail for later review. This gives a central location for the security team to track who accessed what system at what time. Note that tracking only show when a system was accessed by whom and doesn’t extend to what was done at the OS level. Furthermore, EventBridge can be paired with AWS SNS to generate alerts whenever sessions are initiated, resumed or terminated.
SSM Run Command and AWS Config
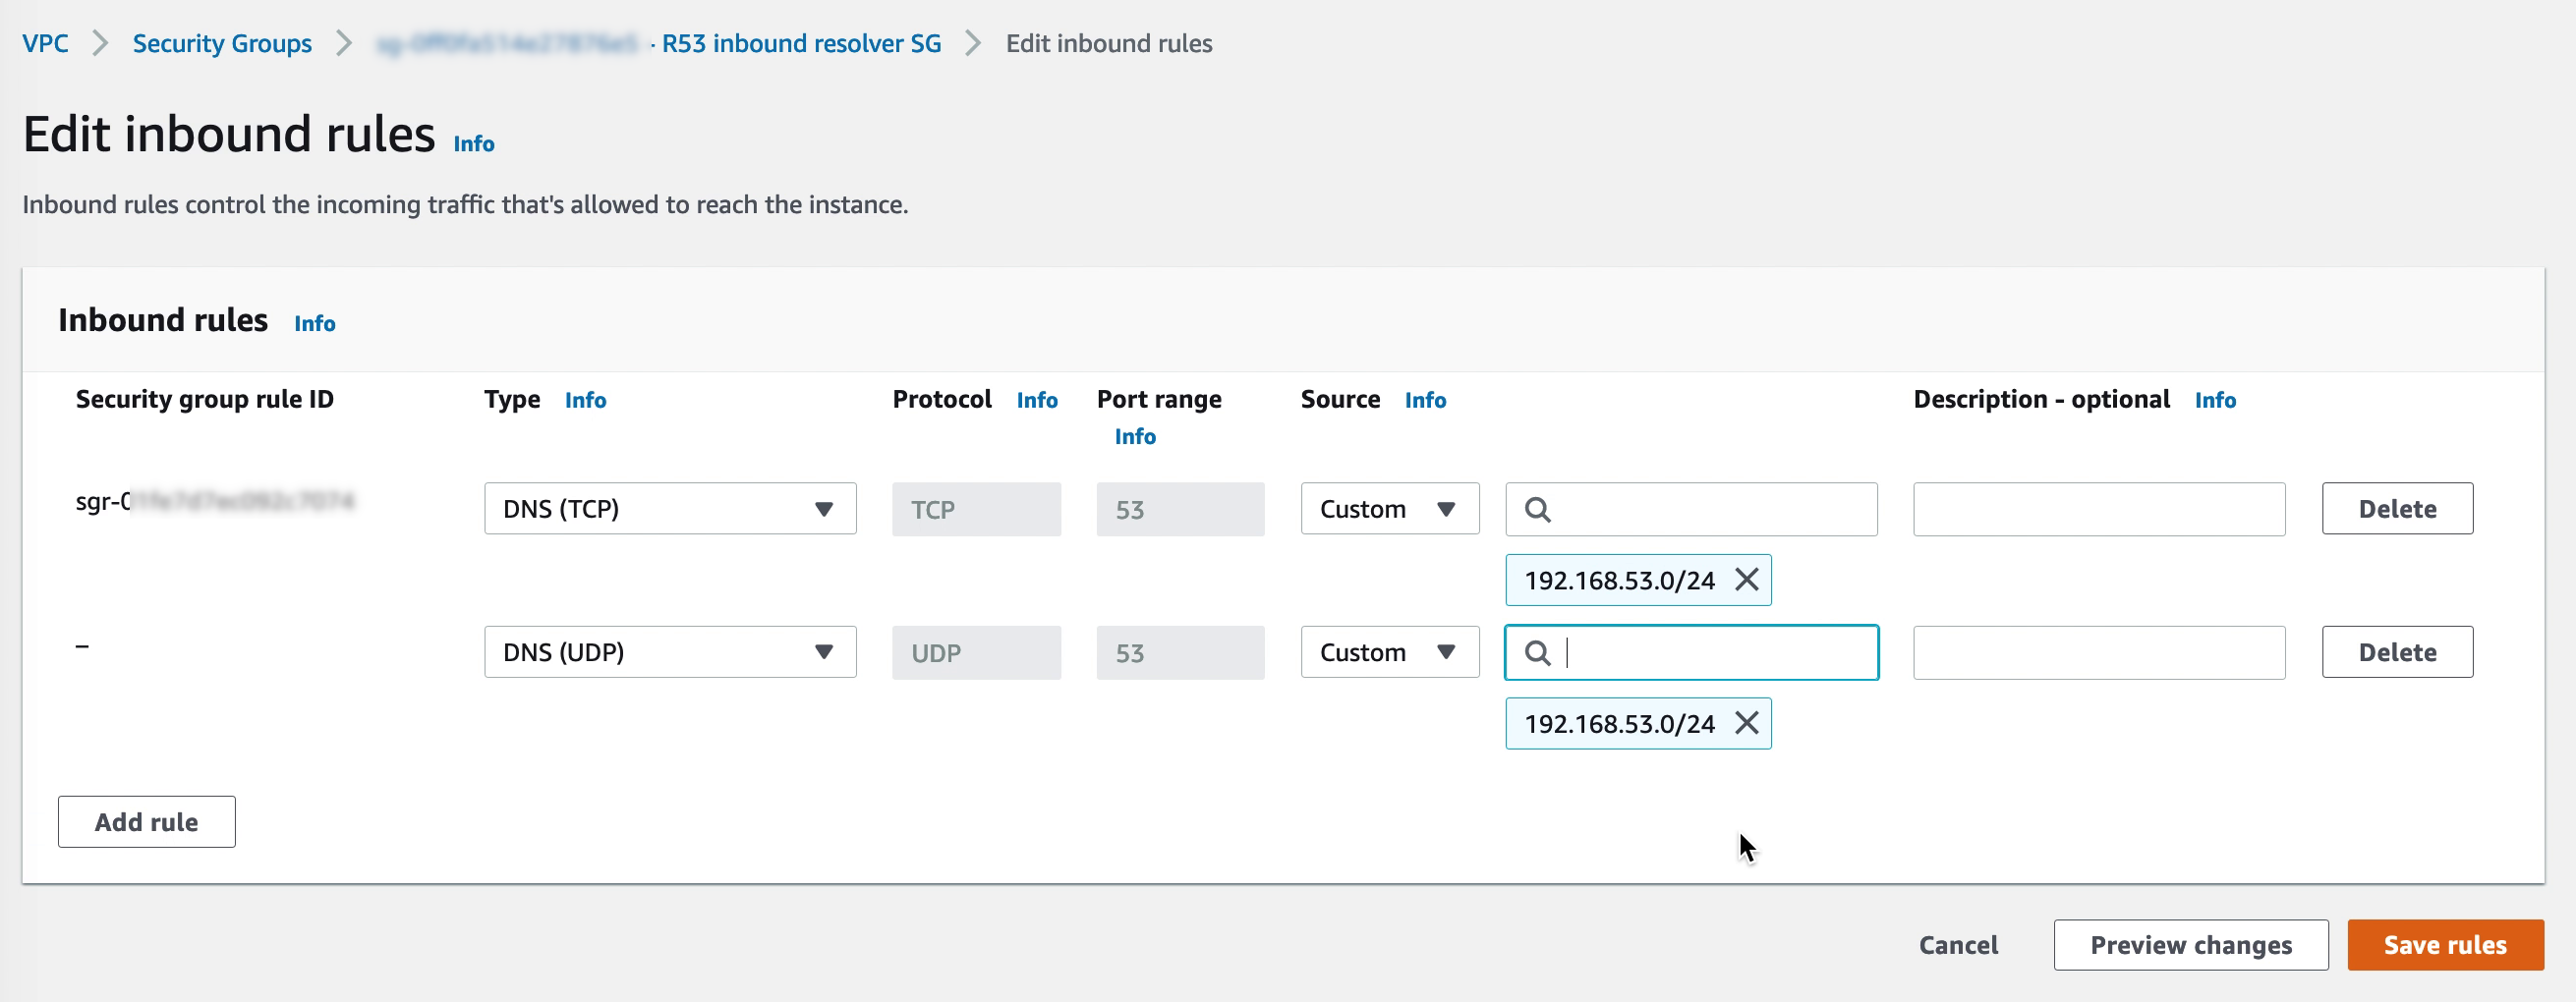
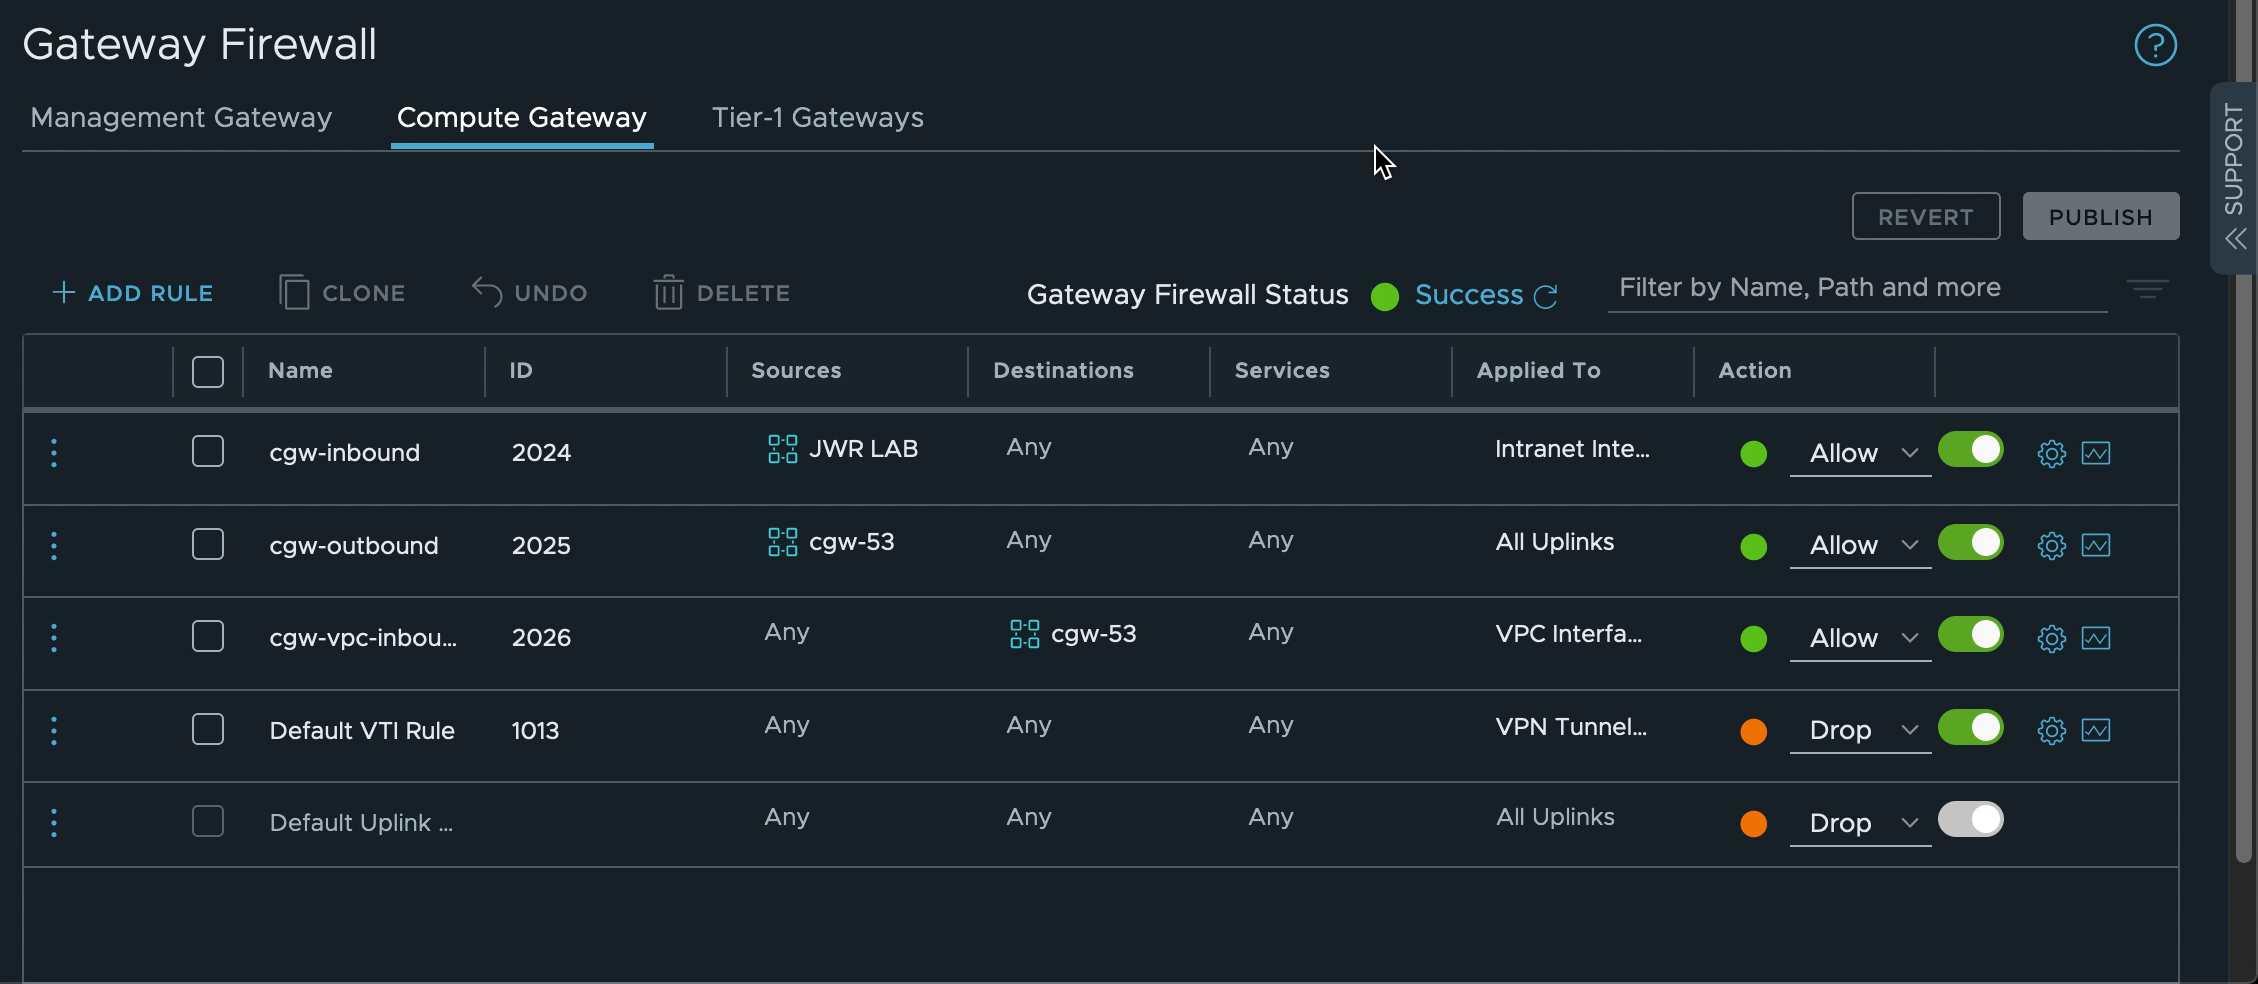
When it comes to setting appropriate firewall rules and then ensuring they don’t change unless intended there are two solutions which come in handy. For the AWS native side there is AWS Config with which rules for approved configurations can be set and maintained. For the VMware Cloud on AWS side it is possible to use SSM Run Command to regularly check for and apply firewall settings with PowerShell and Linux shell scripts.
AWS Backup
While the VMware Cloud on AWS add-ons like VCDR and Site Recovery can help with Guard against ransomware by having immutable backups of important data and virtual machines, AWS Backup is a cloud-native option for safeguarding virtual machine data. AWS Backup supports both VMware on-premises and in VMware Cloud on AWS.
When registering a vSphere system with AWS Backup a virtual appliance is downloaded and deployed in the VMware environment. After linking with vCenter it is possible to create backup plans for the VMware environment through the AWS Console. AWS Backup take backups by creating a snapshot of the virtual machine and then backing up the snapshot to AWS. The snapshot is discarded after it has been copied to AWS. Initial backups are full and subsequent backups are incremental.
Conclusion
VMware Cloud on AWS is not a standalone solution but integrates well with a variety of AWS native services. In this blog post AWS Systems Manager and related services were leveraged to enhance security of virtual machines running on VMware Cloud on AWS by centralizing access controls and automating OS patch management.