

This is a beginner-friendly intro to creating (and destroying!) VMs on VMware vSphere using Terraform. It includes code with plenty of comments to show what option does what.
Bonus: Want to run a script or execute PowerShell commands after VM creation? Perhaps download and install some software? No problems – the code includes a section on this as well (for Windows that is).
Download the code
The annotated TF files used in this example can be found on GitHub here:
Repository: https://github.com/jonas-werner/vsphere-terraform/
Direct download link: https://codeload.github.com/jonas-werner/vsphere-terraform/zip/refs/heads/main
Initialize Terraform
To start with we want to initialize Terraform and download any providers required to run our VM deployment. In this case we’re using the vSphere provider since we’re interacting with a VMware vCenter server.
Enter the directory with the downloaded TF files. Pick either the Windows or Linux example. After that, initialize Terraform with:
terraform initCreating a plan
Start by updating the vSphere login information and other details to match your local vSphere environment. For example what DC, Resource Pool and template VM to use.
When that’s done, proceed to create plan based on the TF file(s) in the current directory by using:
terraform plan -out win.planIn this case we use the name “win.plan” but any name is OK. The output will show what Terraform will do when the plan is applied. Among other things it will list the outputs requested for this particular .tf file. In this example we have asked for the VM names and the IP addresses as per the below:
Plan: 3 to add, 0 to change, 0 to destroy.

Changes to Outputs:
  + vmnames    = [
      + "windows-vm-001",
      + "windows-vm-002",
      + "windows-vm-003",
    ]
  + vmnameswip = [
      + (known after apply),
      + (known after apply),
      + (known after apply),
    ]
Apply the plan
Now when we have a plan created, apply it with:
terraform apply win.planAfter the deployment is complete it’ll show the updated information for the VM:s as follows:
Apply complete! Resources: 3 added, 0 changed, 0 destroyed.
Outputs:
vmnames = [
"windows-vm-001",
"windows-vm-002",
"windows-vm-003",
]
vmnameswip = [
"10.70.2.11",
"10.70.2.10",
"10.70.2.12",
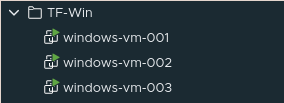
]In vCenter we can now see we’ve got three new VMs
Destroying the VMs
If these are test VMs you may want to remove them after testing is done. To clean up, simply issue:
terraform destroyor, if you want to skip the confirmation prompt:
teraform destroy --auto-approveTroubleshooting
“Failed to verify certificate”: Most lab environments wouldn’t use a proper TLS certificate for vCenter. In those cases the below error will show when running “terraform plan”:
│ Error: error setting up new vSphere SOAP client: Post "https://vcenter.lab.jonamiki.com/sdk": tls: failed to verify certificate: x509: certificate signed by unknown authority
│
│ with provider["registry.terraform.io/hashicorp/vsphere"],
│ on main_win.tf line 3, in provider "vsphere":
│ 3: provider "vsphere" {
The solution is simple – Just uncomment the line below in the vsphere provider section in the terraform .tf file:
allow_unverified_ssl = trueCustomization of guest OS fails: One of the following errors may show up if the source VM don’t have VMware Tools installed. The fix, of course, is to install VMware tools in the template VM and then run Terraform again:
Customization of the guest operating system is not supported due to the given reason: Tools is not installed in the GuestOS. Please install the latest version of open-vm-tools or VMware Tools to enable GuestCustomization.Error: error sending customization spec: Customization of the guest operating system is not supportedVMs boot to a black screen without starting the OS: This is usually down to using EFI vs. BIOS in the VM settings in the .tf file. Try switching to BIOS from EFI or vice versa if the newly created VMs won’t start up.
  firmware         = "efi"
or
  firmware         = "bios"