

Personal project to monitor and automate the enclosure of my ball python Mr. Snuggles. Code is on Github but isn’t well documented yet:
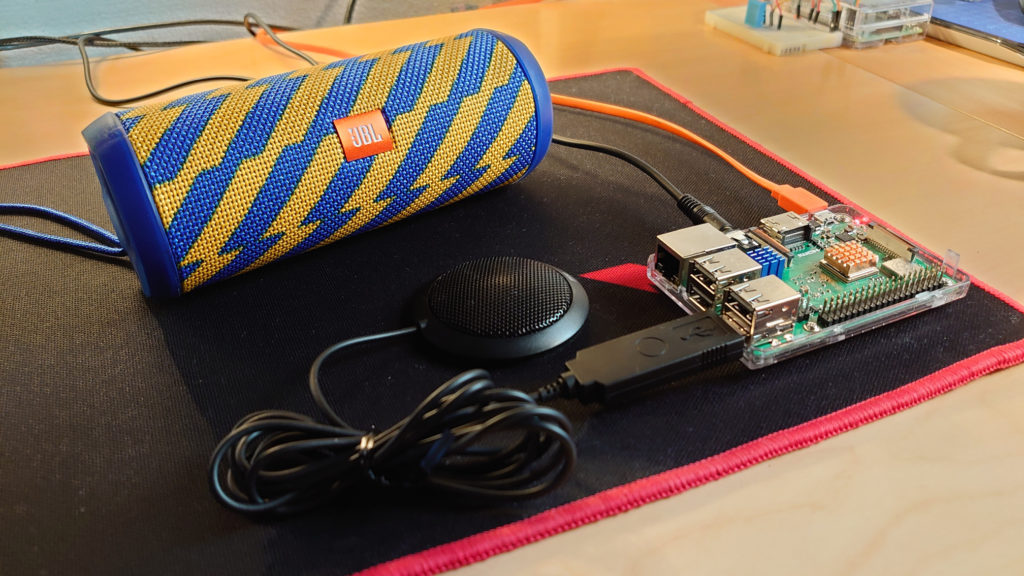
Sound on Raspberry Pi: Separate speaker and microphone
While seemingly simple, getting a USB microphone + a speaker connected to 3.5mm audio jack working AT THE SAME TIME can be very challenging.
Some of the common errors seen when trying to record and play audio
- arecord: main:788: audio open error: No such file or directory
- aplay: set_params:1305: Channels count non available
Find out device IDs
Speaker device
To see which devices are available to use as a speaker, use the following command
pi@raspberrypi:~ $ aplay -l
**** List of PLAYBACK Hardware Devices ****
card 0: ALSA [bcm2835 ALSA], device 0: bcm2835 ALSA [bcm2835 ALSA]
  Subdevices: 7/7
  Subdevice #0: subdevice #0
  Subdevice #1: subdevice #1
  Subdevice #2: subdevice #2
  Subdevice #3: subdevice #3
  Subdevice #4: subdevice #4
  Subdevice #5: subdevice #5
  Subdevice #6: subdevice #6
card 0: ALSA [bcm2835 ALSA], device 1: bcm2835 IEC958/HDMI [bcm2835 IEC958/HDMI]
  Subdevices: 1/1
  Subdevice #0: subdevice #0
card 1: Microphone [USB Microphone], device 0: USB Audio [USB Audio]
  Subdevices: 1/1
  Subdevice #0: subdevice #0
Based on the above output we have three devices:
- The onboard 3.5mm plug listed as BCM2835 ALSA: Card 0, Device 0 (“hw:0,0”)
- The onboard HDMI connection listed as bcm2835 IEC958/HDMI: Card 0, Device 1 (“hw:0,1”)
- The USB microphone listed as USB Audio: : Card 1, Device 0 (“hw:1,0”)
In this example we want to use the 3.5mm audio jack, so we’ll use Card 0, Device 0 as the way to locate our speaker device. The USB microphone doesn’t have audio output and is not valid as a speaker setting. It is listed however, which can cause confusion.
Microphone device
To see which devices are available to use as a microphone, use the following command
pi@raspberrypi:~ $ arecord -l
**** List of CAPTURE Hardware Devices ****
card 1: Microphone [USB Microphone], device 0: USB Audio [USB Audio]
  Subdevices: 1/1
  Subdevice #0: subdevice #0
We only have one device and that’s the USB microphone listed as Card 1 and Device 0 (“hw:1,0”).
Configuring the audio settings
To set the audio settings, create or modify the .asoundrc file in the users home directory as follows. That would be /home/pi/.asoundrc for the default user.
pi@raspberrypi:~ $ cat .asoundrc
pcm.!default {
  type asym
  capture.pcm "mic"
  playback.pcm "speaker"
}

pcm.mic {
  type plug
  slave {
    pcm "hw:1,0"
  }
}

pcm.speaker {
  type plug
  slave {
    pcm "hw:0,0"
  }
}
Logging out / in, rebooting or reloading the audio service would apply the settings.
To apply the settings system-wide, copy the .asoundrc file to /etc/asound.conf
Test the new settings
To test recording audio, use arecord without specifying the device to record from (if our settings are correct, the default device would already be configured and picked up by arecord):
arecord -f S16_LE -r 48000 test.wav
To play the recorded sound use aplay
aplay test.wav
Sample rate
If things still don’t work, consider checking the sampling rate of the microphone. I had bought a new mic for use with AWS Lex and Alexa but it wouldn’t work. The sampling rate required was 16000 and the mic didn’t support it.
It turns out an old PlayStation3 camera has a 16000 sample rate. Checking rate by the following:
cat /proc/asound/card1/stream0 | egrep -i rate<br>
    Rates: 16000
EdgeX Foundry version 1.0 is now available
The Open Source IoT solution called EdgeX Foundry has just had it’s first Long-Term Support (LTS) release. This is a big deal and a real milestone since it’s finally out of 0.x versions and into the first, big 1.x release. After a journey of over 2 years it’s finally ready for broad adoption. EdgeX Foundry is an official Linux Foundation project and part of LF Edge.

Why is EdgeX Foundry so relevant?
Data ingestion
- It is a native speaker of the protocols and data formats of a myriad edge devices
- Without the need for agents, it ingests data from most edge devices and sensors
- It converts the data to XML or JSON for easy processing
- It streams the data in real-time to internal or external cloud and big-data platforms for visualization and processing
Control and automation
- It supports the native commands of edge devices and can change camera angles, fan speeds, etc.
- It has rules that can act on input and trigger commands for instant action and automation
Architecture
- EdgeX Foundry is cloud-native
- It’s open source and can be downloaded by anyone free of charge
- It’s made up of microservices running in docker containers
- It’s modular, flexible and can be integrated into other IoT management systems
How does it fit in with the rest of the IoT world?
While the Internet of Things is fairly new and very much a buzzword, the concept of connected devices runs back much longer through the Machine 2 Machine era.
Oftentimes these solutions are vendor-specific, siloed off and lack any unified layer for insight, control and management. EdgeX Foundry bridges not only the old M2M with the new IoT solutions but also connects the Edge to the core DC to the Cloud. It’s the glue that holds the world of IoT together.
It can favorably be used both stand-alone, as a part of a larger IoT solution (containers can easily be integrated as they contain individual services) or together with a commercial IoT solution such as VMware Pulse IoT Center 2.0.
How to get started
Many resources are available for those looking to get started with EdgeX Foundry. There are starter guides and tutorials on the project page as well as docker-compose files on GitHub as per the below
- Main project page: https://www.edgexfoundry.org/
- Slack: https://slack.edgexfoundry.org/
- Wiki: https://wiki.edgexfoundry.org/
- Docs: https://docs.edgexfoundry.org/
- Docker Hub: https://hub.docker.com/u/edgexfoundry/
- Docker-Compose files: https://github.com/edgexfoundry/developer-scripts/tree/master/releases/edinburgh/compose-files
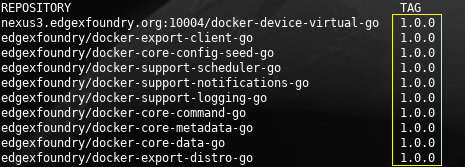
Pulled images from Docker hub
Version 1.0.0 as far as the eye can see 🙂
Converting mp4 to gif with ffmpeg
ffmpeg -i minecraft-ore-lamp_01.mp4 \
-vf "fps=10,scale=500:-1:flags=lanczos" \
-c:v pam -f image2pipe - | \
convert -delay 10 - -loop 0 -layers optimize output.gif
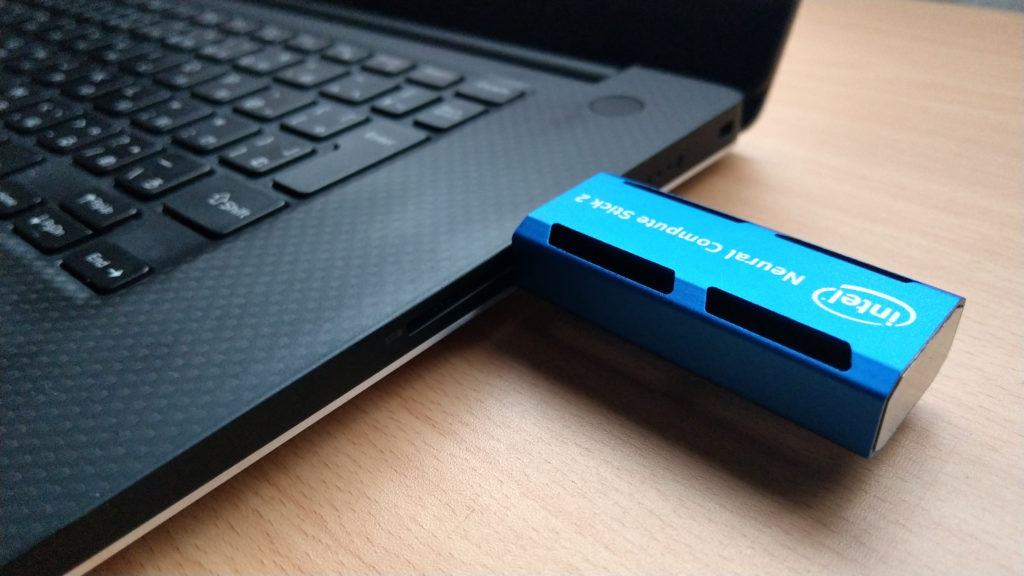
Compiling and running Movidius NCS2 Alexnet benchmark_app in a container
This is a crash course in getting the Movidius NCS2 neural compute stick up and running with a benchmark application. Even though only the benchmark app is covered, the same steps can be used to compile any of the other apps included with the OpenVINO toolkit.
For the REALLY impatient 🙂
Environment:
- Laptop / PC running Linux (I use Ubuntu 18.04 server)
- Docker
- Movidius NCS2 compute stick
Download a container pre-loaded with OpenVINO:
I created a container on dockerhub which already has the OpenVINO toolkit installed. Download it as follows:
docker pull jonaswerner/movidius_nc2_with_openvino:2018.5.455
Run the container in privileged mode
Privileged mode is required as the Movidius compute stick changes from USB2.0 to USB3.0 and is re-enumerated by the OS once the ML model is loaded into it. The container need to be able to access the “new” USB3.0 device once it appears.
sudo docker run -ti --privileged --net=host -v /dev:/dev jonaswerner/movidius_nc2_with_openvino:2018.5.455
Verify functionality and download sample code
From this point all commands are executed inside the container. It will carry the name of the host system (“octo” in my case) as it’s running in privileged mode.
[setupvars.sh] OpenVINO environment initialized
root@octo:/#
root@octo:/#
root@octo:/# cd /opt/intel/computer_vision_sdk/deployment_tools/demo/
root@octo:/opt/intel/computer_vision_sdk/deployment_tools/demo#
root@octo:/opt/intel/computer_vision_sdk/deployment_tools/demo# ls -l
total 1752
-rw-r--r-- 1 root root    2933 Feb 21 04:35 README.txt
-rw-r--r-- 1 root root  310725 Feb 21 04:35 car.png
-rw-r--r-- 1 root root 1432032 Feb 21 04:35 car_1.bmp
-rwxr-xr-x 1 root root    6472 Feb 21 04:35 demo_security_barrier_camera.sh
-rwxr-xr-x 1 root root    8605 Feb 21 04:35 demo_squeezenet_download_convert_run.sh
-rw-r--r-- 1 root root   21675 Feb 21 04:35 squeezenet1.1.labels
root@octo:/opt/intel/computer_vision_sdk/deployment_tools/demo# ./demo_squeezenet_download_convert_run.sh -d MYRIAD
target = MYRIAD
target_precision = FP16

###################################################

Downloading the Caffe model and the prototxt
Installing dependencies
Output has been shortened for brevity. If all goes well it will finish with the following message:
Demo completed successfully.
This verifies that the Movidius NCS2 (referred to as “MYRIAD” in the command above) is working as expected. It will also have downloaded the sample code to multiple applications, including the benchmark_app we will build.
Download the Alexnet model
We now download the Alexnet model which will be used when executing the benchmark_app. Then we optimize it for FloatingPoint 16 (Movidius NCS2) and for FloatingPoint32 (CPU) so we can run benchmarks against both.
When we use the model optimizer (mo.py) to convert model to Inference Engine format we end up with a pair of files – one XML and one BIN.
Enter the correct directory and execute downloader.py
cd /opt/intel/computer_vision_sdk/deployment_tools/model_downloader
./downloader.py --name alexnet
Create directories where we can put the FP16 and FP32 files
mkdir /opt/intel/computer_vision_sdk/deployment_tools/model_optimizer/alexnet
mkdir /opt/intel/computer_vision_sdk/deployment_tools/model_optimizer/alexnet/FP16
mkdir /opt/intel/computer_vision_sdk/deployment_tools/model_optimizer/alexnet/FP32
Enter the base directory and execute the model optimizer
cd /opt/intel/computer_vision_sdk/deployment_tools/model_optimizer
./mo.py --data_type=FP16 --input_model ../model_downloader/classification/alexnet/caffe/alexnet.caffemodel -o ./alexnet/FP16/
./mo.py --data_type=FP32 --input_model ../model_downloader/classification/alexnet/caffe/alexnet.caffemodel -o ./alexnet/FP32/
Compile the benchmark app from the sample source code
Note that in this case we’re doing the benchmark app but there are many interesting application samples included in the same directory.
cd ~/inference_engine_samples/benchmark_app/
make
After compiling the resulting binary can be found here: ~/inference_engine_samples/intel64/Release/
Run benchmarks for MYRIAD and CPU for comparison
Note that even though we run the inferencing against the same image (“car.png”) we have to change the model optimizer between FP16 for MOVIDIUS and FP32 for CPU depending on which of the two we intend to benchmark.
cd ~/inference_engine_samples/intel64/Release/
./benchmark_app -d MYRIAD -i /opt/intel/computer_vision_sdk/deployment_tools/demo/car.png -m /opt/intel/computer_vision_sdk/deployment_tools/model_optimizer/alexnet/FP16/alexnet.xml
./benchmark_app -d CPU -i /opt/intel/computer_vision_sdk/deployment_tools/demo/car.png -m /opt/intel/computer_vision_sdk/deployment_tools/model_optimizer/alexnet/FP32/alexnet.xml
That is all for this blog post, but it should have provided the required information to compile any of the other sample applications as well as the necessary instructions for how to download and optimize models required for some of the apps.