In this video we cover the steps for migration from VMC to NC2 over a VMware Transit Connect (VTGW) and a Transit Gateway (TGW). We briefly also cover the routing through these entities as well as the actual VM migration using Nutanix Move 5.2
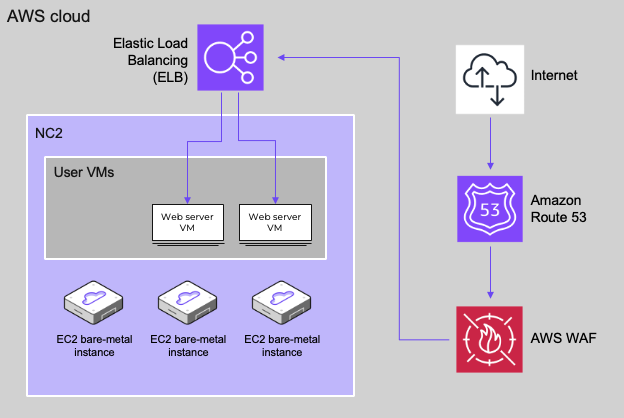
Adding an AWS Elastic Load Balancer (ELB) to direct traffic between web servers on Nutanix Cloud Clusters (NC2)
One of the great things about running a virtualized infrastructure on NC2 on AWS is the close proximity to all the cloud native services. One of those highly useful services is the AWS ELB or Elastic Load Balancer.
In this post we show how to get floating IP addresses from the VPC in which NC2 is located and to assign them to a number of web servers running as VMs on NC2. Then we create a Load Balancer target group and finally we create an Application Load Balancer (ALB) and attach it to the target group.
Architecture
In this blog post we only cover the deployment of the web servers and the load balancer, however, Route 53 can also be leveraged for DNS and AWS WAF for security and DDOS protection purposes as illustrated below
Preparing some web servers
We first deploy a few test web servers. In this case the wonderfully named Jammy Jellyfish edition of Ubuntu Server as a cloud image. Feel free to download the image from here:
Prism Central makes it very easy to deploy multiple VMs in one go.
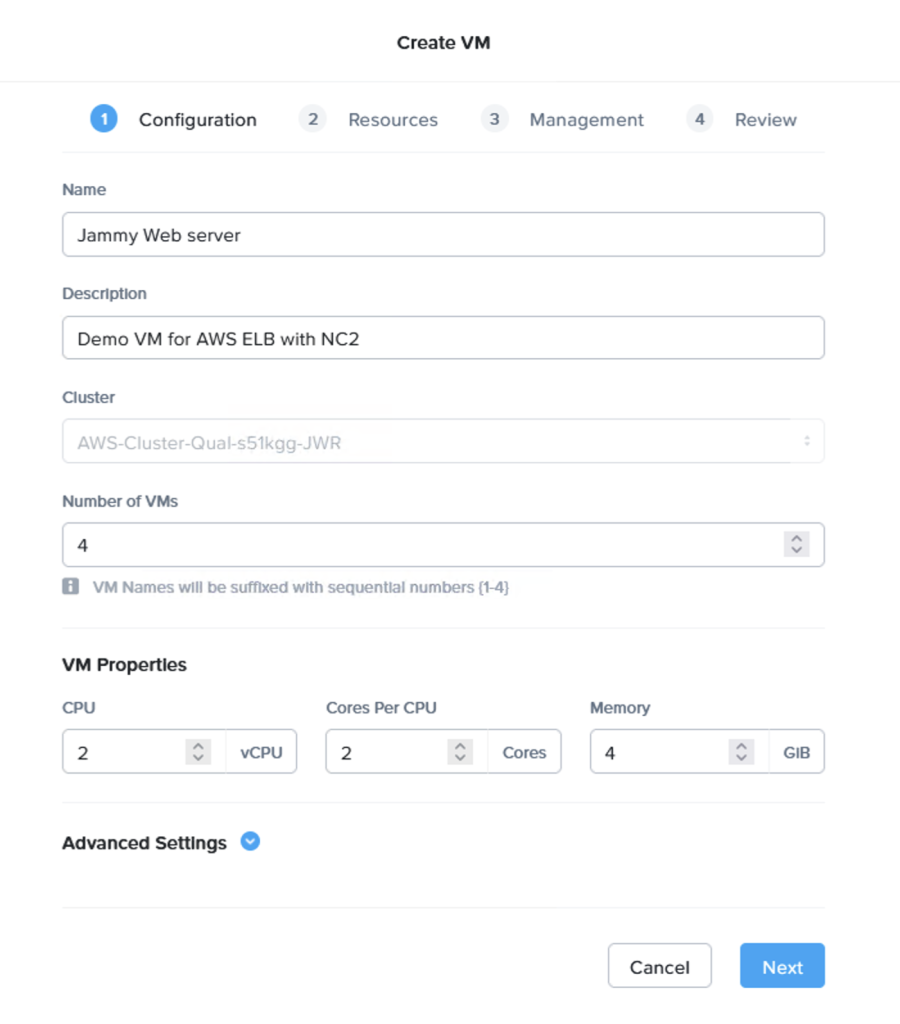
When deploying, make sure to use the cloud-init script to set the password and any other parts to make the VM usable after 1st boot:
#cloud-config
password: Password1
chpasswd: { expire: False }
ssh_pwauth: True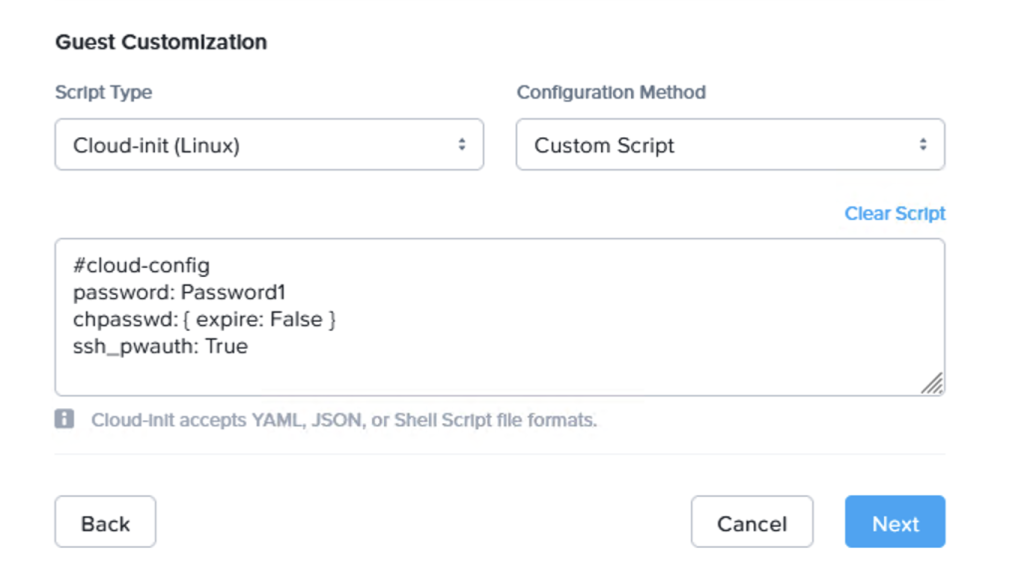
Now we have our VMs ready. I’ve installed the Apache web server to serve pages (apt install apache2) but feel free to use whatever works best in your setup.
I used the following index.html code to show the server ID
ubuntu@ubuntu:~$ cat /var/www/html/index.html
<!DOCTYPE html>
<html lang="en">
<head>
    <meta charset="UTF-8">
    <meta name="viewport" content="width=device-width, initial-scale=1.0">
    <title>Welcome</title>
    <style>
        body {
            display: flex;
            justify-content: center;
            align-items: center;
            height: 100vh;
            margin: 0;
            font-family: Arial, sans-serif;
            background-color: #f0f0f0;
        }
        .message-container {
            max-width: 300px;
            padding: 20px;
            text-align: center;
            background-color: #ffffff;
            border: 1px solid #cccccc;
            border-radius: 10px;
            box-shadow: 0 0 10px rgba(0, 0, 0, 0.1);
        }
    </style>
</head>
<body>
    <div class="message-container">
        <script>
            // Fetch the hostname
            document.write("Welcome to Server 1");
        </script>
    </div>
</body>
</html>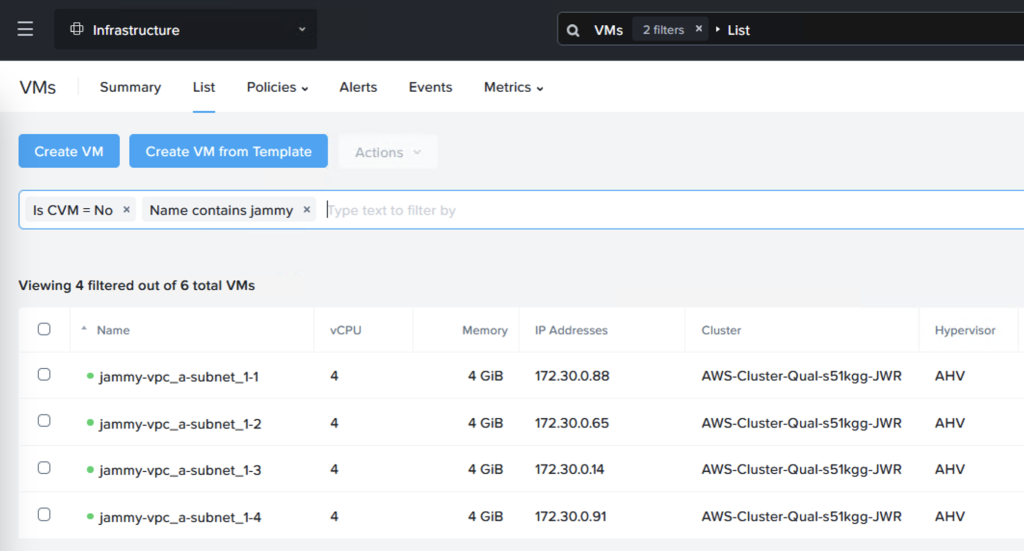
Configure floating IP addresses for the web servers
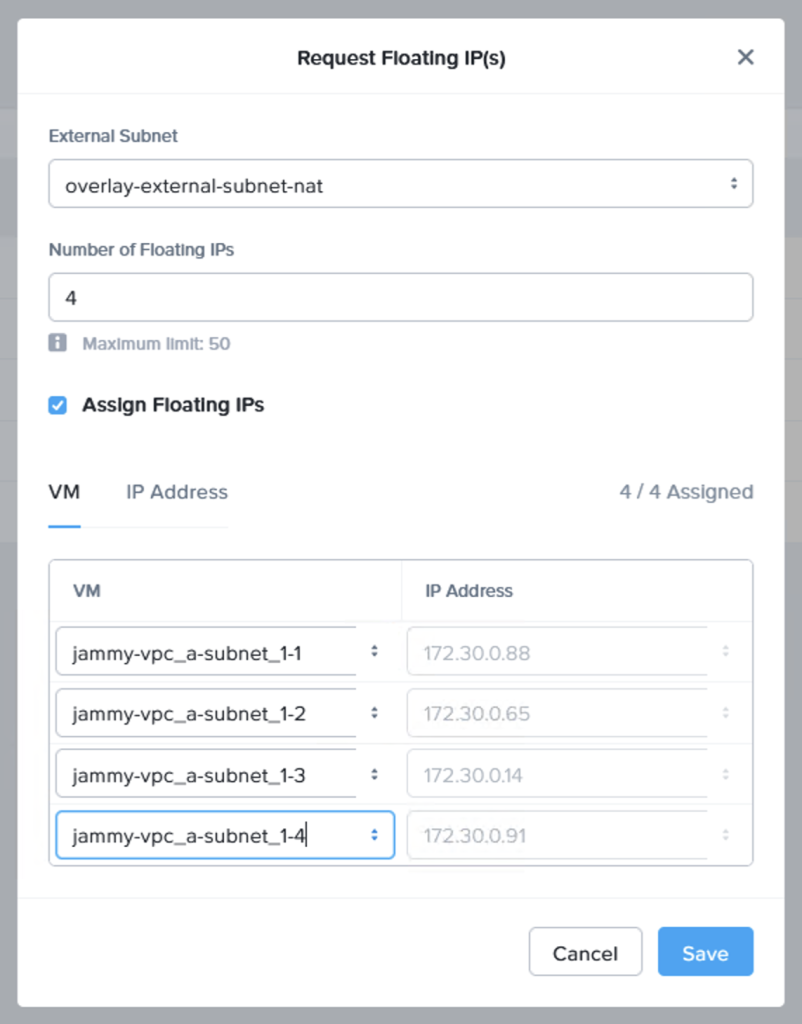
Next we request a few floating IP addresses from the VPC which NC2 is deployed into and then assign one IP each to our web servers. Luckily Prism Central makes also this very easy to do – in a single step! From “Compute & Storage”, select “Floating IPs” under “Network & Security”:
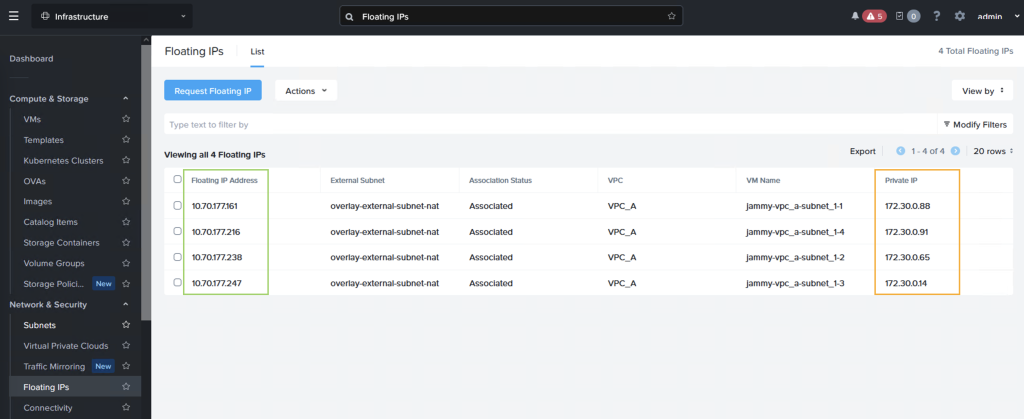
After assigning the IPs we can see that each VM have both an internal and an external IP address, where the “external” IP comes from the AWS VPC CIDR range
Creating an AWS LB target group
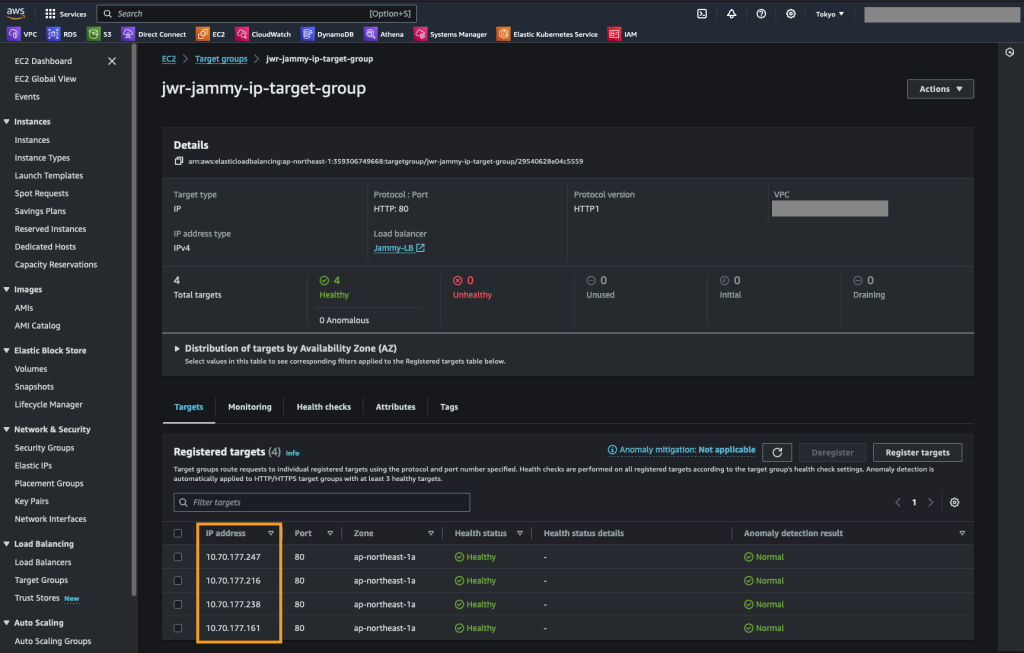
Next we create a target group for the AWS ALB which we deploy in the next step. The LB target group simply contain the Floating IP addresses we just assigned as well as a health check for the web root of these web servers.
We create an “IP address” target group and set the health check to be HTTP, port 80 and the path as “/” or the web root.
We then add the Floating IP addresses we created previously
Create the Application Load Balancer (ALB)
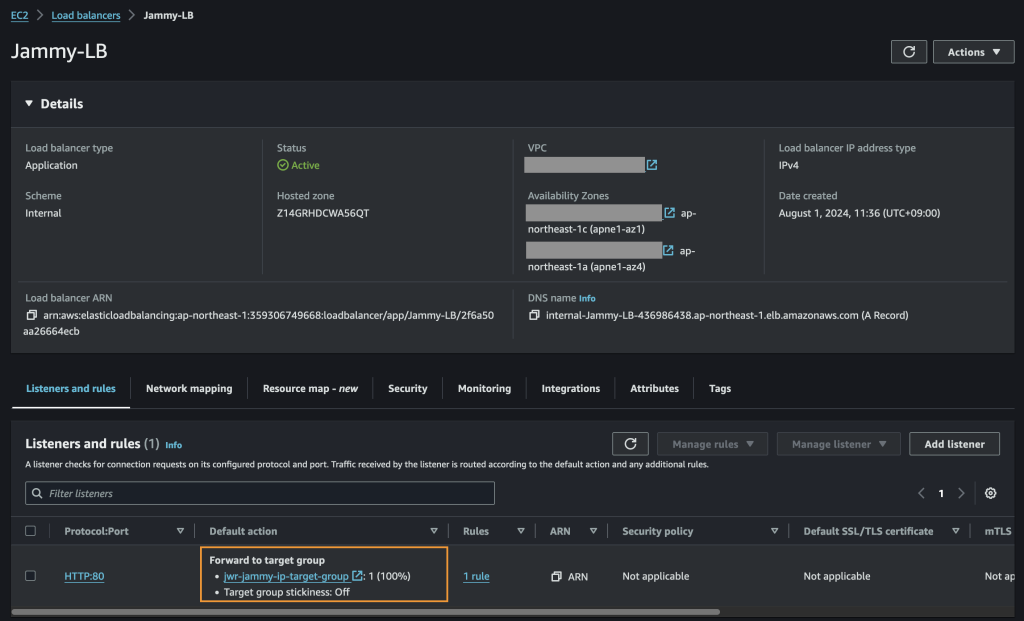
Finally we create the ALB and assign it to our target group
Test of the ALB
Now we’re all done and can access our ALB to see if it shows balances between the NC2 VMs as expected.
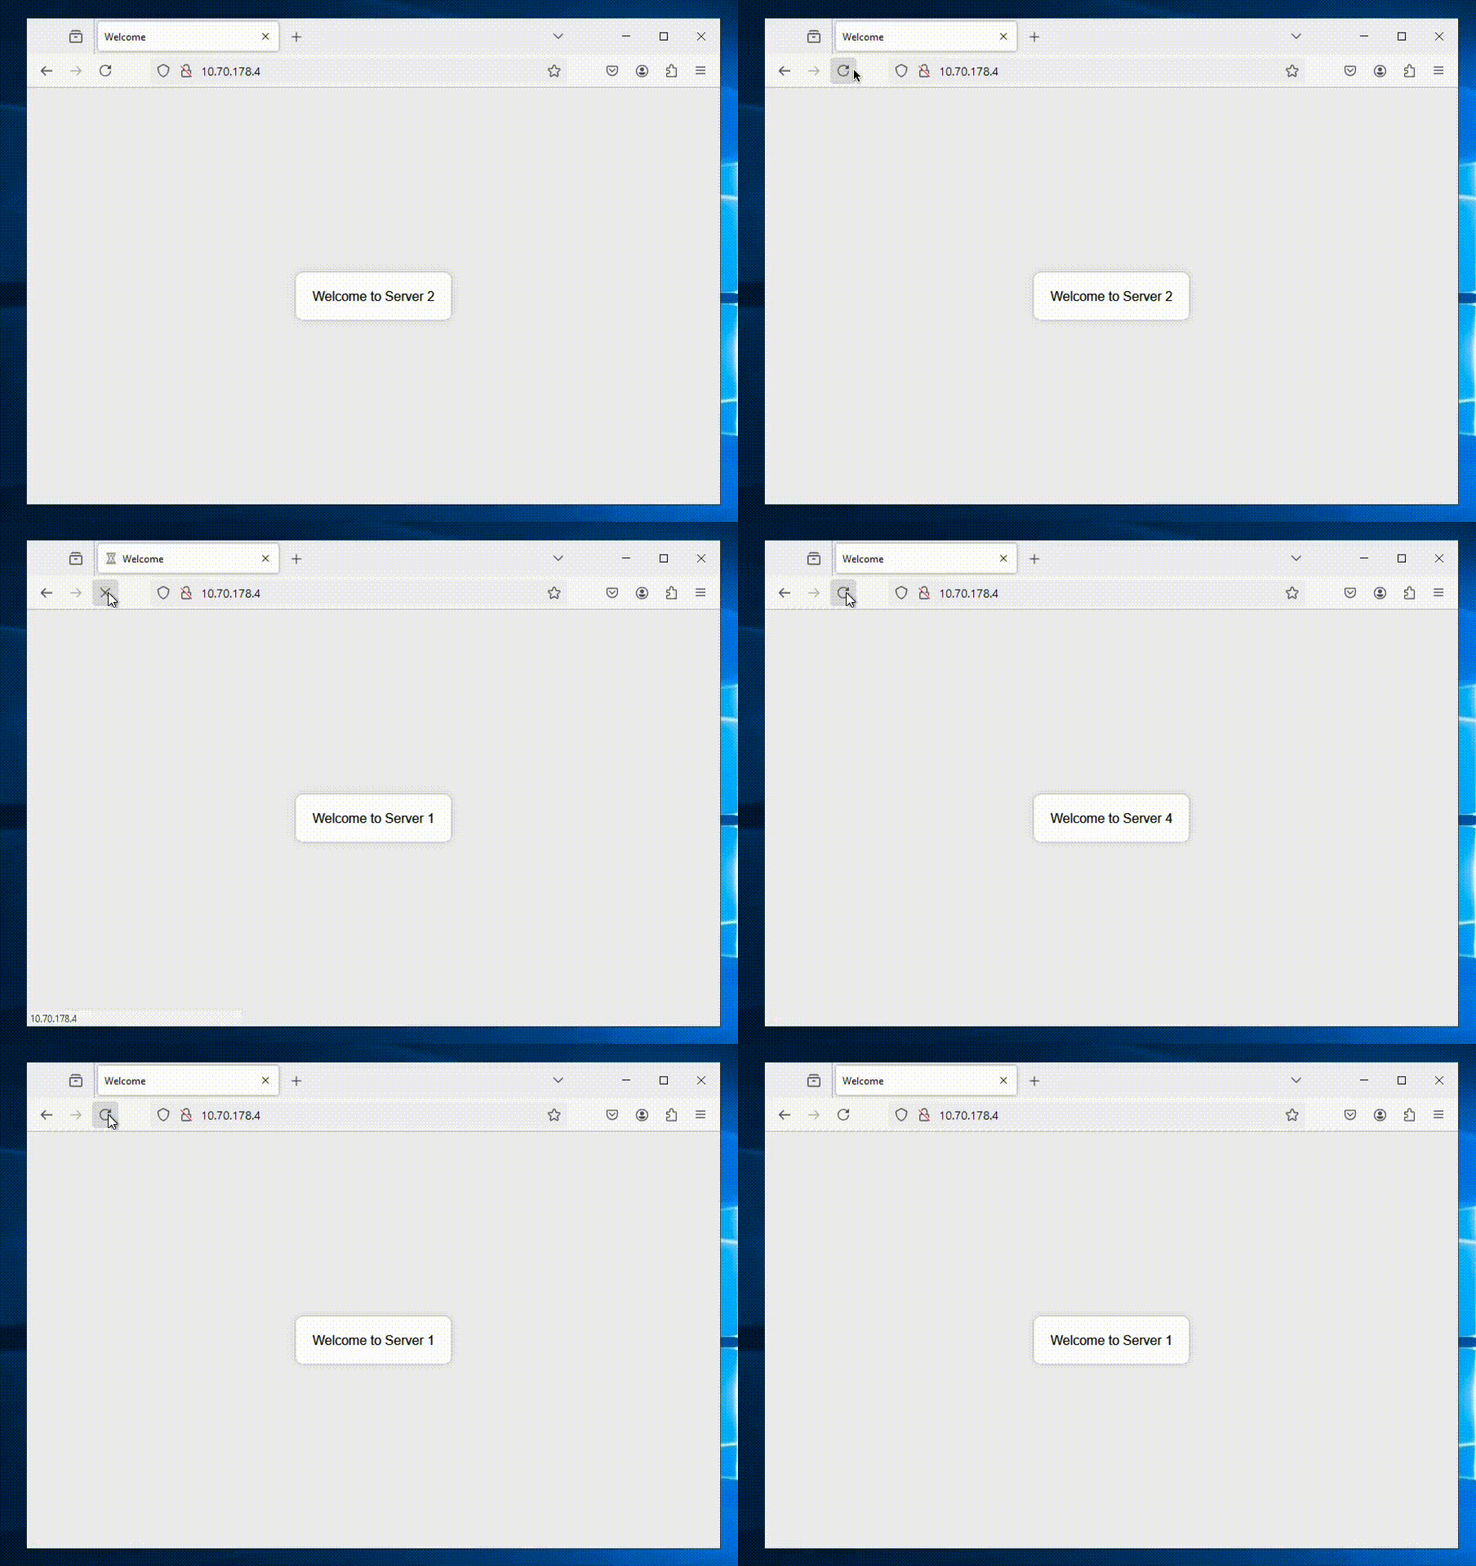
We’re getting a different web server each time we refresh the page – all good!
That’s all for now. Hope that was helpful and thank you for reading!
How to find OEM ESXi installer ISOs on Broadcom’s webpage
If you’re using Dell servers for your DC or home lab, there used to be an option to download the ESXi ISO file directly from the Dell support site under “Enterprise Software”. This year the ability to download ISO images pre-loaded with Dell drivers has been removed from the Dell support site and moved to Broadcom.
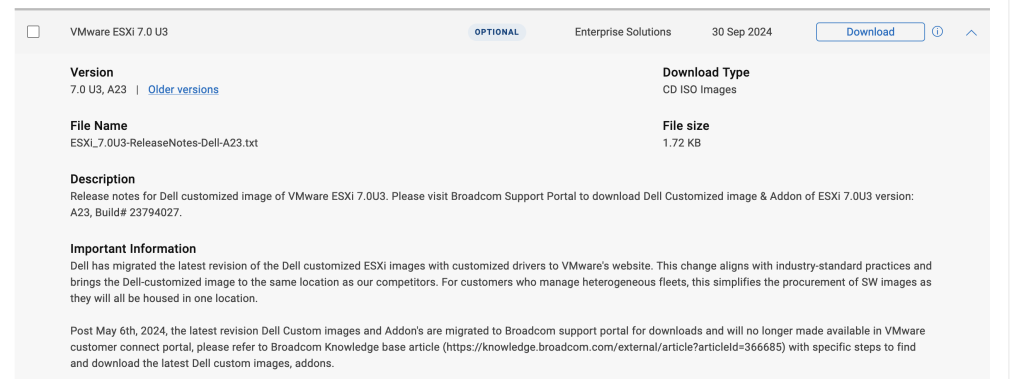
It can be a challenge to find these, so please refer to the below steps to get your ISO images downloaded:
Step 1: Navigate to the Broadcom Support portal. Log in or create an account if you have not already done so.
Step 2: Nexxt to your username on the top right-hand side, click the cloud icon and select VMware Cloud Foundation.
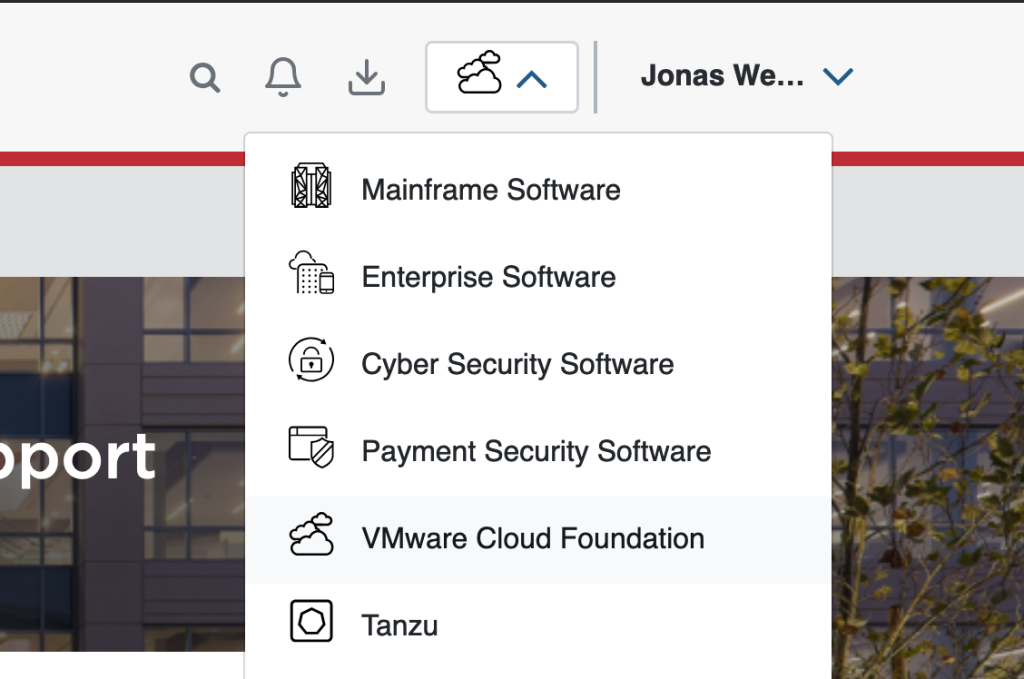
Step 3: You should now have a side-menu to the left. Click on My Downloads.
Step 4: We actually have to search here to find the downloads we’re looking for. Use the top right-hand side search bard and enter “VMware vSphere”. Choose VMware vSphere when the results show up.
Step 5: Select ESXi and then navigate to the Custom ISOs tab
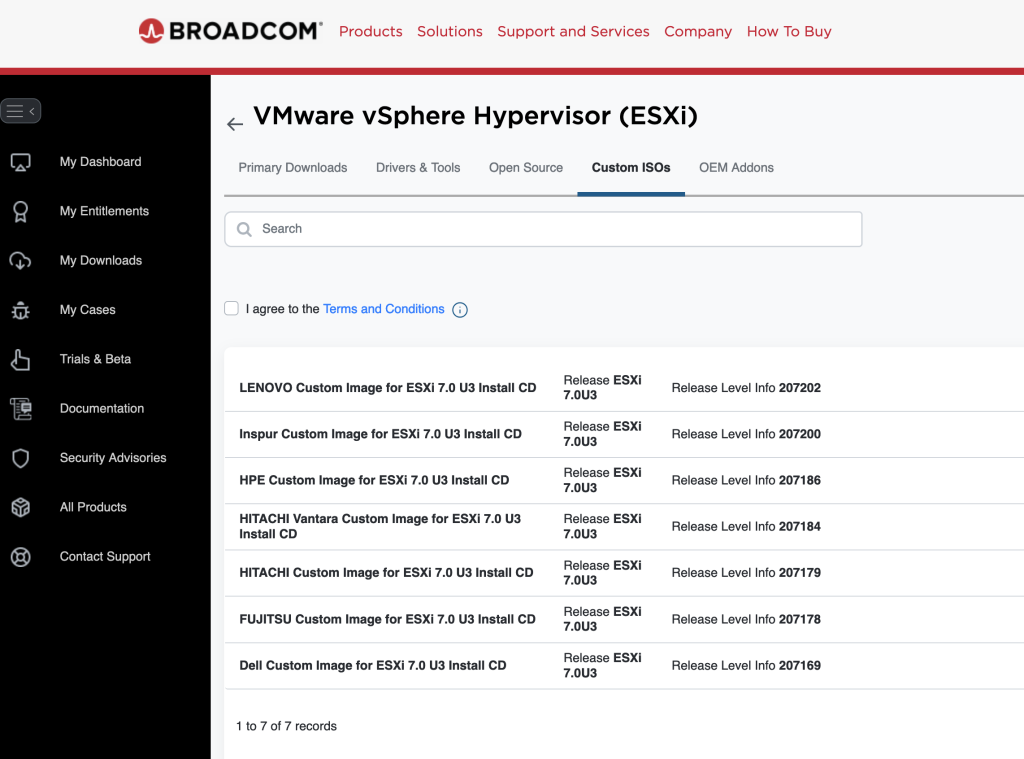
Step 6: Download your favorite ISO image with drivers pre-loaded for your particular brand of server 🙂
Using ChatGPT as a translation service
This is a quick note to show a concept of using the ChatGPT API for translation. In this case for English to Japanese, but it could be changed into any language. Since we want to talk to it we use Amazon Transcribe to turn speech into text. That text is sent to ChatGPT for translation. When the translated text comes back we feed it into Amazon Polly to turn it into speech again.
This is all running on a Raspberry Pi 3b+
Source code
Source code can be found on GitHub:
https://github.com/jonas-werner/chatBot
Quick demo video
Still on 7.0? What in vSphere 8.0 would make the shift worthwhile?
For those who have remained on 7.0, perhaps it is time to look at what new features were introduced in 8.0 to see if an upgrade is in order. This is especially pertinent as the 7.0 u3 release will be EOL in October of 2024. So what’s new? The 8.0 release introduces a good few updates and improvements. Please refer to the below for an overview:
1. Performance Enhancements
- Distributed Services Engine: vSphere 8 introduces support for Data Processing Units (DPUs), which offload infrastructure tasks like networking and security from the CPU to DPUs, improving efficiency and performance.
- NVMe Over Fabrics (NVMe-oF): Enhanced support for NVMe devices boosts storage performance for modern workloads.
- vSphere Memory Monitoring and Remediation (vMMR): Provides improved memory utilization insights for better troubleshooting and optimization.
2. Scalability and Operations
- Increased Limits: The release supports up to 10,000 active vSphere Pods in a vSphere Cluster, enhancing scalability for modern applications.
- vSphere Lifecycle Manager (vLCM): Updates include streamlined host upgrade workflows and enhanced compatibility management.
3. Security Enhancements
- Enhanced TPM Support: Virtual TPM devices are automatically replaced during cloning or deployment, aiding in Windows 11 compliance.
- Deprecation of Legacy Protocols: Integrated Windows Authentication (IWA) and NPIV are being phased out in favor of more secure alternatives.
4. Upgrade Considerations
- Deprecation of Legacy BIOS: UEFI is now strongly recommended for ESXi hosts, as some may fail to boot in legacy BIOS mode.
- Driver and VIB Compatibility: Certain drivers (e.g.,
nmlx4_enand older lpfc devices) and legacy VIBs are no longer supported, requiring replacements before upgrading.
5. Application Modernization
- Kubernetes and Containers: With the enhanced vSphere with Tanzu, support for Kubernetes-native workloads is better integrated, aligning with enterprise modernization goals.
6. Simplified Licensing
- A point of contention for many as some have seen price hikes: VMware introduced a new licensing structure tailored for organizations to leverage flexible consumption models, reducing overhead for hybrid and multi-cloud deployments

